
Install Steam
login
|
language
简体中文 (Simplified Chinese)
繁體中文 (Traditional Chinese)
日本語 (Japanese)
한국어 (Korean)
ไทย (Thai)
Български (Bulgarian)
Čeština (Czech)
Dansk (Danish)
Deutsch (German)
Español - España (Spanish - Spain)
Español - Latinoamérica (Spanish - Latin America)
Ελληνικά (Greek)
Français (French)
Italiano (Italian)
Bahasa Indonesia (Indonesian)
Magyar (Hungarian)
Nederlands (Dutch)
Norsk (Norwegian)
Polski (Polish)
Português (Portuguese - Portugal)
Português - Brasil (Portuguese - Brazil)
Română (Romanian)
Русский (Russian)
Suomi (Finnish)
Svenska (Swedish)
Türkçe (Turkish)
Tiếng Việt (Vietnamese)
Українська (Ukrainian)
Report a translation problem


As for crew armour you want to equip them with body armour as that does buff their health a little and is important for late game encounters.
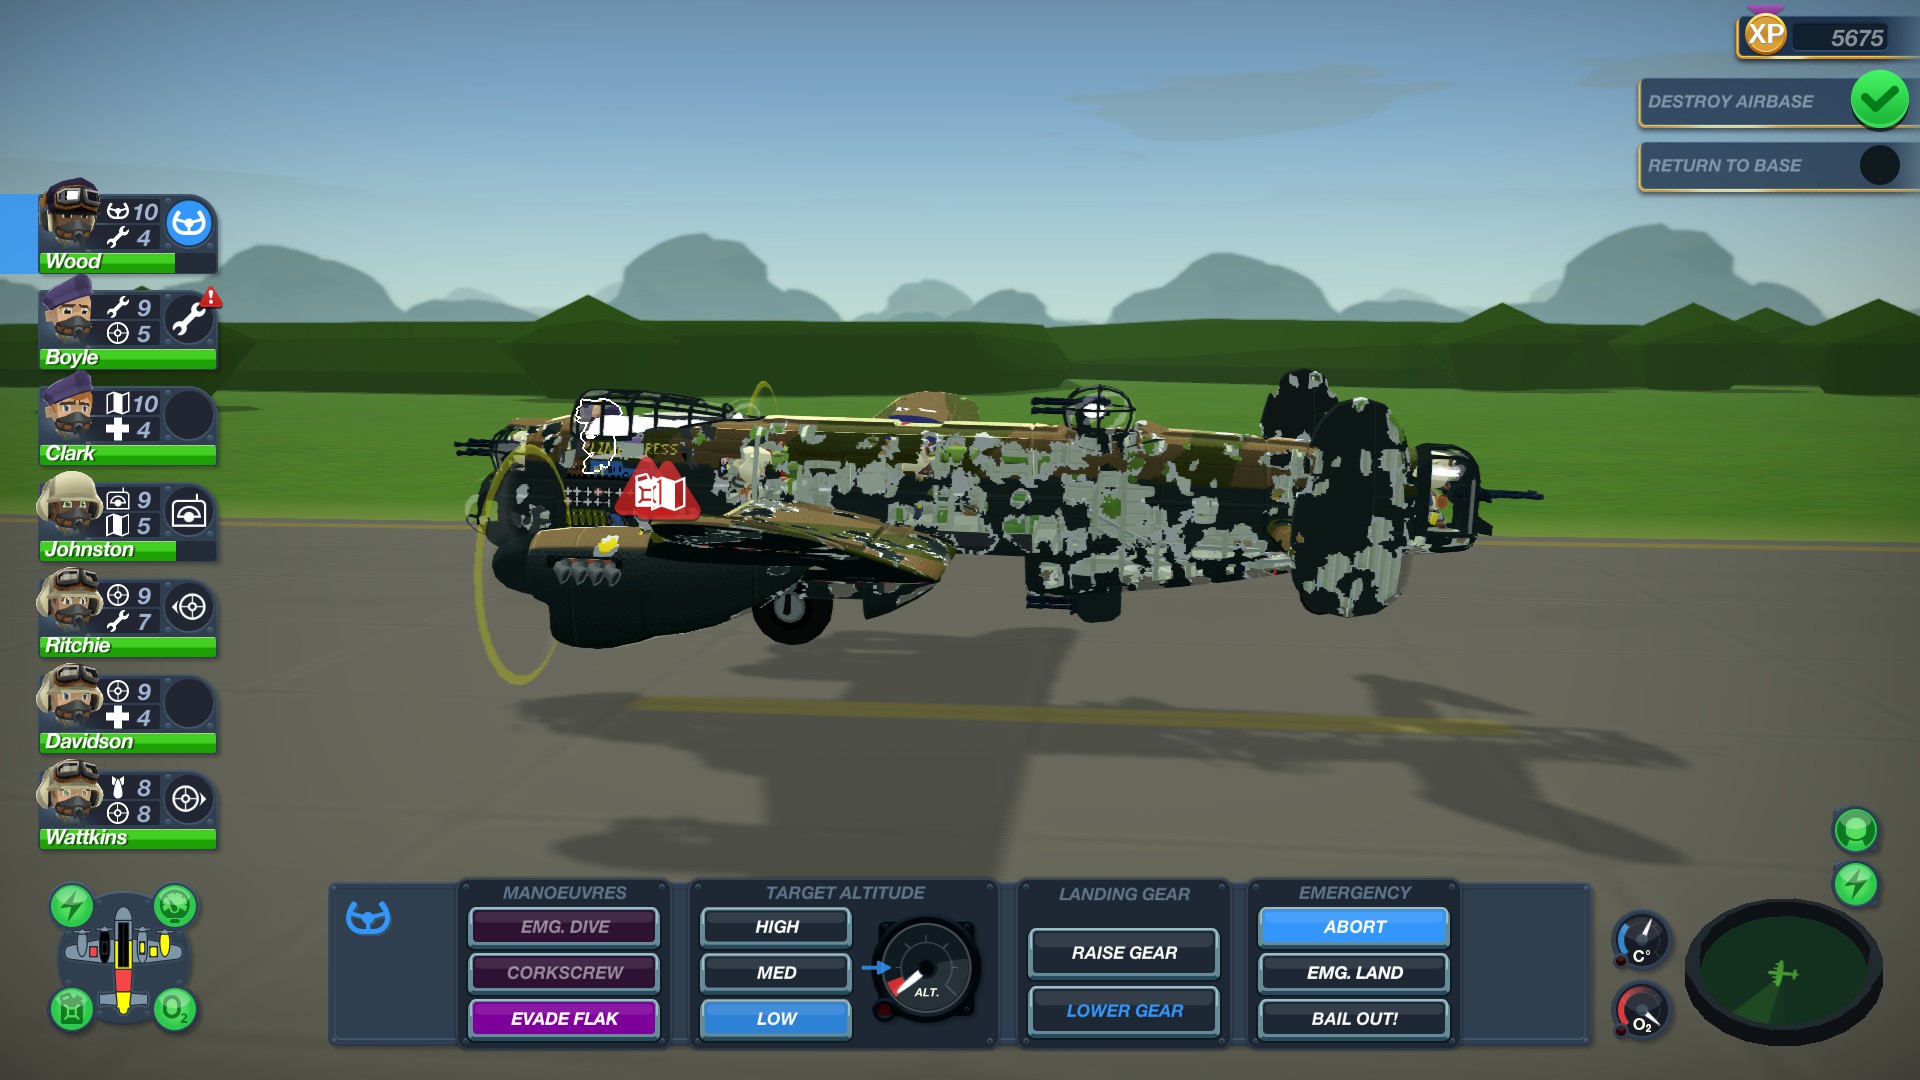
If your bomber is shot to pieces, but your crew still alive and in decent health, Emergency Landings can be your best friend, especially if you can get back over friendly territory where the "Speed Up" button appears and you can avoid forests, cities, or water. (Trust me, open plains are not hard.) Lose the bomber but save the crew (Guaranteed if you land on the British Isle and non-critical, Survival Stats if in Europe,) without needing all the parachutes to bail out. So long as you lose your bombs before hitting the ground, even your moderately injured crew will often survive.
^ The above gave all crew around 60 armor, 32 thermal, and another +46/+34 survival stats on gear alone, with the tradeoff being 50% speed, but with everyone having essentially fixed stations speed doesn't matter anyway. I could optimize it a bit more, but the above should be WELL capable of getting you past the final mission no matter how many fighters the AI throws your way. All Aces were shot down, AP and HE Ammo skills are godsends in how fast they can murderf**k entire clusters of fighters, especially on the best turrets when you have four of them.
Anyway, hope this helps :)
2/2
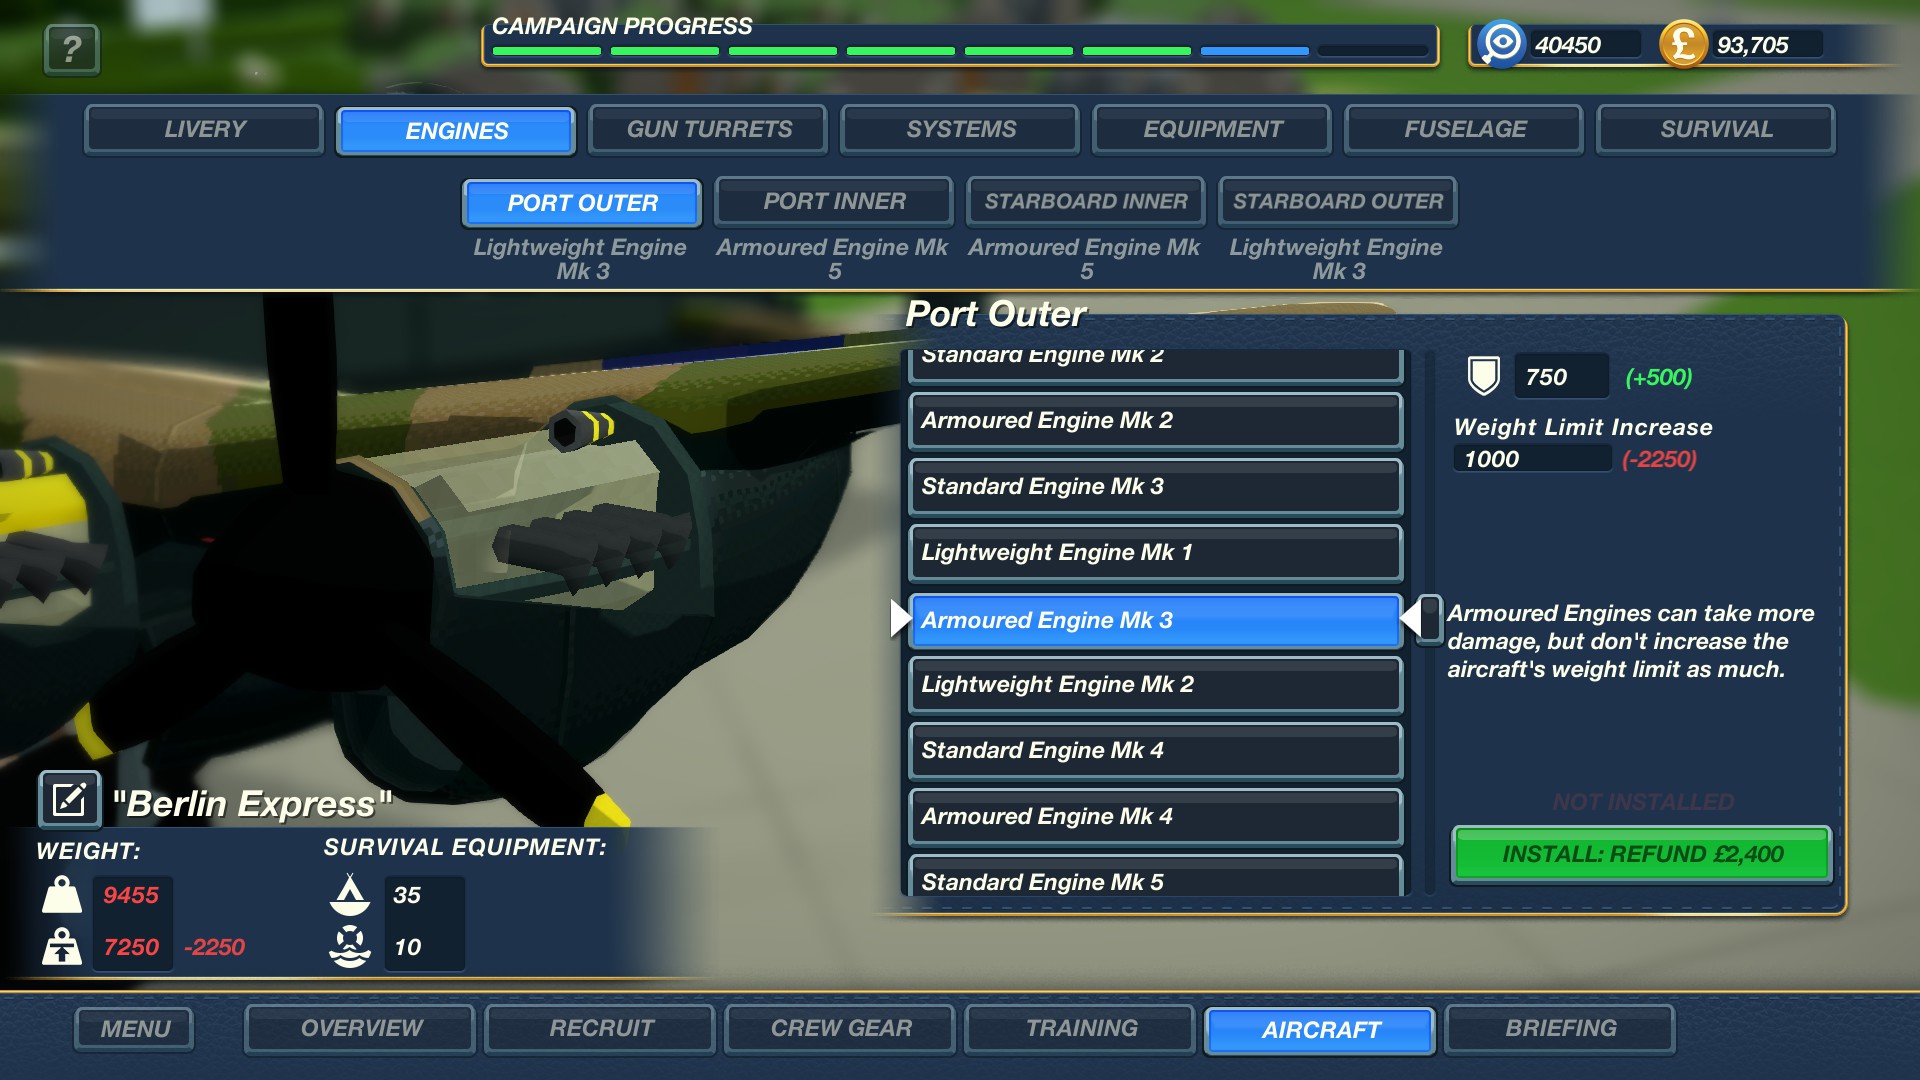
Engines:
- Inner slots: Armored Mk. 5
- Outer slots: Lightweight Mk. 3
^ The idea there was that the outer ones will most likely get damaged, but the inner ones are much harder to disable and the easiest to reach if you need to send a mechanic out.
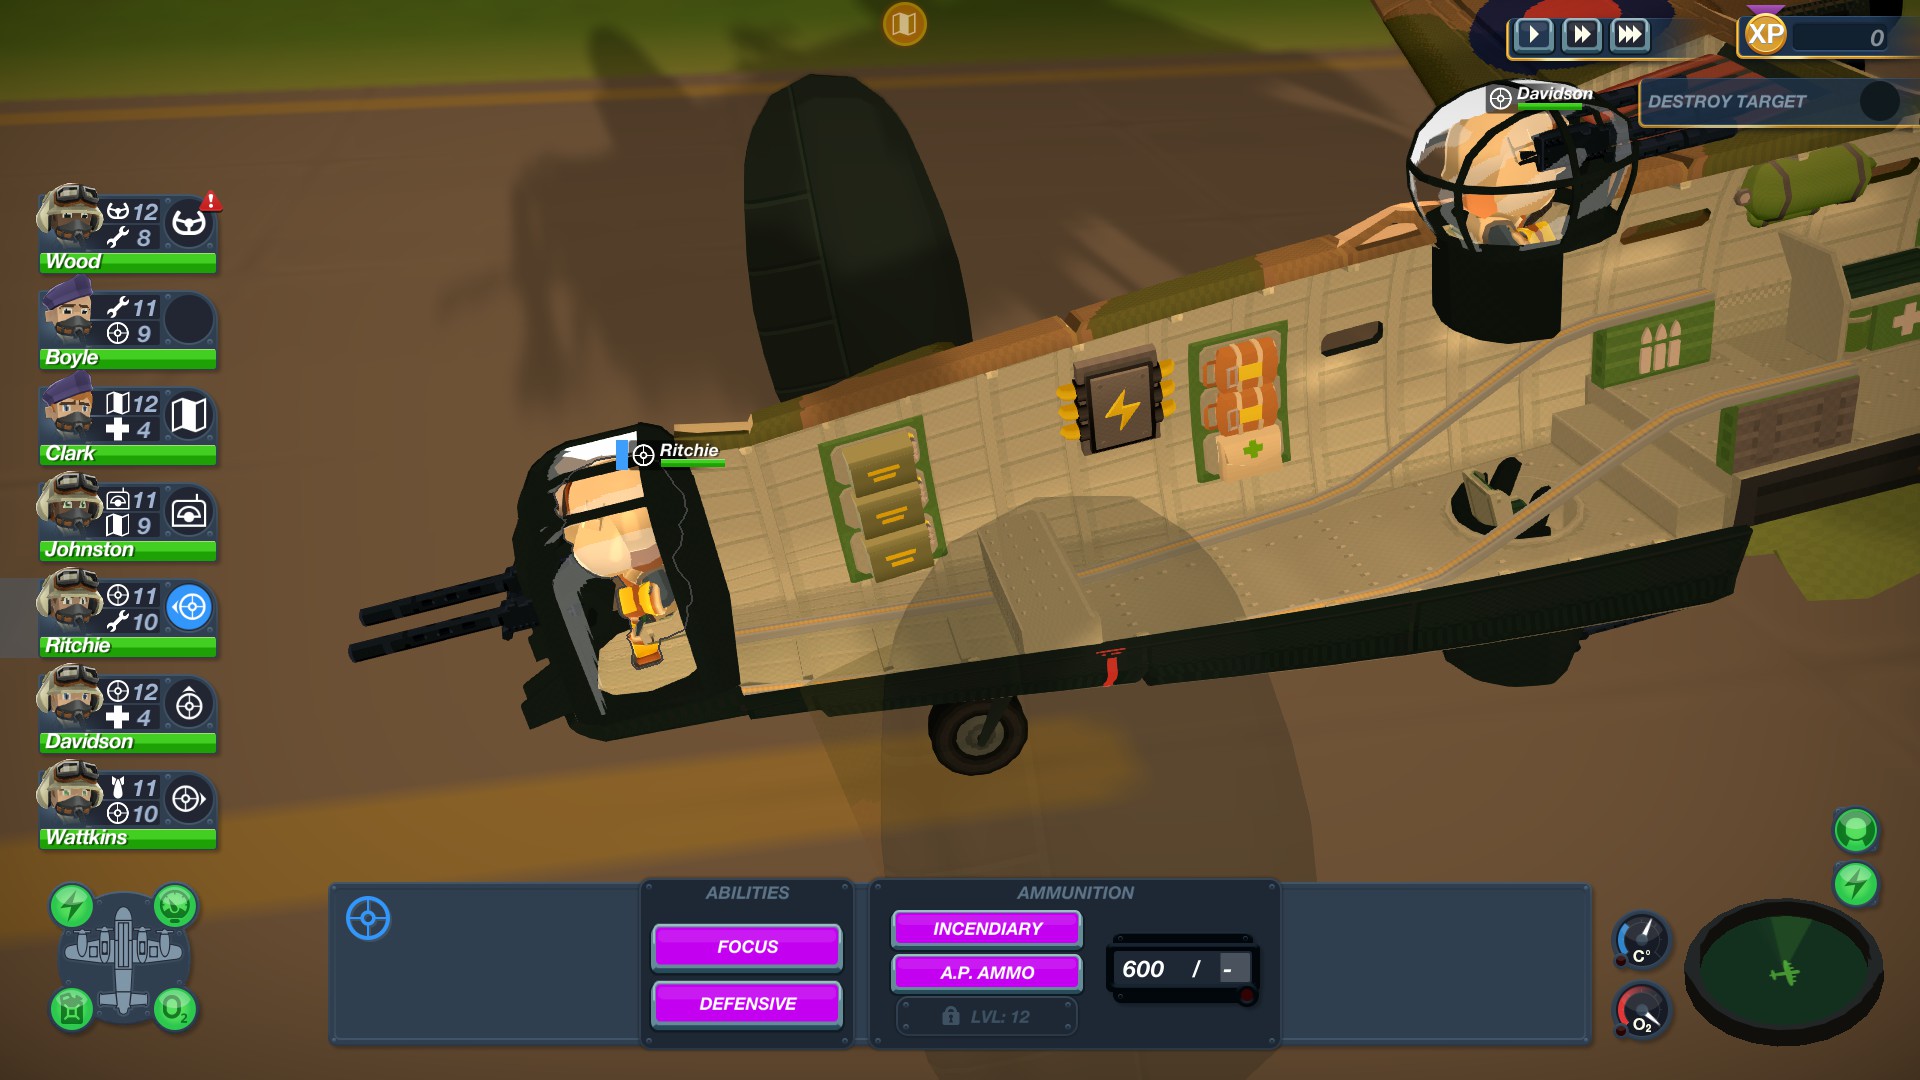
Turrets: All .50X4 Mk. 3 + Ammo Feed. Because nazis can't shoot you when they're dead.
Systems: Mk. 5 Radar, max everything else so your mechanic can keep manning turrets.
Equipment: 3-slot racks, total of 7 parachutes, one First Aid kit in every rack and a fire extinguisher at the front where the important stuff is.
Fuselage: Lightweight Mk. 5 on Nose and Front, Armored Mk. 7 everywhere else
^ Pretty much every enemy is going to try and get behind you, so front armor isn't really that useful.
Survival: Max.
Total aircraft stats: 9455/9500 weight, and 45/45 survival.
1/2