Dungeon Defenders: Awakened

Dungeon Defenders: Awakened

78 ratings
DDA progression guide from beginning to end
By .
Provides an efficient progression path while also explaining aspects of the game added over the years to catch up both veterans and new players to the game.
13
3
2
2
2
   
Award
Favorite
Favorited
Unfavorite
Preface
This guide is designed to take you all the way to the end game in a smooth and efficient manner while showcasing the importance of key towers to successfully clearing maps. Everything tested in this guide was done on solo. While adding additional players will scale up enemy counts and health, I will provide options on how to mitigate this scaling issue.

If you’re comfortable with your game knowledge, you may skip to the bag filter/loot filter sections and tower targeting, and then start at Medium Deeper Well Campaign.
Housekeeping duties
Before we begin our run, we will be creating our heroes, setting up our loot filters, bag filters, and setting up tower targeting priorities.

Loot filters allow us to automatically loot items on the ground without having to manually loot them.

Bag filters allow us to organize our inventory, making it easier to find gear that we need.

Neglecting these will create a lot of headaches going through the game, as the game gives an enormous amount of loot, most of which are obsolete or not relevant at your point in progression. Lastly, tower targeting priorities allow us to customize what type of enemies our towers will target. Many towers function better by prioritizing certain types of enemies.
Loot filters
The way loot filters work is, if an item on the ground meets the criteria for any one of your filters, it gets auto looted. Otherwise, it gets sold instead when starting the wave. Go to options, gameplay, then edit loot filters.
You should see a screen like this. Click on create. We will name our first filter “Weapon”.

Now you should see a screen like this, click on the Weapon filter, then click edit.
Now you’ll see there are 8 sections of settings on the left side: General, Bag Image, Item tier, etc. For the purposes of early progression, we will be ignoring “General” and “Bag Image” settings. Click on “Item Tier”. Item tier is the setting you’ll be updating the most during progression. For now, check off Rare and higher. This is what that looks like. This means if a weapon is rare quality or higher, it will be looted. If nothing is selected, then it will search for everything not selected.
Next is the weapon setting. Here we will select only Polearm and Staff for now. This will be adjusted throughout the run as well. For future reference, Sword/Bow/Polearm/Staff are classified as weapons. Shield/Ammo Pouch/Whetstone/Tome are classified as offhand. And that is everything for the weapon filter. Hit escape to go back to the main filter screen.
If you want to delete or rename a filter, click on the gear icon next to the filter as shown in this screenshot. Also very important to note; when you edit your filter, you have to click apply at the bottom of the options screen for the changes to save, after creating all of your filters.
Next, we will create our offhand filter. Then go to item tier and select rare and higher, same as the weapon filter.
Now go to the weapon setting and select whetstone and tomes. Again, this will be adjusted during the run. And that’s it for the offhand filter. You’re probably getting the hang of this, so I will be listing all the filter settings in one go with screenshots attached.
Filter name: Fused armor
Item tiers: Mythical and higher
Element setting: Fusion
Armor setting: Ancient Set, Guard Set, Militia Set, Miner Set, Primitive Set, Arcanist Set
Filter name: Regular Armor
Item tiers: All tiers
Element setting: Non-elemental
Armor setting: Ancient Set, Guard Set, Militia Set, Miner Set, Primitive Set
Filter name: Runes
Item tiers: All tiers
Misc setting: Runes
Filter name: Pets
Item tiers: All tiers
Accessories setting: Pets
Filter name: Accessories
Item tiers: All tiers
Accessories setting: Brooches, Bracers, Masks
Filter name: Transmog
Item tiers: All tiers
Misc setting: Transmog
Don’t forget to click apply when exiting the filter menu to save your changes! Or else you’ll have to do it all over again.
Bag Filters & Inventory Controls
Next, we will create our bag filters. Go to your inventory (press I if you’re on PC), then press F to go to your inventory filter. Now we’ll create our first bag filter. You can rename the bag by clicking on the gear icon where the mouse icon is as shown in the screenshot.
Leave the first bag on the left, this bag will show all items by default. We’ll name our second bag from the left “Unlocked”. I would recommend setting bag images to help you remember which bag filter is for what. You can use the ones I have in my screenshot if you wish. Set up all your bag filters as the following from left to right (order is important because there is a current bug that affects the filters unless set up this way)
Bag name: Unlocked
General setting: Unlocked
Bag name: Weapon/Offhand
Weapon setting: everything
Bag name: Pets
Accessories setting: Pets
Bag name: Accessories
Accessories setting: Brooches, Bracers, Masks
Bag name: Ancient
Armor setting: Ancient set
Bag name: Guard
Armor setting: Guard set
Bag name: Militia
Armor setting: Militia set
Bag name: Miner
Armor setting: Miner set
Bag name: Primitive
Armor setting: Primitive set
And that’s all of the bag filters. Runes, Transmogs, and Arcanist helmets can be found by manually typing in the word “rune” or “transmog” in the search bar of the all-item bag on the far left to filter them. Here is a screenshot showcasing this.
You can do the same thing with your other bags. For instance, in this screenshot, in your ancient bag you can type in the search bar “glove” and it will show only gloves for that set. This is how you can quickly and easily search and compare potential upgrades for your character. You can also filter by set bonus type (this will be explained in the next section).
“Locking” an item in your inventory prevents it from being sold. Anything you loot from the ground comes into your inventory as unlocked. This is why we have an unlocked bag. The unlocked bag allows you to see all the loot you’ve picked up. Although you can go through your other bags to find the loot, this bag will show everything new you’ve looted in a single bag.

Here are some tips and tricks with navigating your inventory. If you hit “left control” (or whatever you have selection mode binded to, as shown next to your currency at the bottom), you can highlight multiple items at a time to lock multiple items, sell multiple items, or add multiple items to a trade at the same time.
Left click on an item while selection mode is active to manually select multiple items.
You can also turn on selection mode (by hitting left control on PC), and then right click any item and choose select all, and then either sell everything, unlock everything, or lock everything.
Alternatively, you can hold control + S to sell everything. The “select all”, “lock all”, “unlock all”, and “sell all” will only apply to items shown in the bag filter.
If you want a way to quickly sell/lock single items at a time, you can hold “S” and left click on an item to quickly sell it. Or hold “L” and left click on an item to quickly lock it. And you can also double left click on an item to equip it.

You can also reset upgrades on any item by selecting upgrade on the item, and then holding "R", as shown in the screenshot below next to the mouse icon.
However, resetting upgrades doesn't refund your gold.
Set Bonuses
Armor has varying set bonuses. For instance, in this screenshot here is a miner piece with the set bonus “miner’s moxie”. If all 4 pieces share the miner’s moxie set bonus, that character will gain a 40% stat boost on all of the pieces.
However, if you look at this screenshot, this miner piece has a “plagued defense” set bonus, this grants a 20% stat bonus and 50% increased tower poison damage with a full set.
Because of this, it’s possible to get a full set bonus with different types of armor. For the purposes of this guide, we won’t need to mix different armor types. We will only equip pieces with the following sets in the early game due to the higher stat bonus (40%) we get from them: Ancient Authority, Guardian’s Grace, Militia’s Might, Miner’s Moxxie, and Primitive Power. For more information on the types of sets and their bonuses, you can check this link:
Armor Set Bonuses[wiki.dungeondefenders.com]

Weapons and offhands also have a set bonus of their own, but this won’t be relevant to the progression guide until the very endgame. In short, they provide your hero with a bonus related to hero stats or DPS. For more details on this, you can check this link:
Weapon Set Bonuses[wiki.dungeondefenders.com]
Rift mode and Fused Gear
Rift mode increases loot quality by 10%, changes enemy health, damage, and have unique properties (such as the dark elf warrior draining ability mana on hit). However, rift monsters (with the exception of the Lycan monster) are not immune/damage resistant to any elemental ailments, allowing you to use elemental towers without any consequence. For more information on enemy changes in rift mode, click the following link:
Rift Mode[wiki.dungeondefenders.com]

In rift mode, fused gear can drop. Fused weapons and pets can deal fusion damage. Though some pets don't have a fused version. Any source of fusion damage will deal double damage against enemies in rift mode. Fused armor pieces add “rift armor” allowing you to take less damage against rift enemies. Having a fused armor set in addition to a 30% stat bonus, will fuse your towers. Fused towers have varying effects such as dealing fusion damage, making enemies take increased fusion damage, or adding rift armor to heroes and towers. If you build fused towers with a character, then swap it out of the deck, the towers built from that character will lose their fused status. You can check out the cheat sheet in the fusion tower tab for more information on fused tower effects:
Fusion Tower Info[docs.google.com]

The fused armor set type determines which tower gets fused. Ancient fuses tower 1, Guard fuses tower 2, Militia fuses tower 3, Miner fuses tower 4, and Primitive fuses tower 5. The tower numbers reference what key you press to build the defense. As an example, for monk tower 1 is ensnare, tower 2 is electric aura, tower 3 is healing aura, tower 4 is strength drain, tower 5 is enrage aura. You can check out this link (under the fusion armor tab) to find where to target farm each fused armor piece. Scroll to the far right of the tab to find enemy floor drops:
Fused Armor Drops[docs.google.com]

Offhands, runes, transmogs and accessories cannot be fused. You cannot mix fused and non-fused armor pieces together for a set bonus.
Arcanist Helmet
A special helmet worth noting. This helmet fuses tower 1 on its own and allows you to fuse another defense simultaneously if your other 3 pieces are the same set (such as fused guard gloves/chest/boots, or fused militia gloves/chest/boots). In addition to that, arcanist helmets offer 10% rift armor instead of 5% like other helmets do. And the base stats for arcanist helmets are the highest in the game. As a result, this is the best in slot helmet in the game. This helmet is found in the chest of keep survival/mix mode on W25+.
Survival Mode
Survival mode allows you to go past wave 5 where campaign stops at. This (and mixed mode) are the best ways to farm exp, items, and gold. After clearing wave 25, there is an option to go past wave 25 by clicking on the blue continue button in the summary screen, as shown in this screenshot.
Every 5 waves in endless survival (waves 30, 35, 40, etc) will give a special chest just like wave 25 does. For waves 26 and higher, item quality is scaled to wave 25. Endless survival is ideal for afk farming and to avoid rebuilding. On boss maps, higher scaled bosses spawn on wave 25, and spawn every 5 waves in endless. The higher the wave, the higher the stats of enemies and bosses. Though bosses only gain increased health, and not damage.
Mixed Mode
Mixed mode is basically survival with some key differences. Spawns are random, skeleton enemies are added, there’s no endless mix mode meaning it goes only to wave 25, and mixed mode gives 6% higher quality than regular survival. Runes also have twice the drop rate of regular survival. Mix mode is ideal for potentially getting the highest quality of item drops as possible. However, something to consider are how many runs per day you can do actively on mix mode compared to how many runs you can do afk farming survival with a macro. (Auto starting waves and auto tower boosting are allowed in this game. Auto building is not allowed). A github link to the macro is provided in the Resource section. It is highly recommended to not bother with farming on Mixed mode until you've unlocked Dune Eater difficulty due to the slight increase in quality of gear.
Hardcore Mode
This toggle increases loot quality by 15% from easy-hard difficulties, 20% on insane difficulty, and 25% on nightmare/massacre difficulties. Hardcore imposes the following changes to the game:
  • If you die during the wave, you don’t respawn until the next build phase.
  • Your heroes no longer build instantly like they do with hardcore off.
  • All mana dropped from monsters on the floor (not players) disappears upon wave start.
  • Heroes lose mana upon dying.
Pure Strategy Mode
Pure strategy is like survival mode except your hero can only upgrade towers and loot items during the combat phase. During the build phase your hero can build, upgrade, and sell defenses. Your hero’s pet won’t function either. Bosses also do not spawn on wave 25. Pure strategy is not worth running due to the lower loot quality of drops from the lack of hardcore mode.
Bonus Difficulties
Maps progressing from act 1 to act 5 generally increase in item quality as you go through the acts. This normally results in the earlier maps being inferior to farm. However, with bonus difficulties you can scale up item quality from the earlier maps with the later maps. Although this also scales up the difficulty of that map from the boss map they occur on. Bonus difficulties can only be applied to survival and mix mode. Note that bonus difficulties are only available in nightmare mode and higher and must be cleared for survival mode and mixed mode separately.

There are 5 bonus difficulties in the game:
Demon Lord (from clearing Alchemical Labs on wave 25)
Goblin Mech (from clearing Throne Room on wave 25)
Ancient Dragon (from clearing Summit on wave 25)
Lycan King (from clearing Keep on wave 25)
Dune Eater (From clearing Forsaken Temple on wave 25).

These bonus difficulties will scale item quality to the respective map where the bonus difficulty comes from. For example, after clearing Keep on wave 25, you’ll unlock the Lycan King Bonus. This means you can scale up maps prior to Keep, to Lycan bonus difficulty. You don’t have to unlock these difficulties in order and can skip as many as you can.

For instance, if you unlock Lycan king you’ll also unlock Demon Lord, Goblin Mech, and Ancient Dragon difficulties. Bonus difficulties cannot be applied to maps following the boss map they occur on, with exception to Foundries and Forges, Castle Armory, and the “Bonus Maps” section, which have specifically picked difficulty bases. For example, you can't apply Lycan difficulty to the Forsaken Temple, because Forsaken Temple already has better item quality than the Keep.
Runes
Runes are items you can equip onto your hero to add special effects to the hero’s towers or abilities. Each hero can equip 4 tower focused runes and 2 hero focused runes (Rogue is the exception with 6 hero focused rune slots). Runes currently have 8 tiers in the game.

Runes drop from both monsters and chests. You use runes in your inventory by right clicking on them and select use. This unlocks the rune, but you must manually equip them by going to the character’s rune menu. You can skip tiers if you find a higher-level rune. Runes above the common tier, cost gold to use. However, despite the tooltip, runes do not give gold upon selling.

If your character has runes equipped and built towers, and is then swapped out of the deck, your towers will lose the effect of the runes (exactly like how fused towers work). For more information, check out this link to find where to farm each rune.
Rune Drop Locations[docs.google.com]
Also, favored maps are very insignificant for target farming runes. All this does is give a chance for the chest to drop the rune. It’s best to farm your preferred map in the same act as the favored map. For example, if the favored map for a rune is Ancient Mines, you can also farm Deeper Well, Lava Mines, Alchemical Labs, or Magus Quarters for the rune.


The following runes are detrimental to your gameplay. You can unlock these runes if you wish but equipping them at this time would make the game more difficult.

  • Arcane Surge (prevents apprentice from tower boosting)
  • Noxious Fumes (limits targets gas trap can be used on)
  • Strengthened Field (reflect becomes physically targetable by enemies and becomes easily breakable or cause splash damage onto your towers/crystals)
  • Berserker Aura (While we don’t use enrage auras in this guide, this rune makes them worse by reducing the stall effect they inflict)
Hero Creation & Towers
Create the following heroes: Monk, EV, Huntress, Apprentice, Summoner, Warden, Rogue, Squire, Guardian.

You create a hero by going to your hero selection screen (hit ‘H’ or ‘F7’ on PC), then right click on any card in the deck and click “create” as shown in this screenshot.
You can remove a hero from your deck by right clicking on the hero you want to remove, then click “remove” as shown in this screenshot.
Removing heroes does not delete them, it places them in a reserve where you can select them later. If you wish to delete or rename a hero, you can do so by clicking on “change hero”.
Then click on the yellow gear next to the hero. If you delete a hero, make sure you remove all gear on that hero, or else the gear gets deleted too. Equipped runes are unaffected, as they affect your entire account.
While hero slots in your reserve are limited, it is more than enough to build all the heroes you would need.


Have the following heroes in your deck: Monk, EV, Huntress, Apprentice, Summoner, Warden. Also, you can rename and respec (stat points) your hero at anytime without any cost of gold. Next, I will describe each tower we use with each class in this progression guide.

Monk: We use his ensnares, strength drain auras, and occasionally healing auras. Ensnares are mandatory in nearly every build in the game (except for niche speedrun builds or if you’re overgeared). Ensnares slow enemies down. Strength Drain strips enemies’ elemental immunities and decrease their damage against towers and heroes. However, this does not affect bosses. This aura will allow you to safely tower boost your towers when dark elf warriors rush out and attack you. Healing auras provide a passive hp regen whenever heroes are in the aura. The monk also has a strong tower boost ability that we use in the early game.

EV: We use her reflect and her overclock beams. Reflect beams reflect enemy projectiles (not bosses) which is crucial to preventing your defenses/crystals from being destroyed. Overclock beams buff your defenses by increasing their stats. Both reflect beams and overclock beams are also mandatory in nearly all builds of the game. It's worth mentioning that the buff beam gets destroyed if any of the towers it buffs is destroyed. Players selling towers doesn't destroy the buff beam.

Huntress: We use her gas traps. Gas traps stun enemies. They get triggered when an enemy walks over the hair trigger (any part of the green circle). The effective range of the gas trap exceeds the hair trigger area. You’ll see this when you place the gas trap down. While not mandatory in every build, it is a crucial tower for progressing the game, as it can stun some of the most threatening enemies in the game (except for bosses, ogres, and potentially Lycan).

Apprentice: We use his lightning towers late in the game to kill weak/fodder enemies but is used as a tower booster in the early game. While the monk’s tower boost ability boosts damage, apprentice boosts attack rate. If towers hit the attack rate cap (most towers are 0.25 rate for their cap), any extra rate converts into damage. Apprentice’s tower boost is actually much stronger than monk’s the majority of the time (similarly to how the speedy gem pet gives more damage than the powerful gem pets from the summit map). There are a few exceptions (such as spiders in the very early game, and owls) where this doesn’t hold true.

Summoner: We use his spiders, sirens in the late game, and archers only for campaign bosses on easy difficulty. Spiders are the best damaging tower in the early difficulties. They slow enemies down, make enemies take double damage, their projectiles have an area of effect, and scale attack rate and range extremely well with little to no investment. In the late game they’re still a very strong pick due to the double damage debuff they provide. Spiders cannot damage or debuff bosses, despite targeting them. Sirens with their rune provide a reflective bubble similar to reflect beams. Though at the time of writing this guide, sirens appear to take damage upon reflecting projectiles. Sirens are handy on numerous maps but require the rune to begin with. As a result, sirens aren’t used until the late game when we have access to a high-level siren rune. We use archers only for early game campaign bosses because spiders cannot damage bosses.

Warden: We use her roots, blossoms, and sludges. Roots are required to place down blossoms and sludges. Blossoms provide excellent single target damage, especially later on with their rune. Sludges hit hard and provide an aoe for clearing fodder mobs quite nicely. However, sludges fall off in performance for the end game once we have access to other runes.

Rogue: Is a DPS character with no towers. We don’t have a use for him until we’re trying to clear the keep map on massacre survival. While he can melee, in our progression we use only his ranged attacks to kill bosses. His skill rotation for bossing is to spam his 3 devices (though napalm is the only important one), go into umbral form (4 key) whenever it’s off cooldown, and to spam swift assault (F key) while invisible. His ability stat scales the cooldown of both his swift assault and umbral form skills. More information about ability stat thresholds is provided in the "Gear set up" section.

Squire: We use only his harpoons. Harpoons are very strong in the late game once we have the rune to go with it. Harpoons especially excel on maps with portals (act 4 rifted maps) due to its pierce property. Runeless however, it is underwhelming compared to Warden’s towers. For this reason, we don’t start with him in the deck early game.

Guardian: Guardian has many useful towers used in varying circumstances. Her bulwark wall fully protects towers within its range (towers must be completely covered in its circle), taking their damage for them. If the tower its protecting and the bulwark wall itself are on a buff beam, the buff beam damage reduction double dips. Her empowering tower dramatically increases your heroes DPS. Her owls hit very hard and have their place on some maps. And finally, her obelisk tower applies an aoe slow to targets far away; ideal for long lane maps to apply an early slow to ogres or for maps with portals. However, in our early progression we don’t have a use for her towers, so we don’t start with the Guardian in the early game.

Also, you should always have 6 heroes in your deck. Having empty slots does not impact exp gain per character. Something worth noting. Enemy health and counts scale with player count. As a result, this will increase the difficulty of your progression. It is recommended that the extra players are able to tower boost with a monk/apprentice early on, and on a summoner for late game. For the early game, I recommend having 2 active monks in 2p, 2 monks and an apprentice in 3p, and 2 monks and 2 apprentices in 4p. These ratios will change after the early game, so make sure the extra players have a monk, apprentice, and summoner at least.

DPS Rogues are also good choices for your extra players. Both his rune and weapon drop in act 4 which can be conveniently farmed in F&F and Keep. DPS Huntress is not viable in the early game without taking a detour to act 1 to farm for her Focus Fire rune, and running Summit Survival for her weapon. So I would advise avoid using DPS Huntress until after you beat survival temple on massacre.
Explaining Stats and the Hybrid Hero stat system
Stats can fall under 2 general “categories”. Hero stats and tower stats.
Hero stats are stats that impact the hero itself, such as health scaling (vitality), damage (attack), or effectiveness of their abilities (ability). You can only get hero stats on your weapons, offhands, pets, or speccing your hero points into them. Also, your pet’s damage scales with your hero’s attack stat and hero abilities that boost damage.

You'll also find the "Damage" stat on weapons and some pets. Damage increases the base damage of a weapon or pet which scales better than upgrading the attack stat. The damage you or your pets deal then gets scaled further with the attack stat and any abilities that boost damage.

Tower stats affect the towers you build with that hero. Fortify determines the health of your towers, Power determines the damage of your towers, Range determines your tower’s effective range, and Rate determines how frequent your tower attacks or activates. You get tower stats on armor pieces, accessories, or speccing your hero points into them. For Rogue, his tower stats instead apply to his devices.

Recall that armor set bonuses can give a 30% or 40% stat bonus to your pieces (for fused armor and non-fused armor respectfully). This has no relation to, or any effect on passive stats (stats immediately below the set bonus). Passive stats are always active unless they have a listed requirement such as the upgrade or repair passives.

If you wish to see details of specific passives ingame, press the “D” button on PC to view the second page while looking at an item.


Details of how each stat affects every tower/hero can be found here in the general and in the Hero Stat Breakdown tabs:
Cheatsheet General Tab[docs.google.com]
Cheatsheet Hero Stat Breakdown Tab[docs.google.com]
Also note that items can have passives. For more information, you can check here in the “Sets and passive” tab, scrolling right:
Cheatsheet Sets and Passives Tab[docs.google.com]
Tower Stat Priorities
The following stat priorities are for towers in the early-mid game.

Hero
Tower
Stat Priority 1
Stat Priority 2
Stat Priority 3
Stat Priority 4
Early-Mid game EV
Buff Beams/Reflects (reflect stats don't matter)
Power
Fortify
Rate
Range
Early game Summoner
Spiders
Power
Range
Fortify
None
Mid game Summoner
Spiders
Rate
Range
Power
Fortify


Any hero without an "endgame" tag can be assumed to have the same stat priority at all parts of the game.

Hero
Tower
Stat Priority 1
Stat Priority 2
Stat Priority 3
Stat Priority 4
Monk
Ensnares/Strength Drains/Healing Auras
Range
Power
Fortify
Rate
Monk
Electric Auras *****
Power
Range
Rate
Fortify
Endgame EV
Buff Beams/Heat Cannons/Plasma Defense Systems/Reflects (reflect stats don't matter)
Power
Rate
Range
3906 Fortify*
Huntress
Gas Traps
Range
Fortify
Rate
None
Apprentice
Lightning Towers **
Power
Rate
Range
Fortify
Endgame Summoner
Spiders/Sirens
Power
Rate
Range
Fortify
Squire
Harpoons
Power
Rate
Range
Fortify
Warden
Blossoms/Sludges ***
Power
Rate
Range
Fortify
Guardian
Obelisks
Power
Rate
Range
Fortify
Guardian
Owls ****
Power
Range
Rate
Fortify
Guardian
Bulwark Wall
Fortify
None
None
None
Guardian
Empowering Shrine *****
Power
Range
Fortify
None

  • 3906 fortify minimum to hit the armor cap on your buff beams at max upgrades. *

  • Lightning towers should be specced at a ratio of 1.2 - 1.4 power to 1 rate for optimal DPS, ratio varies based on your stat range. **

  • Sludges get outclassed by Harpoons with runes later on. ***

  • Rate only affects time to reperch. This caps easily. ****

  • Electric Auras and Empowering Shrines don't get used during my progression. *****
Endgame Meta Towers and Passives
This section is placed a little out of order to make it easier to refer to the stat priority section above. You can skip this section until you’ve cleared Keep on Massacre Survival.

There will be some overlap with the tower explanations earlier in the guide. This section focuses on the endgame functionality of towers. While most towers are viable for clearing W23-25 on mix mode, I’ll be describing the highest performing/useful towers. This assumes late game stats (gear farmed on Lycan/Dune eater difficulty), runes are used, (with the exception of the gas trap, enrage, and reflect beam runes) and that you’re building for AFK farming endless survival. Any towers not mentioned can still be viable and have other niche uses, but the ones mentioned are most commonly used.


Armor passives to look out for (any not mentioned are not worth using): Fortify/Power/Range/Def Rate stats; whichever stats your hero is prioritizing, % Def Damage (blue text) for damaging towers. Note this is an additive multiplier for damage when used with the overclock rune. Prioritize Power and Rate over Def Damage % for your damage towers.

Monk

Ensnare: A mandatory tower at all points of progression since enemies move lightning fast on Massacre difficulty. The Sluggish Rune is helpful for making your towers tankier, but not at all necessary.

Strength Drain: While helpful during progression, this aura isn't used as often without it's Exploding Aura rune. The Exploding Aura rune works very well with enemies that die in close proximity to others (such as portals). This rune works exceptionally well in endless mode due to it's scaling functionality.

Healing Aura: Early on has its occasional uses for healing your tower boosters. However in the late game, this aura is very niche. It needs to be fused to be worth using in the late game. Even so, in the late game you should have enough hp regen on your accessories to not need it in most cases. The Rejuvenating Aura rune is also very low impact and not particularly helpful either.

Electric Aura: Needs to be on its own buff beam with overdrive or else the damage drops off too quickly in endless survival. It is however excellent for clearing fodder monsters. Just be wary that in endless survival, it becomes obsolete over time.

EV

Overclock Beam: Mandatory in all parts of the game. Aim for 3906 fortify to hit armor cap at max upgrades (as mentioned earlier). Fused buff beam is good in combination with Bulwark wall or making defenses tankier against bosses/enemies. The Overdrive rune provides the biggest power spike out of all runes in the game. 2-3 towers per buff beam is the most efficient use of the rune.

Plasma Defense System: Excellent for killing flyers or anything on big maps. One of the top tier towers in the game period, due to its massive range and hitting targets instantly. The dead zone is not an issue as long as you build around it. The Full Coverage rune massively increases its range and is always worth using. The deadzone has a maximum range that it hits regardless of using the rune or not.

Heat Cannon: Very niche, useful for spawn killing on Alch labs or F&F. The Immolation rune provides a decent damage boost, and is worth using.

Reflect Beam: Mandatory in all parts of the game. Without this tower, enemy projectiles are extremely problematic. The Strengthened Field rune as mentioned earlier should not be used.

Huntress

Gas traps: Helpful at all parts of progression. Great for stalling and grouping enemies together for towers that can AOE to kill (such as Harpoons). As mentioned before, the Noxious Fumes rune is detrimental and should not be equipped.

Apprentice

Lightning tower: Great for stunning and clearing fodder. The Pulsator rune is quite exceptional on this tower and can even kill side Djinns in some circumstances.

Summoner

Spiders: Arguably mandatory in every build. Provides a slow and applies a debuff that makes monsters take double damage. It makes ogres and other high HP targets less of a threat. The Spider's Poison rune is fairly low impact, but still adds some DPS to the Spider.

Siren: Interchangeably used with EV's reflect beams, if the Siren has the Reflective Screech rune. Siren does cost 4 DU however, so in many cases it's more efficient to use reflects if less coverage is required. Enemies inside of the Siren's bubble can throw projectiles freely. Thus, it's ideal to keep Siren's rune at 6/8. Some maps benefit from 7/8 or 8/8, but for the time being you can't scale down the rune.

Squire

Harpoon: Runeless, the tower is mediocre. With the Poison Tipped Spears rune, it becomes one of the best towers in the game. The damage is great (not as good as Blossoms), it pierces, and has a massive horizontal range. Harpoons especially excel in act 4 maps with portals, or lanes where monsters group up.

Warden

Blossom: Solid damage runeless and becomes one of the best single target towers in the game with the Focus Blossom rune and instantly hits it's targets. However, it can only hit 1 target at a time (assuming no Wrath boost from Warden), and it also requires a root placed. It's horizontal field of vision is much smaller compared to Harpoons, which is both beneficial and detrimental.

Guardian

Bulwark wall : Has niche uses but makes towers very tanky. As mentioned earlier, it benefits from double dipping with the armor bonus from buff beam. The Divine Absorption rune is very impactful to its tankiness.

Owls: One of the best towers in the game. However it is lackluster without the Flaming Owl rune. It hits very hard, but requires some crowd control or other damage towers to go with it due to its lack of consistent DPS in specific lanes.

Obelisk : Provides a 90% slow debuff (maximum slow) from a long distance. This is very niche, but does have its uses on maps with long lane ogres or maps with portals. The Dead Gaze rune does provide AOE damage, but it's not that impactful.

Empowering Shrine : While currently bugged and not applying its full buff damage, it is still strong for DPS heroes. There are also future plans of a fused version of this tower to reduce hero cooldowns. The Empowering Friendship rune is very impactful in multiplayer games.


Meta DPS Heroes and Gear Setups
You can skip this section until you reach Keep Survival on Massacre.

This will cover which DPS heroes are meta, as well as their ideal equipment sets/stat priorities. Any DPS heroes not mentioned are not considered meta and thus will not be covered.

Passives on DPS weapons to look for in order from most impactful to the least. Note that this section is still a work in progress, more testing is required to confirm. But this should give you a good enough idea of what passives to use. Any passives not listed are generally not worth using over the listed passives.

  1. Irradiate
  2. Sunder Armor
  3. Double Edge
  4. % Damage (blue text)
  5. % Attack Rate (blue text)
  6. Aftershock

Passives for offhands to look for:

  • Chance to boost Attack Rate
  • % Damage
  • % Attack Rate

For upgrading weapons and pets, assume you upgrade damage and tower/hero boost stats unless mentioned otherwise.

Booster Monk (used only in boss fights in group games, not solo)

Weapon Set Bonus: Etherian Champion

Weapon: Wolfsbane Cleaver (Keep weapon, Monk is mainly used as a booster, so the weapon is not crucial, just the base stats on it)

Accessories: MP regen, and HP regen. On the off chance you have spare slots, stability and movement speed are nice passives to have.

Pet: Cat if no one else is using one, otherwise Obsidian Gemstone (20% drop from throne room survival boss) if no one else is using one, else use a Giraffe/Mista Mine to stack ability for hero boost.

Stat priority: Spec vitality if your HP is on the lower side (would recommend at least 600k health, depending on the map you’re running), otherwise spec ability.

How to play: Turn on hero boost, be close to your teammates. Tower boost towers if you’re close to your towers and/or you have enough MP regen to sustain both hero and tower boosts. Fire projectiles at whatever you need to.

Rogue

Weapon Set Bonus: Inspired Assault for solo, Marked for Death in a group (only need 1 player with this set bonus).

Weapons: Wolfsbane Sniper in the bow slot, Wolfsbane Claymore in the sword slot. Claymore is better than Smasher if you're using Rogue’s spin attack for clearing lanes. Otherwise, use either Claymore or Smasher if you’re using only Rogue’s ranged attack. Upgrade damage on the bow, upgrade damage on the sword if using the spin, otherwise upgrade stats on the sword. All Rogue weapons are found from Keep.

Armor Set: Fused Militia is the best set to use.

Tower stat priority (Range does nothing, also don't put any hero points into your tower stats)

  1. Power
  2. Fortify
  3. Rate

Accessories: HP regen, MP regen if using the spin, otherwise stability or movement speed are nice passives to have.

Pet: Cat, not Giraffe.

Hero stat priority: Ability breakpoints for rogue’s dagger throws during invisibility are 1000 ability for 2 throws, 3800 ability for 3 throws, 6415 ability for 4 throws. You may wish to add extra ability if you’re playing in a multiplayer game with latency, or for a bigger window to throw the daggers. Spec your hero points according to whichever threshold you’re closest to. Then spec rest of your points into attack if you’re comfortable with your HP pool.

How to DPS: This has been covered in the hero section above, regarding his skill rotation.

Huntress

Weapon Set Bonus: Etherian Marksman (Ammo Pouch)

Weapon: Dragoon from Summit

Accessories: HP regen, MP regen. On the off chance you have spare slots, stability and movement speed are nice passives to have.

Pet: Cat, not Giraffe.

Stat priority: Vitality scales poorly on Huntress, attack is ideal. But try to get vitality on your weapon/offhand/pet to make her less squishy.

How to DPS: Turn on Adrenaline Rush, and spam Phoenix Shot while holding the fire button.

Squire

Weapon Set Bonus: Spinning Steel

Weapon: Path Sword from Throneroom or Wolfsbane Smasher from Keep

Accessories: HP regen, MP regen. On the off chance you have spare slots, stability and movement speed are nice passives to have.

Pet: Fused Monkey King with 0.33 attack rate for bossing, else use bombers for non-boss waves. Rocks/Giraffes if you care about spinning for more damage. But I personally wouldn’t use Squire on non-boss waves regardless.

Stat priority: 800k hp is usually enough for Squire with Blood Boil on. Spec as much attack as you're comfortable with.

How to DPS: Turn on Blood Boil, and spam Circular Slice pointblank range at your target for spike damage. If you’re not in pointblank range, you lose a lot of damage. Hold your fire button while spamming the slice.

Summoner

Weapon Set Bonus: Etherian Marksman (Tome). You only need a Tome to complete a weapon set bonus. Also look for only the % damage (staves) passive for the offhand, as it is currently the only passive that works with Summoner at all.

Accessories: HP regen, MP regen. On the off chance you have spare slots, stability and movement speed are nice passives to have.

Pet: Fused Dead Lil Bomber x 2 (with 0.63s rate, 3 projectiles, best map to farm from Royal Gardens), Speedy Gemstone + Powerful Gemstones (Summit Campaign, base stats don’t matter due to going into overlord mode, just make sure to cap the boost stat and 4 targets) Note that speedy gemstones will not boost owl DPS in the late game.

Stat priority: Attack is ideal. However, you can easily spec into tower stats instead and DPS just fine.

How to DPS/boost: To DPS, just turn on Pet Boost and flash heal as necessary. For gemstone boosting, go into Overlord mode and stand close to the towers you wish to boost and spam flash heal.

For some ideas of group DPS set ups (if all heroes are close together)

Ranged DPS Variant

Rogue with marked for death set (Cat or Obsidian Gemstone pet, whichever is missing)
Huntress (Cat or Obsidian Gemstone pet, whichever is missing)
Booster Monk (Giraffe)
Either another Rogue with inspired assault set, or another Huntress (Bomber pet may be a good choice for killing spiders)

Melee DPS Variant

Rogue with marked for death set (Cat or Obsidian gemstone pet, whichever is missing)
Booster Monk (Cat/Obsidian gemstone pet, whichever is missing)
Squire (Monkey king)

You can also try something with Guardian as she heals the party and provides armor while DPSing if you like, though HP regen from accessories should remove this need. Guardian would work better with Squire as they are both melee heroes.
Tower Targetting
We can customize what type of enemies our towers prioritize. This is important to ensure our towers are killing the most important targets they need to. In short, fodder prioritizes weaker monsters, strong prioritizes the highest hp targets, air prioritizes airborne enemies, and special prioritizes special monsters.

Tower targeting is done across multiple characters. For instance, you cannot have 2 apprentices with 2 magic missile towers, with one on fodder priority, and another on strong priority. Both towers will have the last targeting priority you set. However, in multiplayer, you can have your missile towers on fodder, and your friend’s missile towers on strong. Some tower’s targeting will be altered throughout the run, so keep this in mind.

You adjust this by going to your inventory and then the Spellbook tab, scroll down and click on your defenses as shown in the screenshot below:
Some defenses won't have a targeting priority, but most do. Set the following priorities for all of your heroes:

EV: Plasma Defense System to air
Apprentice: Lightning tower and Magic Missile to fodder
Summoner: Archer and Spider to strong, Siren to air
Warden: Blossoms to strong, Sludges to fodder
Squire: Harpoons to strong
Guardian: Owls and Obelisks to strong
You can find details on targeting lists in the general tab:
Cheatsheet General Tab[docs.google.com]
Tower Boosting/Buffing Towers
Monks buff towers by hitting “F” on PC. This creates a bubble with all towers in range get a tower damage boost. Multiple monk boosts do not stack on the same towers, and neither do multiple apprentice boosts. However, a monk boost and an apprentice boost do stack together.

Apprentice boosts works by hitting “C” (overcharge), and then right clicking once to apply the tower buff. Overcharge can be immediately turned off to save mana, until you need to reapply the tower buff. With the overcharge buff, the duration cannot be refreshed until it expires, unlike the monk boost which can be overlapped. Make sure you don’t equip Apprentice’s overcharge rune as mentioned earlier.

This screenshot here shows a tower is being buffed by the buff beam with this type of glow.
This screenshot shows a tower being buffed by an apprentice.
This screenshot shows a tower being buffed by a monk.
And finally, this screenshot shows a tower being buffed by a gemstone pet (found in summit).
These pets buff up to 4 of the towers closest to your character. Gemstone pets are how you can offset multiplayer scaling if you’re struggling to clear maps in 3 or 4 player games.

The main pets you’d want to look out for are the striking gemstone (increases tower range), speedy gemstone (increases tower defense rate), and powerful gemstone (increases tower damage). Towers require some defense rate (higher than 0) for the speedy gem to actually function. It's worth mentioning that speedy gemstone actually boosts more damage than powerful gemstone does, even if the tower is already defense rate capped. Summoner can equip 2 pets, so it would be ideal if your third/fourth players were summoners and equipped 2 different gemstone pets each.

It’s generally bad to equip 2 of the same gemstone pet on a single character because the pets tend to target the same towers, and gemstones of the same type cannot be stacked on the same towers. Gemstone pets have 2 main important stats: max targets and their tower defense boost. You can only upgrade the tower defense boost stat (this has a cap). Max targets range from 1-4, with the max buff being at around 100%. Ideally the pets you use at early progression will boost a minimum of 3 towers, and even a tower boost of 50% would be very impactful. But of course, the higher the better. You can find gemstone pets as high as around 90% tower boost on hard summit campaign, with 4 max targets.

Pets can also gain experience if equipped on your active hero during a wave and gain free levels that do not cost gold to upgrade. To upgrade gemstone pets properly, all you need to do is max out their tower boost stat. With spare points you can spec into anything you want on the pet.

To make upgrading easier, under options you can enable "Smart Upgrade Mode". This allows you to prioritize upgrading buff beams, followed by damage towers, and then your other towers. You use this by selecting upgrade tower on your character, and then aim at the floor near towers, but not at an actual tower. Keep in mind for the early game, this will make upgrading a little awkward. But when you hit level 60, you'll be able to fully upgrade towers, which will make this feature will function much better. Make sure you also enable “Smart Repair Mode”.

----Early Game----
Medium Deeper Well HC (Hardcore) non-rift
Select Deeper Well on Medium, toggle Hardcore for better drops, but turn rift off. While we would welcome the item quality increase from rift, monsters have too much health since we need to melee them on wave 1 due to lack of spiders. Also from here on out, don’t use any runes higher than the common quality unless I specify otherwise. It is a huge waste of gold doing so at this point in progression.

A reminder to have your Monk, EV, Huntress, Apprentice, Summoner, and Warden in your deck. Keep an eye out for accessories with hp and mp regen in their implicits, as well as vitality/ability on your weapons/offhands. We need hp regen for your DPS character later in the guide, and we need MP regen for your tower boosters and summoner. We also need ability on your monk and apprentice to scale their tower boosting abilities.

For early game item drops, Militia/Miner guarantee power as a stat. While Ancient and Guard pieces guarantee Fortify as a stat, and Primitive guarantees defense rate as a stat. Distribute the gear accordingly to your heroes based on the stats they need. When you enter insane survival, don’t worry about these specific drops, and focus on putting together the best armor sets on your builders.

Your summoner will be your main damage builder for all of campaign and for most of, if not all of insane survival. Give your best gear with power to your summoner. However, aim to get 20 range on the summoner as soon as you can to make kobolds a non-issue in future maps. After 20 range, you can spec your summoner into pure power. Though extra range doesn’t hurt if it’s on the gear already. Spiders in the early game require no defense rate.

For your monk, get around 5 points into power before focusing primarily on range. More power is of course welcomed, but 5 points for clearing campaign is enough.

For your huntress (though gas traps aren’t required until insane survival), you should prioritize range while speccing some points into fortify and defense rate. The stat ratios are pretty flexible early game, but you can aim for a 2:1:1 ratio for Range:Fortify:Defense rate if you like.

For your EV, prioritize power and fortify. While rate and range are welcome to have, they aren’t necessary in the early game. However, EV’s stats won’t matter until you hit level 20 (which you typically hit during throne room campaign) when you finally have access to her buff beams. Also, EV’s reflects are accessible upon hitting level 2.

If you have extra players, you only need monk boosters until you make the swap to warden’s towers. Apprentice boosting spiders at this point will not affect the spider’s attack rate.
Anyway, just follow the DDA planner I’ve linked. Be sure to read the description for every DDA planner I link for details. I can’t emphasize this enough. Just remember for all maps, using up all DU grants an exp bonus, as well as not getting hit during the wave. Asides from wave 1 where you have to melee monsters on this map, avoid running around and getting hit if you can help it.

If you ever get stuck on a map, check out the "Troubleshooting a failed build" near the end of the guide for some ideas.

Deeper Well Medium HC Campaign Planner[builds.dundef.com]
Hard Ancient Mines HC Rift Optional
After clearing Deeper Well on medium, go back to tavern and change the difficulty to hard, hardcore still ticked on, and rift can be turned on if you wish. Rift mode at this point only serves to increase item quality and remove elemental immunities from monsters at the cost of increased health pools on monsters (including ogres and bosses!). So, if you’re playing with friends and struggling with rift mode, you can turn it off until I mention otherwise.

Loot filter update: Change your loot filter to uncommon tiers and higher for your regular armor filter. Feel free to equip any weapons you find on the ground, but they’re not typically worth using until rare tier or higher when they start dropping with actual stats on them.

Your summoner likely doesn’t have 20 range yet, so focus on getting this before going pure power. Equip gear on your Summoner/Monk/EV and then start the map. Follow the planner and read the description to get an idea of what to do and not do. If you mess up and a kobold hits your spider, your spider *should* be able to survive an explosion (even with 0 fortify on summoner) but avoid this at all costs.

Ancient Mines Hard HCR Campaign Planner[builds.dundef.com]
Hard Lava Mines HC Rift Optional
You can enter the next map without going to tavern. Same as before, with rift being optional. Follow the DDA planner link and read the description.

Lava Mines Hard HCR Campaign Planner[builds.dundef.com]
Campaign up to Summit on easy, non-rift, non-hardcore
After Lava Mines, go back to tavern and untick hardcore, untick rift if you haven’t already, and change the difficulty to easy. Now start alchemical labs and skip all encore maps along the way. The reason we started Ancient Mines and Lava mines on hard was to drop enough uncommon/rare gear to trivialize the rest of campaign even further on easy. We clear campaign all the way to summit in order to unlock insane difficulty. Clearing campaign on higher difficulties is entirely optional and overall, just not worth the effort. The next step in progression can be done easily with just the levels we get from clearing campaign on easy.

I highly recommend you just try the rest of campaign on your own to experience the game. Just note that for alchemical labs, throne room, and summit, you’ll need to use archers to kill the bosses, as spiders cannot damage bosses. However, if you insist on following DDA planners, I’ve provided rough DDA planners for these maps. Due to how easy the maps are, I did not go into great detail for these builds. And just a disclaimer that these aren’t the only, nor best way to build for these maps. But they work. To speed up the waves, you can just place spiders at spawn points once you have your main lanes covered on wave 1.

Alch Lab Easy Campaign Planner[builds.dundef.com]

Tornado Valley Easy Campaign Planner[builds.dundef.com]

Tornado Highlands Easy Campaign Planner[builds.dundef.com]

Ramparts Easy Campaign Planner[builds.dundef.com]

Throne Room Easy Campaign Planner[builds.dundef.com]

Arcane Library Easy Campaign Planner[builds.dundef.com]

Royal Gardens Easy Campaign Planner[builds.dundef.com]

Promenade Easy Campaign Planner[builds.dundef.com]

Summit Easy Campaign Planner[builds.dundef.com]

Stats I had at the end of summit campaign:
Fortify/Power/Range/Rate
Monk: 8/46/98/0
EV: 39/97/0/0
Huntress: 25/0/73/40
Apprentice: 98 ability
Summoner: 3/138/24/4
Warden: 98/0/0/0

Keep in mind your stats don't have to be exactly the same as mine. This is just to provide you a rough idea of what type of stats to expect.
Insane Ancient Mines Survival Hardcore, Rift Recommended
After completing summit on easy, you’ll have unlocked insane difficulty. Remember if you’re struggling to clear maps with multiple players, you can farm summit campaign on hard/insane, hardcore with rift off. Rift would increase the item quality, but the boss health would dramatically increase. You can just build towers at each of the boss spawns to damage the boss so you don’t need DPS heroes to do so. You should only “need” gemstones if you have 3 players or more. Note that it’s impossible to get a max boost stat gemstone on hard summit, and extremely difficult to get a max boost gemstone on insane summit. However, for lower difficulties non capped gemstones will still help greatly if needed early on.

Loot filter check: You’ll want to change regular armor autoloot to rare tiers and higher. Epic gear starts to show up around wave 6. Likely around wave 8 or so when your builders are in full rare armor, you can update the autoloot filter for regular armor to epic tier and higher. For your weapons/offhand filters, you can likely update them to legendary tiers and higher around wave 15 or earlier. Remember to look for vitality + ability on your weapon and offhand.

Monk tower boosts work more effectively than Apprentice boosts on your spiders in this map, so be sure to use your monk. You’ll notice I specced into pure fortify on my warden. Only for this map, we use warden as a waller since spiders are our main damage tower. As you start putting together armor sets for all your builders, put one together for warden as well, as she’ll be covering your main tower damage needs and no longer just a waller.

I personally didn’t need to put together a full armor set (with the set bonus) until I was in full epic gear. But if you’re playing in a multiplayer lobby, always play it safe and equip your best gear as soon as you can. I also didn’t need to upgrade any armor until I was in Foundries and Forges, but if you’re struggling with the build, it may be worth considering upgrading gear earlier.
When putting together sets, you can filter by set name in each armor bag filter to find the relevant pieces to get the 40% stat bonus as referenced earlier in the guide.

The pet you get at the end of wave 25 is a Hippogryph. If you cleared this map on rift mode, you’ll get a fused version of this pet, which will provide a big source of DPS on your tower boosters. This is why I recommended to opt into rift mode. You’ll also get a giraffe, which increases the cast rate of your builder. Try to get one for all of your builders at some point (2 for summoner if you wish). Run this map into endless if you can until you hit level 60. I hit level 60 at the end of wave 34 in my run. Fortunately, this will allow you to farm for multiple hippogryphs and giraffes. If your build fails in endless, you can try a wave 23 start, otherwise if that is still too difficult, try a lower wave start.

My stats at the end of this section were:
Fortify/Power/Range/Rate
Monk: 124/74/369/92
EV: 138/412/69/152
Huntress: 109/119/389/101
Summoner: 102/408/95/213
Warden: 123/458/143/203
Apprentice: 235 vitality, 0 attack, 313 ability

Ancient Mines Insane HCR Survival Planner[builds.dundef.com]
----Mid Game----
Nightmare Ancient Mines Survival HC, Rift Recommended
This section is actually skippable. However, if you’re playing in multiplayer and/or want a smoother progression path, don’t skip this section. This will take around 2 hours or so, similarly to insane ancient mines survival. I would again recommend turning rift mode on as this will give you strong pets at waves 14 and 25, as well as giving you parts of fused sets that will make the next map much easier to gear for.

Loot filter check: Myth gear appears to start dropping around wave 8. You’ll likely be able to skip legendary armor entirely and go straight to myth armor. By wave 15 my builders were in mostly myth sets. So, you can probably change your regular armor loot filter to myth tier and higher around wave 10 or so. You can do the same for your weapons/offhand filters.

Keep an eye out for fused myth quality guard/militia/primitive/ancient armor pieces. You’ll need these for the next section. Feel free to equip any fused armor on your apprentice booster, as this will grant them rift armor. Wave 16 is when the difficulty begins to ramp up, so be sure to gear accordingly by then.

We switch to Warden towers for our tower damage, using spiders to debuff enemies and make them take double damage. Prioritize increasing defense rate on summoner at this point. Gas traps are mandatory on this map due to Sharken and Djinns. Sharken will sprint past your defenses without a gas trap, and Djinns will desummon your auras/towers without a gas trap. Your pets from insane ancient mines survival will help kill some early wave monsters and the dark elf warriors that pursue you later on.

Ideally you want to apprentice boost your towers instead of monk boosting. However, Apprentice requires 2 mp regen to fully sustain the tower boost the entire wave. Not to mention that if dark elf warriors hit you, you lose even more ability mana. If push comes to shove, just apprentice boost whenever you see ogres on the map. In multiplayer games, you can mix up monk and apprentice boosters as you see fit. Just keep in mind the west section needs an apprentice booster the most, due to the two lanes. You’ll probably only need to run this to wave 25, but feel free to keep going in endless if you want better hippogryphs.

By wave 20, these were my stats on my heroes:
Fortify/Power/Range/Rate
Monk: 618/772/1044/591
EV: 604/969/410/299
Huntress: 557/293/774/484
Summoner: 297/764/301/379 (I forgot to spec into defense rate)
Warden: 429/864/403/552
Apprentice: 240 vitality, 216 attack, 530 ability

Stats at the end of wave 25 are provided in the planner.

Ancient Mines Nightmare HCR Survival Planner[builds.dundef.com]
Nightmare F&F (Foundries and Forges) Survival RHC (Rift Hardcore)
Your stats at this point, whether you skipped nightmare ancient mines or not, will set you up to very easily steamroll act 4 campaign maps to unlock Foundries and Forges. Clear act 4 campaign maps on easy all the way up to and including F&F.

Rift mode is mandatory at this point, because we need to put together fused sets in order to jump to F&F on massacre. But also, rift mode will become significantly easier once you put together fused sets. To the point where using fused sets on rift mode is easier than playing on non-rift mode largely from the double damage you get from your towers.

If you ran Nightmare Ancient Mines prior to this, you’re in excellent shape. You’ll likely have some fused pieces already, allowing you to complete fused sets much earlier. You’ll also have a very strong DPS pet that will trivialize the beginning quite significantly, as well as have towers with enough stats to smoothly push through the waves, and you won’t need to re-adjust the build as posted on the DDA planner.

If you skipped Nightmare Ancient Mines, you’ll have to adjust the build on the DDA planner slightly, as mentioned in the description. Once you get enough tower range to cover your lanes properly (at least around 200 range on warden, 100 range on EV), reposition your towers as shown in the DDA planner. You want your blossoms/sludges (on a buff beam) to cover at least up to the portals.

Loot filter check if coming from Nightmare Ancient Mines: You can delete the normal armor loot filter if you’re comfortable with your characters myth sets. Otherwise, leave the regular armor filter on until your characters are in full fused myth sets. Adjust your rune filter based on the current blossom rune you’re on. For instance, if you have an uncommon blossom rune, change your rune filter to rare and higher. You can also change your accessory loot filter to be stricter if you wish. I can’t give an exact filter to change to, as your previous accessory drops are pretty randomized. So, use your own judgement for your accessory filter.

Loot filter check if coming from Insane Ancient Mines: You should still be in epic armor. I would advise changing your regular armor, weapon, and offhand loot filters to legendary and higher. When you find you’re oversaturated with legendary gear, you can move it up a tier to myth. Once you’re in full fused myth sets, you can delete your regular armor filter and you’ll be looking for only fused armor from here on out. Adjust your rune filter based on the current blossom rune you’re on. For instance, if you have an uncommon blossom rune, change your rune filter to rare and higher. You can also change your accessory loot filter to be stricter if you wish. I can’t give an exact filter to change to, as your previous accessory drops are pretty randomized. So, use your own judgement for your accessory filter.

If you get unlucky with finding a fused militia set, your build may fail around the wave 16 mark. At which point, just keep restarting at W12 until you find a fused militia set for your Warden (I only had to reset once coming from insane ancient mines). Clearing wave 14 guarantees 2 random fused armor pieces from the chest. Though with clearing Nightmare Ancient Mines, you may not need to reset at all due to your higher tower stats and pets. Also be sure to gear your apprentice in fused armor (any pieces) to increase his rift armor to help him tank hits against dark elf warriors.

Fused armor to watch for: Keep an eye out for a fused ancient set for your monk, fused guard set for your huntress and summoner (prioritize fused spider over gas trap), fused militia for your warden, and fused primitive for your EV. Fused ensnares and gas traps will increase fusion damage taken from your fused towers, fused blossoms will double their DPS, and fused buff beams will make your towers significantly more durable which helps a lot in this small map. With fused miner pieces, you can give them to your apprentice for rift armor. Otherwise, there aren’t any purposes with miner gear until you find godly miner pieces.

In addition to fused armor pieces, look out for the beaming blossom rune here. Unlock and equip the highest blossom runes you can find here, as this will significantly increase your tower damage. Runes can drop as high as epic tier on this map in nightmare difficulty, though rare runes are far more common. Keep in mind you’ll need around 200 million gold to upgrade your first fused militia set for Warden.

In solo, use your apprentice to tower boost all your towers. In 2p, use an apprentice + monk to tower boost. In 3p or more, have the third and fourth players (ideally summoners with powerful and speedy gemstones) use gemstones to boost your towers. If your extra players have striking gemstones however, they can increase the range of your towers (could replace 3 ensnares with an ensnare, strength drain and healing aura to cover your entire build), potentially allowing you to restructure your build, especially if you’re coming from insane ancient mines with lower stats.

I personally didn’t upgrade any gear in my entire run until the end of F&F to stress test the build. While this was clearable in solo, I would advise upgrading your first fused militia set. If you find you’re struggling to clear far enough to farm fused militia, then you may want to upgrade your non-fused myth. Just be sure to leave around 200 million gold for upgrading your fused militia set.

Stats I cleared with all the way to W25 solo (only blossoms were fused, none of my gear was upgraded, and used only a 1/8 blossom rune)
Fortify/Power/Range/Rate
Monk: 519/451/855/512
EV: 554/710/261/435
Huntress: 508/479/979/530
Summoner: 570/692/473/830
Warden (Fused): 569/833/419/598

I hit level 80 around wave 52. With all the trans fused armor pieces, my stats going into Massacre F&F Survival RHC (with upgrading) were:
Fused Monk: 719/1169/2119/1079
Fused EV: 1891/2519/1423/967
Fused Huntress: 866/668/2166/1047
Fused Summoner: 895/1514/870/1748
Fused Warden: 1151/3543/1684/1218, with 3/8 blossom rune

F&F Survival HCR Planner[builds.dundef.com]
----End Game----
Massacre F&F Survival RHC
Loot filter check: Change your fused armor filter to trans and higher, and accessories to trans and higher. Accessories drop consistently in F&F, so be sure to look out for mp regen and hp regen accessories. This map is a great opportunity to start looking for weapons with cast rate. You’ll want all of your builders to have cast rate on their weapons to speed up building in your build phase. While this isn’t necessary, it’s quite convenient and saves you time in the long run.
Set your weapon filter to include swords and bows, item tier to trans quality and higher, until you get cast rate weapons for all of your builders. You’ll want 2 swords, 2 staves, 2 bows, 2 pole arms. I personally aim for a minimum of 150 cast rate to instantly build towers, you can try out weapons with lower cast rate if you wish.
After you get all of your cast rate weapons, change the weapon filter to include fusion under the element tab. Make sure you checkmark “Fusion” and not “Always include fusion”. As you get to the late waves, you’ll be able to swap your fused armor filter to godly and higher.

The build is identical to the nightmare version. Try to keep your gas trap range around 4k. Otherwise with too much range, the gas trap will slow down waves. Also, if a single ensnare can cover all 3 portals, you can drop the other 2 ensnares and replace them with a healing aura and strength drain aura to make it safer for your tower booster.

Runes to look for: 6/8 focus blossom, 6/8 poison tipped spears (optional), 6/8 poison dagger (optional), 6/8 divine absorption (optional), though trans runes can drop here without bonus difficulties applied.

Fused sets to look for: Ancient for Monk, Guard for Huntress/Squire/Summoner, Militia for Warden, Miner for Apprentice/EV, and Primitive for Guardian/EV. You’ll want both fused miner and primitive sets for EV, depending on the map. So be sure to get both.

Note that for the Temple map in the distant future, I prefer fused militia on Summoner over fused guard, as sirens can kill flyers more efficiently than spiders. The harpoon rune allows us to clear the keep map coming up which will unlock the lycan bonus difficulty for us.

Same as before, upgrade your blossom rune as you progress to make later waves easier. At some point, swap out your monk and huntress for your squire and rogue to level them up to 80, and eventually a guardian to level 80 as well (prioritize the squire and rogue first). Losing fused ensnares and gas traps won’t impact your build too much. Don’t worry too much about levels either, as long as all of your heroes are at least level 80-100. Very rarely you’ll find a supreme item that requires level 110, but it is not at all necessary to use during this progression. Aim to get 8k main stats on all of your builders, as well as a 5/8 or 6/8 poison tipped spears rune (aim for 6/8 if playing in a group) before moving onto the next section.

Fully upgrading godly armor sets and accessories seem to cost about 15-18 billion per character, so keep this in mind. You’ll need your Monk, EV, Huntress, Apprentice, Summoner, Squire, and Rogue geared up for the keep coming up.

My stats at the end of F&F around wave 72:
Fused monk: 3399/4072/8385/4544
Fused EV: 3836/8380/3075/4433 (only had fused primitive here, but you should get miner too)
Fused huntress: 5488/3618/6657/4261
Fused apprentice: 4612/7566/4164/5874 (for fused lightning towers)
Fused squire: 3679/8527/3884/5090 (5/8 harp rune)
Fused warden: 4175/8121/3617/3565 (5/8 bloss rune)
Summoner: 1534/2385/1344/2708 (I neglected summoner at this point, but I’d advise upgrading his gear anyway for an easier time)
Massacre Alchemical Labs Survival RHC
Loot filter check: Make sure your weapon filter is looting trans and higher. You can set your rune filter to epic and higher for now, as there are some helpful runes in act 1. You can also set your pet filter to trans and higher as well.

Before we take on the keep, we need to get weapons with a certain passive that drops only from bosses on rift mode called “Chance to Irradiate”. This passive grants a chance to inflict irradiate, which deals damage to the target based on a percentage of their maximum health for a given time interval. Even though this effect is reduced on bosses, it’s still the best passive for bossing especially during progression.

We choose to run alchemical labs because it’s the easiest map to kill a boss with your towers alone. The map in survival also grants a pet that greatly increases your damage. In this run we’ll be using the Rogue as our boss killer. The rogue can use both a sword and bow, both whose passives will stack with each other. Thus, his chance to irradiate passives will stack and will make irradiate proccing more consistent. With your current stats, your towers will melt the boss on campaign and survival.

Farm wave 25 survival to get the weapons you need from the chest. Open the chest once as a huntress, and then another time with a squire to guarantee a bow and sword drop respectfully (2 different runs). You'll also get some propeller cats (1/5 chance of getting it at W25) while farming these weapons. If you're unlucky with the cat drops, you could farm W14 for lower quality cats that drop 100% of the time, but I leave that decision to you.

Aim for vitality on your weapons and cat as you’ll need a minimum amount of hp regen to facetank the boss as rogue.
Now, you *can* use a giraffe instead of a cat to clear the keep boss if you want, but I’d advise against this due to the damage loss you’d have. But in addition to that, you’d want a cat for the temple boss in the future anyway.

Keep an eye out for pulsator, flash heal, and entangling root runes here. These are helpful to have on your apprentice/summoner/warden, but not at all mandatory to the progression. Upgrade your cat until it hits the maximum hero boost stat and upgrade your weapons into damage. Though you can upgrade your sword into vitality if you wish, as you won’t be attacking with the sword in this guide.

Alch Labs Massacre Campaign/Survival HCR Planner[builds.dundef.com]
Massacre Keep Survival RHC
Loot filter check: Change rune filter back to mythical and higher.

Prior to the boss, make sure your rogue has your upgraded weapons/cat from alch labs equipped, poison dagger rune if you're using the cheese method, a rift armor set to get the rift armor bonus, and all of the hp regen accessories you can stack on him.

For the Lycan boss, you’ll have to do enough damage to the boss with hero DPS (your pet won’t attack him either) before entering the lure phase. You’ll then be prompted to lure the boss towards one of the chairs with dynamite. At this point his defense drops and both you and your defenses can deal full damage. You have the option to hit the dynamite again to stun the boss to prevent him from attacking you, or you can tank the boss hits and get the boss to take damage for longer.

Tanking the Lycan boss on this difficulty requires somewhere between 38,000 to 44,200 hp regen (this is without the arcanist helmet, so 20 rift armor). You can calculate your hp regen by multiplying your maximum hp by the hp regen % on your accessories. However, if you’re facetanking and you’re playing solo, and you use the invisible ability (4 on the keyboard) then the boss will start attacking your towers instead. Being unable to go invisible will decrease your DPS, so keep this in mind. This applies to all bosses, including the temple boss. If you’re in a game with multiple players, you can go invisible as long as one person stays visible within the boss’s line of sight.

If you’re facetanking the boss solo, only spam his devices (1, 2, and 3) while holding the firing button. If you have other players holding boss aggro, follow the skill rotation as mentioned earlier in the guide in the hero section. The poison dagger rune found in act 4 will greatly increase your DPS in this scenario.

In multiplayer, you might need other players apprentice boosting east and west sections if your build is struggling to hold (including during the boss wave). Clearing this map will unlock the Lycan bonus difficulty which will make farming for godly runes possible on maps prior to keep in survival mode. You also get the arcanist helmet, as well as the best weapons you can get for rogue in this map. Run Keep through endless to farm as many arcanist helmets and weapons as you can. Be sure to open the chest with squire and huntress to replace your sword and bow from alchemical labs. Ideally you find a sword and bow with the “inspired assault” weapon set. The sword can be a smasher or a claymore, it won’t matter for the purposes of this progression guide. The fastest attack rate for the sniper is 0.15s for reference.

Over the next maps prior to temple, your goal will be to get as a bare minimum, mythical runes (trans for multiplayer) as well as at least 8k main stats for solo. The arcanist helmet here will help increase your stats significantly. The blossom rune, harpoon rune, and poison dagger rune drop on this map as well. Prioritize gearing up your squire with a good arcanist helmet so you can push farther into endless on this map.

Note that the stats listed in the planner do not reflect the stats I had in this run.

Keep Survival HCR No Overdrive Rune Planner[builds.dundef.com]

(Optional) Massacre Summit RHC Campaign
For afk farming, you can farm for gemstone pets for your summoner if you haven’t already. Though I would recommend farming Bazaar for the PDS rune (and ideally Endless Spires for the overdrive rune) prior to doing this if you want an extremely brain-dead build to use. Otherwise summit campaign is still ridiculously easy and trivial with your current stats.

Summit Massacre Campaign Planner[builds.dundef.com]
Massacre Endless Spires Survival RHC
Loot filter check: Rune filter to epic and higher, slowly increase the filter until you’re at mythical overdrive/flaming owl runes.

We are primarily here to farm for the overdrive rune and flaming owl runes. The sluggish aura, pet master, and spider’s poison runes are also good to have. Make sure you turn on Lycan Bonus difficulty from here on out. If you wish to farm on mix mode instead of survival, you’ll have to clear Keep on mix mode to unlock it. Equip the highest overdrive rune you find on this map, as the build provided is based on having it. Keep farming here until you get a mythical overdrive and flaming owl runes or higher. Worth noting that squire’s best DPS pet drops here: the monkey king. Though we don’t use it in this run.

Endless Spires HCR Survival Planner[builds.dundef.com]
Massacre Bazaar Survival HCR
Clear campaign on easy for bazaar, all the way to and including Forsaken Temple. Then you can start Bazaar on Massacre Survival.

Loot filter check: Rune filter to epic and higher, slowly increase the filter until you’re at mythical reflective screech rune.

Runes to look out for here: Reflective Screech (don’t use anything higher than mythical, save any higher tiers you find, as having too much range on the siren rune can be detrimental), Full Coverage, Deadly Gaze, Exploding Aura, Empowering Ring.

Out of the runes to look for here, only Reflective Screech is necessary for clearing temple. However, the other runes (especially Full Coverage) are quite helpful with certain builds/maps.

If you already have all the runes/arcanist helmets you need, this map is ideal for getting higher quality chests/gloves/boots prior to clearing temple. However, this map runs slower than F&F.

I’ve provided a build with and without overdrive rune in case you decided to run Bazaar first. Though all of the screenshots are in the non overdrive planner.

Bazaar Survival HCR Without Overdrive Rune Planner[builds.dundef.com]

Bazaar Survival HCR With Overdrive Rune Planner[builds.dundef.com]

(Optional) Massacre Royal Gardens Survival RHC
Optional but you may also want to consider farming Royal Gardens after farming the PDS rune in Bazaar if you wish to use bombers on a Summoner for farming F&F on Lycan difficulty (Pulsator rune is optional here). If you do use bombers, stack as much MP regen as possible on your Summoner's accessories for longer pet boosts:

Royal Gardens Survival HCR Planner[builds.dundef.com]
Massacre Forsaken Temple Survival Rift Non-HC
This is by far the most difficult map in the game for progression. This map will unlock the final bonus difficulty which will allow us to farm the highest quality gear in the game, as well as make godly rune farming significantly easier. Make sure you farm for the necessary runes/stats as listed in the DDA planner. HC doesn’t need to be on to unlock the bonus difficulty, and the loot on this map isn’t worth farming, so HC does nothing for us.

We make the swap from Harpoons and Blossoms, to Owls in Temple. So be sure to give your Guardian your best fused militia gear as well as your Arcanist helmet. Guardian needs an Arcanist helmet to fuse the Bulwark Walls and Owls simultaneously. Check the "Tower Stat Priorities" section if you're unsure of how to allocate stats for Owls and Bulwark Walls. Note you need only 1 Guardian for this map, just make sure all of your pieces have both Power and Fortify on them.

If you wish to DPS on Huntress instead of Rogue, you'll need to make a pit stop for farming the Dragoon Weapon on Summit survival, and the Focus Fire rune in act 1. Huntress DPS is overall more consistent in this map, but dies much more easily. Otherwise, Rogue will do just fine if you're looking to unlock the final bonus difficulty ASAP.

Summary of maps to farm in preparation for Temple:
  • Keep for better Arcanist helmets, masks, and weapons for rogue
  • Bazaar for myth siren rune and general armor drops (significantly slower than F&F but higher quality at this point)
  • F&F on Lycan bonus for general armor drops and accessories
  • Endless Spires on Lycan bonus for overdrive and flaming owl runes (overdrive rune gives the biggest boost to all of your builds)
  • Alchemical Labs on Lycan bonus for a better cat if you need it
  • (Optional) Survival Royal Gardens for bomber pets
Check the DDA planner section for additional builds if you're interested.

Dune eater boss: In the first phase of the fight, the boss rises from the front middle of the arena on the west side of the map and shoots projectiles at you if you’re far or does a melee attack if you’re close. The projectiles can hit your towers if you’re not careful. If all the heroes are invisible/dead, the boss aggros onto the towers. So, keep this in mind if you’re soloing and you’re tempted to use the invisible skill for dagger throws on rogue. After you do enough damage, the boss will dive underground then summons minions that appear from 5 doors on the map. Number of minions (and their health) scale with the number of players on the map. The minions show up as big red circles on the map. These minions slowly walk towards the middle of the arena to heal the boss and are targetable by towers and heroes. Note that the minions will jump over your towers if they’re in the way, so blocking them is not an option. After all minions die, or minions heal the boss enough, the fight shifts back to phase 1 and rises from a different spot in the middle and repeats.

Things to consider if trying to clear Temple in multiplayer: Farming for higher tier runes/tower stats than described in the planner or farming for bomber pets for your extra players (dual wield as summoner) from Royal Gardens on Lycan Bonus difficulty. Summoners with bombers would be more impactful than dual gemstone pets on this map. Another thing you could try if it’s too difficult, is to clear temple solo, then bring your friends into other maps farming on dune eater difficulty, then return to temple later to unlock the bonus for them. This would likely be the easiest option to consider. Otherwise, in a 4P group, a combination worth considering would be a summoner with dual bombers at each core, with a single rogue DPSing the boss. Ideally the rogue would have the dagger rune and thus would go invisible, so the summoners would have to watch out for boss projectiles. In 2p or 3p, you can try different combinations of heroes.

Forsaken Temple Survival[builds.dundef.com]
Post farming after unlocking DE bonus difficulty
For rune farming, I prefer the following maps.
Act 1: Magus Quarter
Act 2: Endless Spires or Ramparts
Act 3: Royal Gardens
Act 4: F&F
Act 5: Bazaar

At this point you can start farming for Supreme gear more reliably. For general gear farming, F&F is ideal on DE difficulty. F&F is the fastest map in the game that also drops all armor types. It’s more efficient to farm all armor types on F&F, and then target farm on specific maps for whichever few pieces you’re missing. Or alternatively just keep running F&F indefinitely due to how fast it is.

For offhand farming, F&F would also be ideal. Even with bonus difficulties applied, acts 4 and 5 give the best offhands.

For accessory farming, running Alchemical Labs, Throne room, and Summit are ideal for target farming Brooches, Bracers, and Masks respectfully with 4 guaranteed tower stats. Keep also drops masks but 4 stats aren’t guaranteed.

For pet farming:
Any map for Giraffes
Ancient mines for Mista Mine (I personally don’t have a use for this pet)
Alchemical Labs for Propeller Cat (ideal for Rogue and Huntress DPS)
Endless Spires for Monkey King (ideal for Squire DPS for bossing)
Royal Gardens for Lil Bomber (ideal for Summoner ranged DPS)
Yuletide Village for Penguin (hybrid summoner DPS pet with less range but more damage, however Bombers perform significantly better)
Summit for Powerful/Striking/Speedy Gemstones (campaign is a much faster farm, and the pets do not require high stats due to being in overlord mode on summoner)

For weapon farming:
Huntress: Summit for Dragoon
Squire: Throne room/Keep for Path Sword/Wolfsbane Smasher respectfully
Rogue: Keep for Claymores/Snipers
Troubleshooting a failed build
Things to check if your build has failed:
  • Tower target priority
  • Towers losing fusion status/rune effect from being swapped out of the deck or player who built the towers disconnected from the lobby
  • Runes and fused armor being equipped properly to fuse towers/utilize runes
  • Following the DDA planner description/instructions
  • Stats are too low
  • You’re playing with multiple players, and the additional players are not tower boosting/gemstone boosting/DPSing
  • Players aggroing ogre projectiles/bosses onto defenses
If you lose a map and you notice the following things, it may hint at what destroyed or got through your defenses/crystals.

  • If you’re missing a reflect, a Djinn desummoned them.
  • If you’re missing only a buff beam, either a Djinn desummoned it, or a trap/aura touching the beam died for whatever reason (Djinn desummon or lack of repairs)
  • If a buff beam and a tower is missing, either a Djinn desummoned the tower which also kills the beam, or the tower died from other means.
  • If multiple of your towers have taken damage, likely they suffered from splash damage from an ogre projectile, a kobold explosion, or rifted skeleton explosions.
  • If a mage or an enemy with projectiles are hitting your crystal despite a reflect being on it, it means your reflect is not close enough to the crystal. The mage also may have been buffed by a djinn which in turn becomes immune to all sources of crowd control, this happens very often in rift mode.

Overall if you keep failing a map, keep your map overlay up to pay attention to what exactly is killing your build. On PC if you’re the host, you can open the textbox to see messages of what monster is hitting your core.
Conclusion
That’s the end of my guide. Check out the cheat sheet for a recommended endgame loot filter, though you'll likely want to adjust it based on your current needs. Below is a list of planners for your reference. Some were not linked in the guide, so take a look. But try to get creative in building maps, you should have enough knowledge to come up with builds of your own after going through this extensive guide. If enough people find this guide useful and/or request video guides, I might consider doing some in the future. Thanks for reading, and I respect you for clearing the game on your own without carries.
Compilation of DDA Planners
Deeper Well Medium HC Campaign Planner[builds.dundef.com]

Ancient Mines Hard HCR Campaign Planner[builds.dundef.com]

Lava Mines Hard HCR Campaign Planner[builds.dundef.com]

Alch Lab Easy Campaign Planner[builds.dundef.com]

Tornado Valley Easy Campaign Planner[builds.dundef.com]

Tornado Highlands Easy Campaign Planner[builds.dundef.com]

Ramparts Easy Campaign Planner[builds.dundef.com]

Throne Room Easy Campaign Planner[builds.dundef.com]

Arcane Library Easy Campaign Planner[builds.dundef.com]

Royal Gardens Easy Campaign Planner[builds.dundef.com]

Promenade Easy Campaign Planner[builds.dundef.com]

Summit Easy Campaign Planner[builds.dundef.com]

Ancient Mines Insane HCR Survival Planner[builds.dundef.com]

Ancient Mines Nightmare HCR Survival Planner[builds.dundef.com]

F&F Survival HCR Planner[builds.dundef.com]

Alch Labs Massacre Campaign/Survival HCR Planner[builds.dundef.com]

Keep Survival HCR No Overdrive Rune Planner[builds.dundef.com]

Endless Spires HCR Survival Planner[builds.dundef.com]

Bazaar Survival HCR Without Overdrive Rune Planner[builds.dundef.com]

Bazaar Survival HCR With Overdrive Rune Planner[builds.dundef.com]

Royal Gardens Survival HCR Planner[builds.dundef.com]

F&F Survival HCR Lycan Difficulty[builds.dundef.com]

Alternate (kills stuck monsters) F&F survival HCR Lycan Difficulty[builds.dundef.com]

Untested F&F Survival HCR Lycan With Owls + Heat Cannons[builds.dundef.com]

Forsaken Temple Survival clear with 8k stats and Myth runes[builds.dundef.com]

Forsaken Temple Survival Clear with Harpoons/Blossoms (outdated)[builds.dundef.com]

Farming Keep HCR With Overdrive Rune[builds.dundef.com]

Magus Quarters Survival HCR Planner[builds.dundef.com]

Summit Massacre Campaign Planner[builds.dundef.com]
Resources
DDA Planner[builds.dundef.com]

DDA Wiki[wiki.dungeondefenders.com]

DDA Cheatsheet[docs.google.com]

Github for the Macro (PC only)[github.com]
Special thanks
A big shout out to Oswarlan for helping me fill in gaps as well as rephrasing portions of the guide.

Another big thanks to Placebo for helping me fact check gemstones in hard/insane difficulties, as well as maintaining both the wiki and cheatsheet.

Appreciation also goes to AFKonCore, Ailia, and Wurzle for creating and maintaining the macro on PC.

Last but not least, thanks to Phil for spearheading the last updates to this game.
Changelog
  • Published the guide on June 7th, 2023.
  • Added in stat priorities for DPS Huntress/Squire/Summoner, altered the stat priority for Endgame EV, and fixed some grammatical errors on June 10th, 2023.
  • Added a screenshot showing how to reset upgrades on an item in the Inventory section, and elaborated on the "Damage" stat on weapons and pets in the "Explaining Stats" section on June 11th, 2023.
  • Rephrased some parts of the guide on June 14th, 2023.
  • Added optimal fused armor set and tower stat distribution for Rogue in the DPS section on June 18th, 2023.
  • Removed the Lycan Cheese method as it no longer works. Also updated the progression path for Alchemical Labs, as well as providing a stronger build with lower stats required for clearing the Temple. Changes made on Jan 5th, 2024.
11 Comments
Anima 1 Mar @ 9:21am 
Great guide but the docs links no longer work
Radlad 26 Dec, 2024 @ 5:44pm 
Should I choose fused sets over non fused even tho the stats are way worse?
Ekimmak 2 Apr, 2024 @ 5:57pm 
((Also, player mana just doesn't refill at all? I got scratched once by a DEW, is it supposed to be a permanent no abilities?))
Ekimmak 2 Apr, 2024 @ 5:43pm 
Tried following along. It's gone well right up until Massacre F&F. Something about the east side keeps getting screwed over by Djinn desummoning the slow aura. And for some reason, I also lost the overclock aura along the top? I'd think that would ruin all the overclocks.
Ekimmak 1 Apr, 2024 @ 12:24am 
I do remember playing original Dungeon Defenders back in the day.
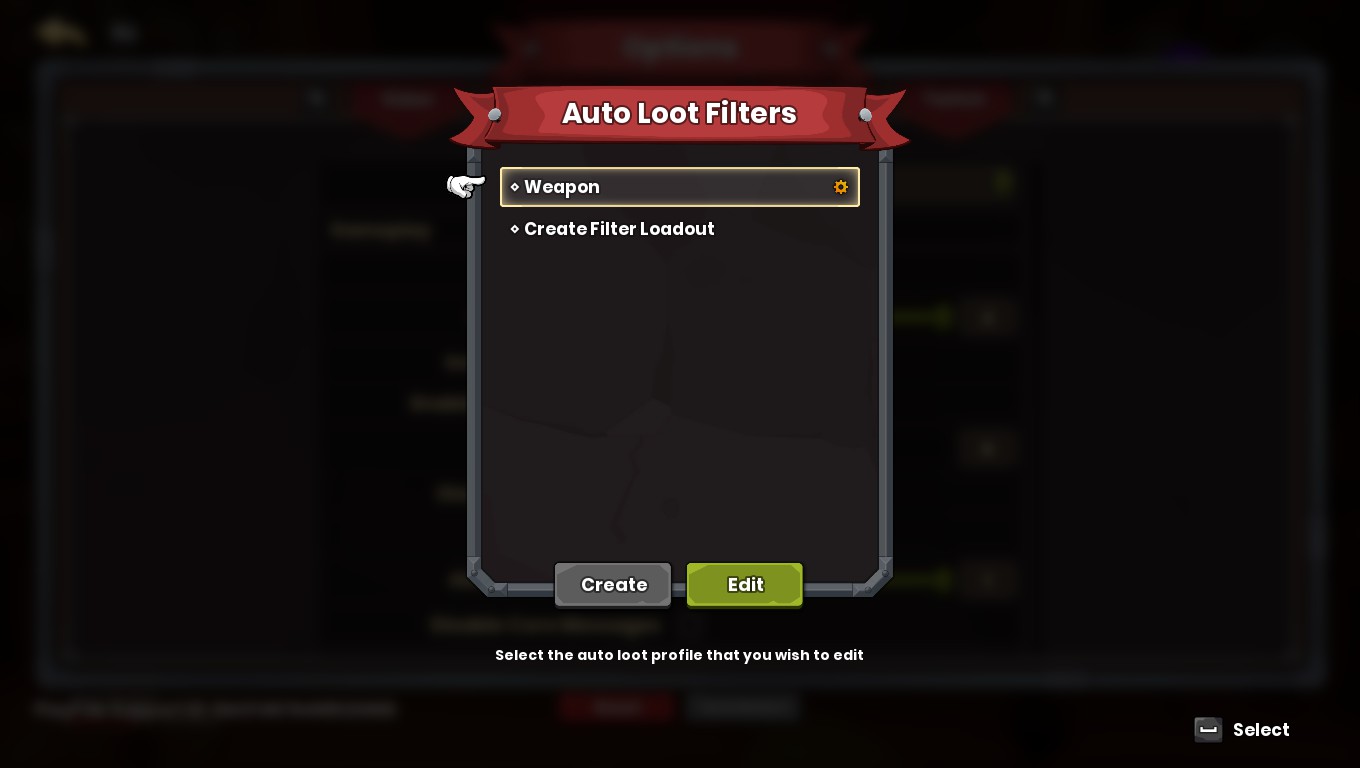
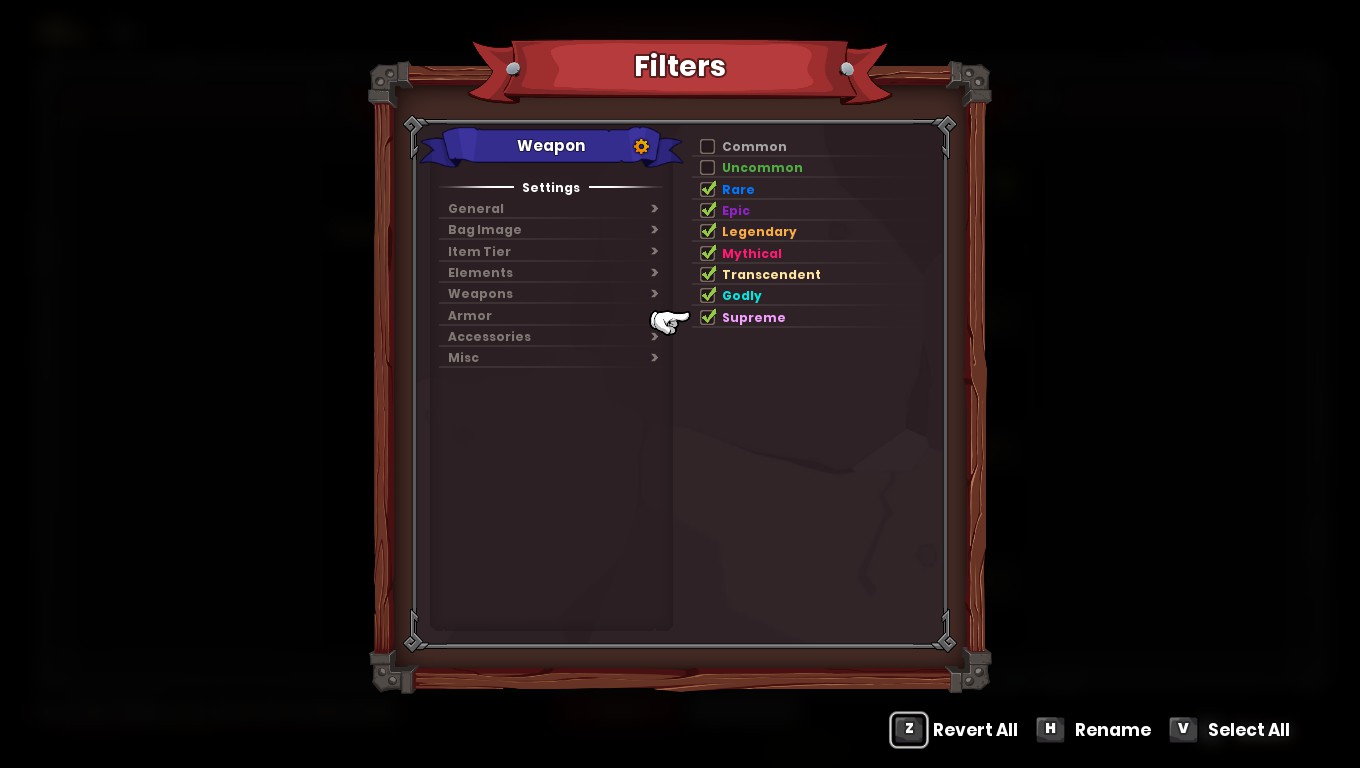
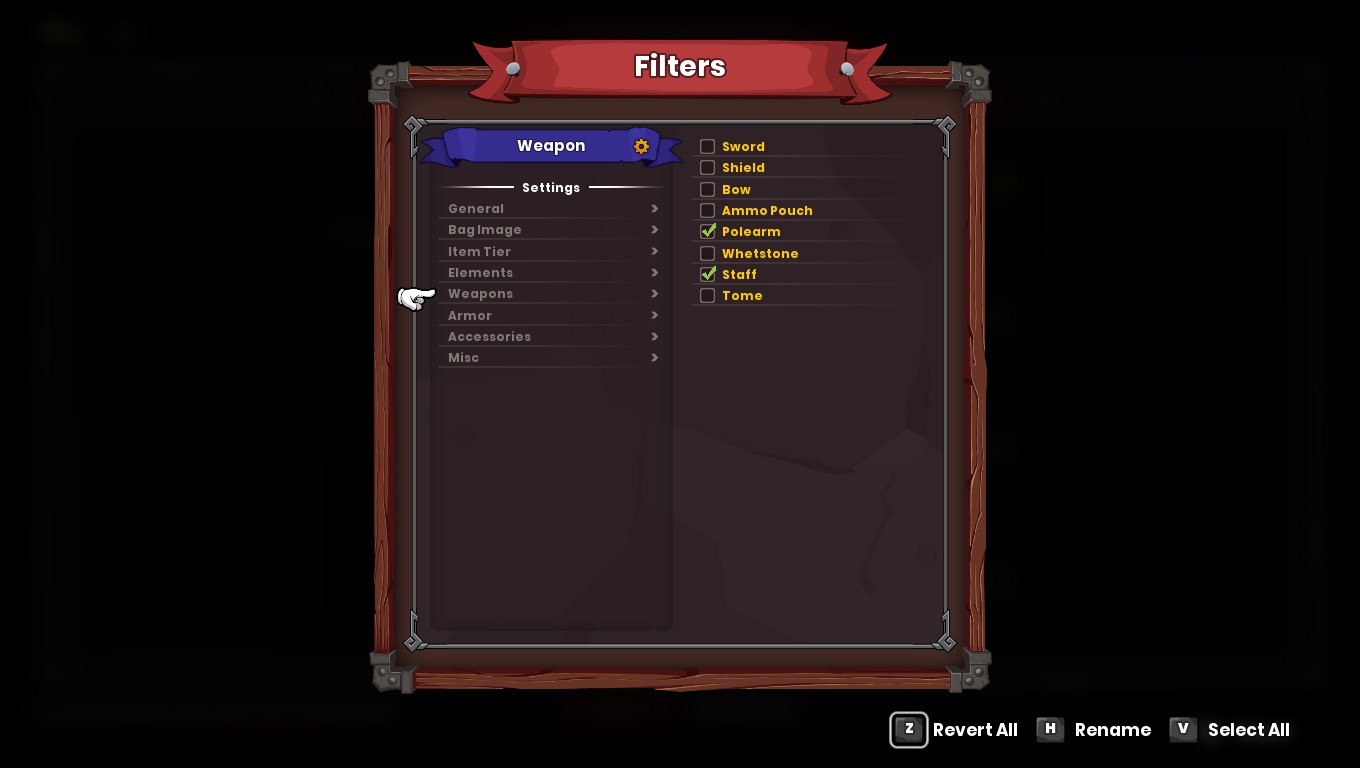
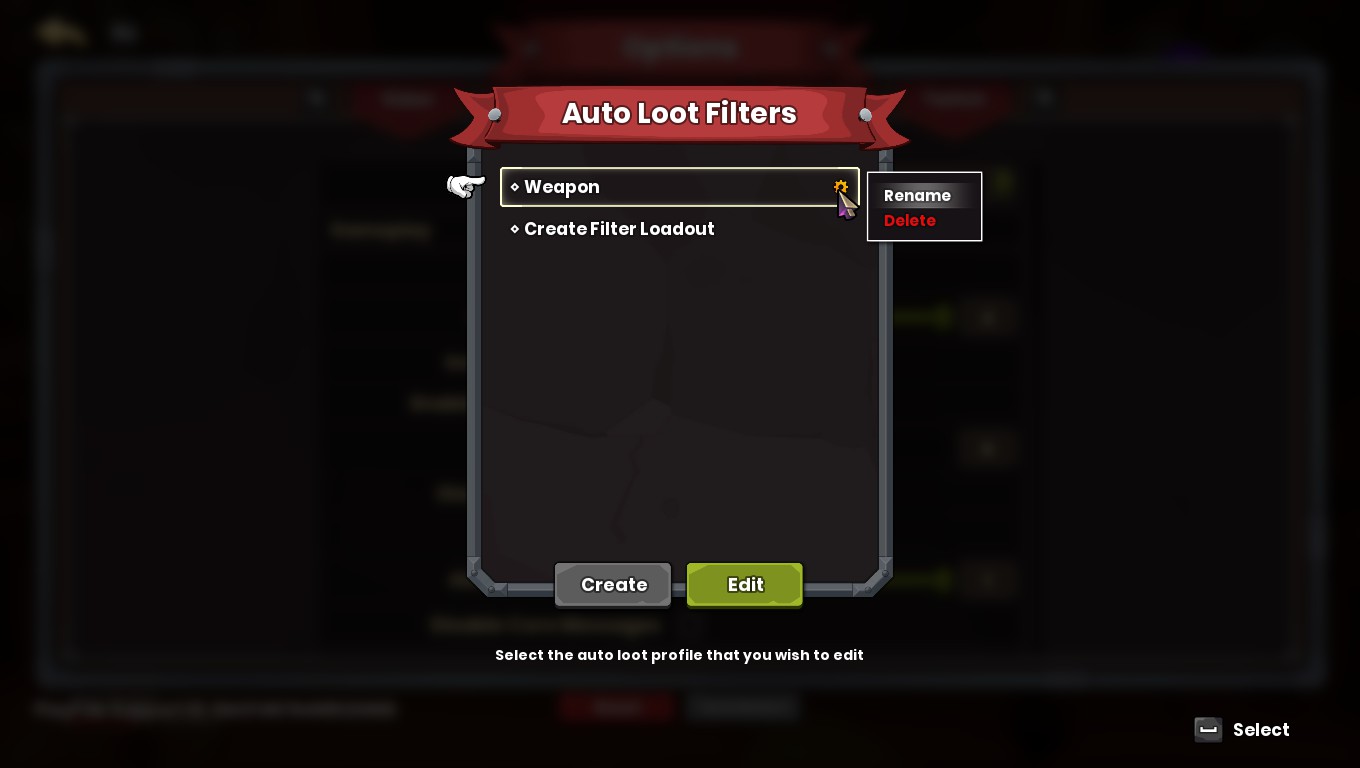
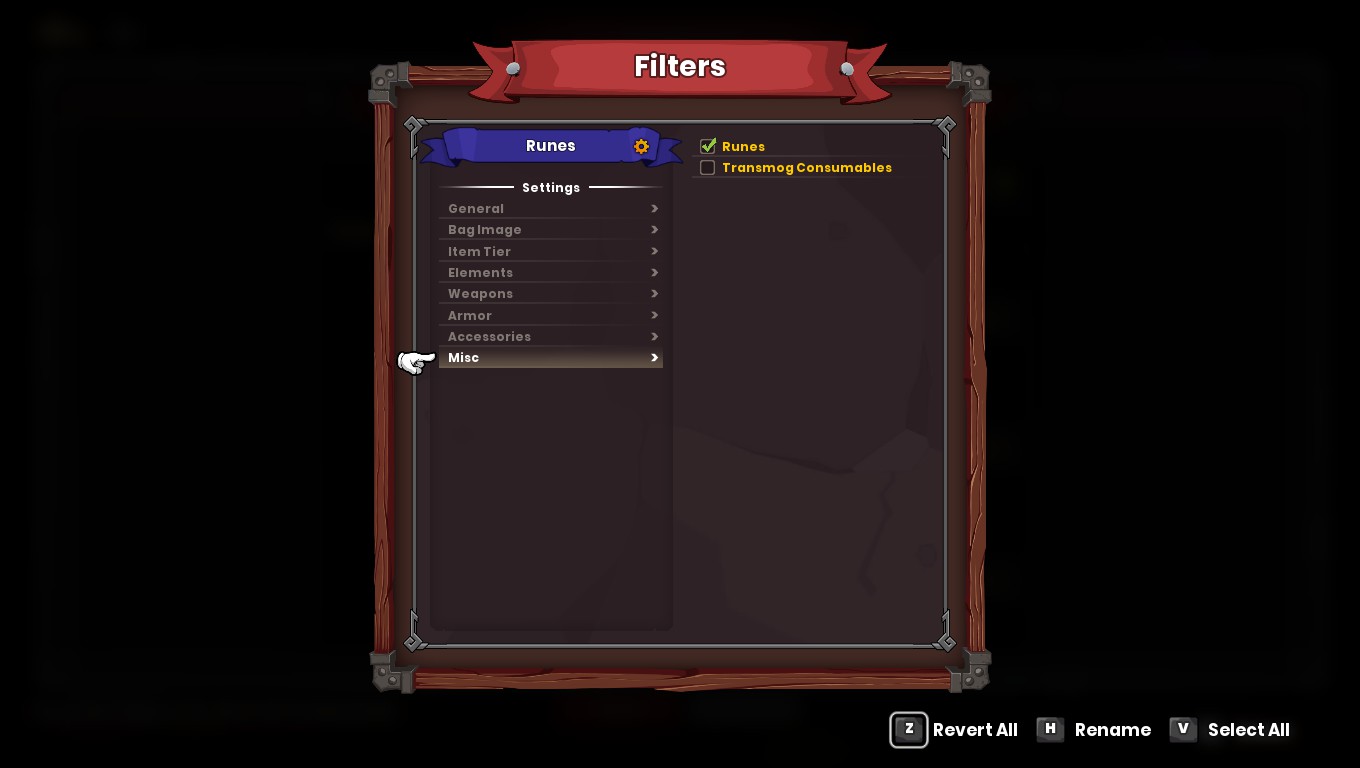
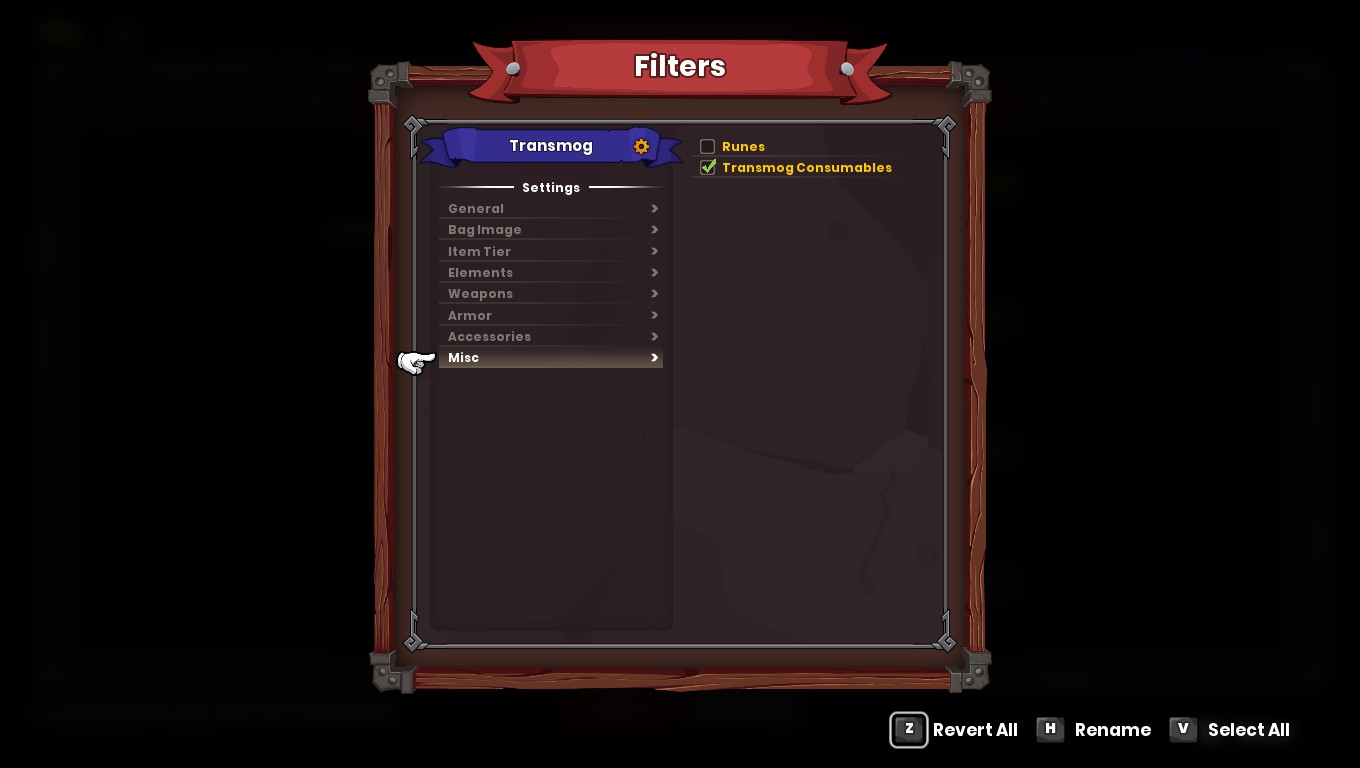
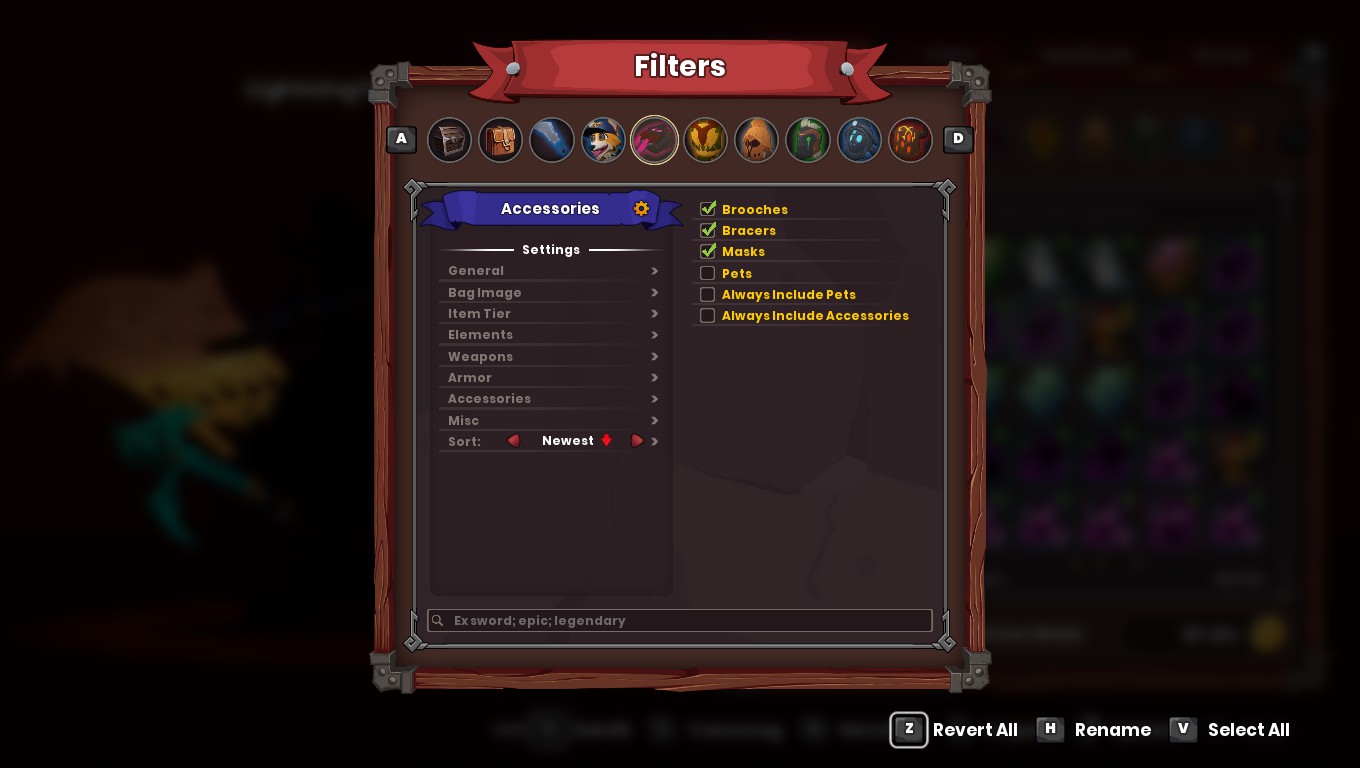
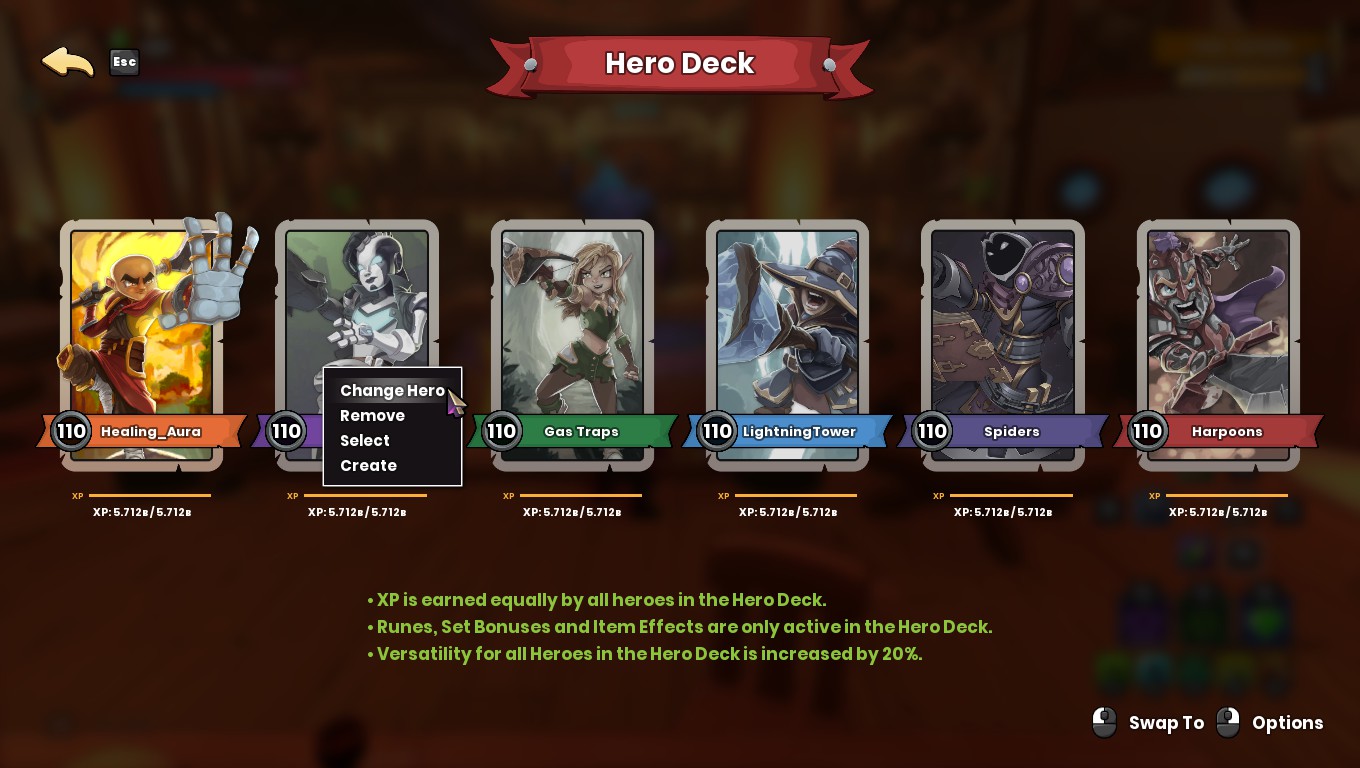
It's kind of overwhelming to see all this.
dudlajz1 29 Jan, 2024 @ 3:24am 
Hi, thank you so much for this guide, it helped me a lot to finish progression and I can start finishing the rest of the game now.

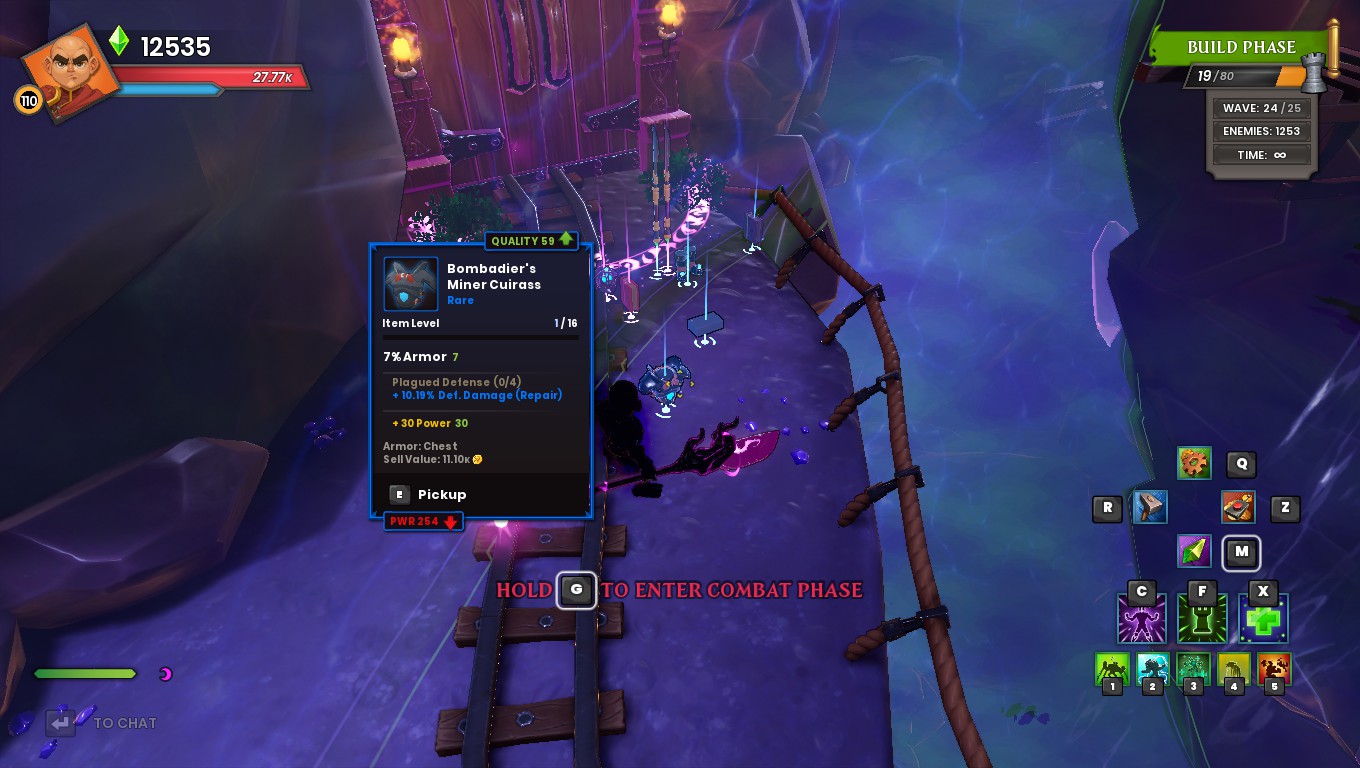
I also wanted to add that during The Forsaken Temple boss I recommend standing on the east side because Goblin Copters and Spiders won't be attacking you and you won't risk your defense being destroyed. Spiders will try to follow you but they won't attack (or at least they haven't). Otherwise good luck.
Toni 27 Jan, 2024 @ 12:08pm 
Standing in the strength drain may actually be what I'm missing, thank you. I resorted to finding somewhere that I could stand to "cheese" the AI and only have a couple of them actually find me, but it wasn't very optimal
.  [author] 27 Jan, 2024 @ 11:29am 
@Stu: I may add a pet section in the future, but at the moment I'm fairly busy.

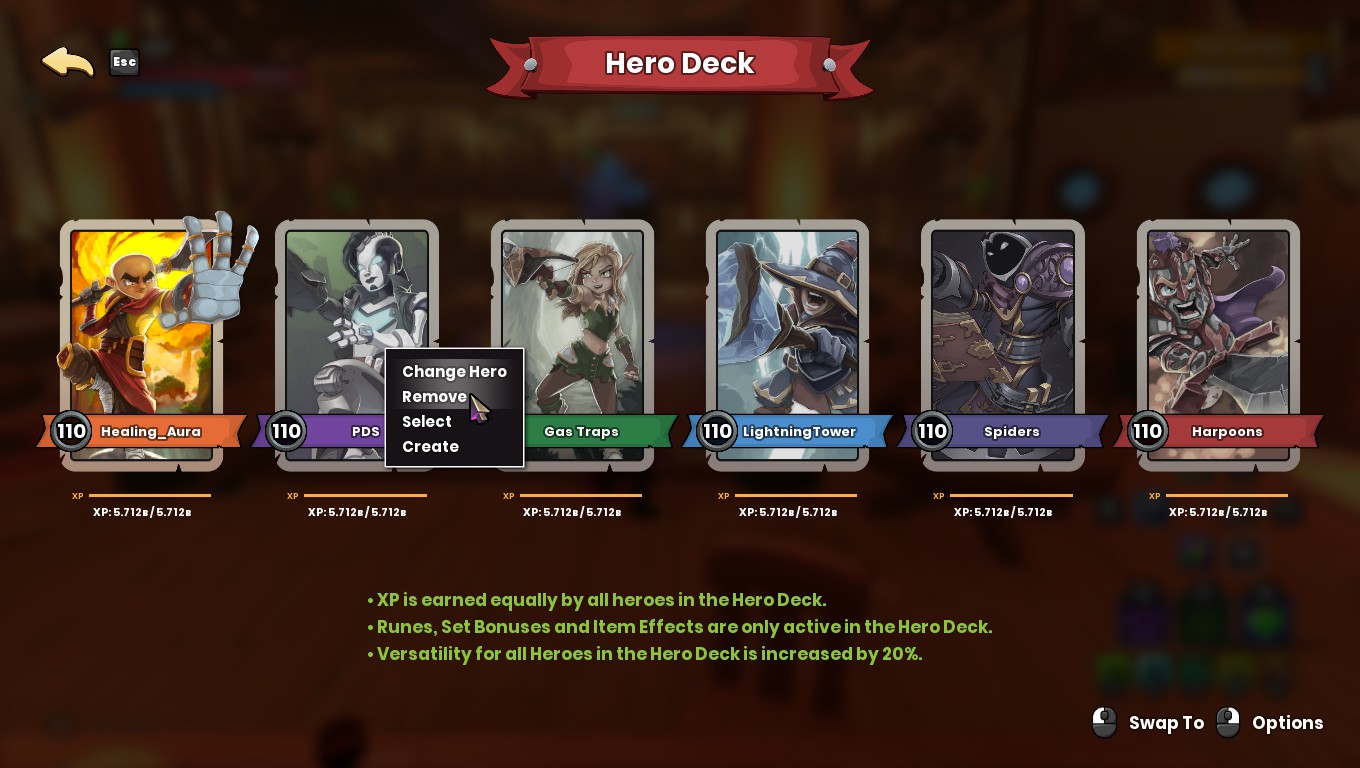
@Toni: I used strength drain auras and stood infront of my towers (can spam jumps in front of them so you take less hits). Make sure to upgrade the strength drain aura to get increased effectiveness of it. I also used a monk (using spiders as damage towers) to increase the damage of said towers. Rogue is just bad early game, I recommend against it personally. But if you can make it work, go for it.

And yeah I'd recommend you just use my builds if your build isn't working.
Toni 26 Jan, 2024 @ 4:39pm 
I really just went to this guide for the progression aspect, so I'm not following the same build and that might explain what is going wrong but I don't really see what it might be, so going to ask here:

For the early-game "Insane Ancient Mines Survival HCR", how do you deal with the dark elf assassins? Because none of my towers seem to want to target them, and I really can't figure out how to deal with them otherwise, my Rogue is being like 3-shot by them, and when there's 6 coming it's hard to deal with.
I just barely managed to get past wave 9 by standing on some of my towers and jumping to kill them without them hitting me, but it resulted in some of my towers and a buff beam getting destroyed, so that doesn't seem very viable for actually taking it all the way to wave 25 (and beyond).
It likely wouldn't be a problem on non-rifted, I'm guessing, but I'd really like to be able to beat the rifted version
Stu3 28 Sep, 2023 @ 12:28am 
Has almost everything, but can we get an update to include pets?