dotAGE
52 ratings
Detailed Strategy Guide for winning beyond normal difficulty
By Ryder17
A detailed beginner's guide on how to win with Matus beyond normal and up to middle challenge difficulty levels, by someone who has beaten 600%.
8
4
2
   
Award
Favorite
Favorited
Unfavorite
Introduction
(updated for April 9 2024, Live Patch 1.1.10m)

Greetings Elders of Dotage! I am a veteran strategy game player that has played countless strategy games and beaten most of them at their highest difficulties. While I have played strategy games from different genres, ranging from strategy RPGs like Xcom and the Trails series, to board games like Mageknight, to city builders like Civ5/Civ6, I gained a particular fondness for strategy rougelikes. I've spent several hundred hours playing Slay the Spire in order to beat A20 Heart on all four classes, and have played numerous other strategy roguelikes since.

I recently arrived at DotAge, after seeing it Steam a few weeks after its release. DotAge is, in my biased opinion, a fantastic game that I feel no regret dumping hundreds of hours into. As of this writing, I have over 300 hours of playtime recorded on Steam. I have beaten Shaman and Captain on Challenge 600% once each, and have beaten Matus on 600% a few times now, so I am confident that I'm qualified to write this guide. That being said, this is also my first guide, so I hope you can forgive any strange formatting or organizational choices.

While this is a beginners guide, I do recommend having at least a basic understanding of how the game plays. If you haven't already, I strongly recommend playing at least 1 half game(~140 turns or so) of DotAge before reading this guide, just to learn the basic gameplay mechanics that I will not be covering.

This guide will also be focused in purely winning(beating the Apocalypse) with Matus. Other challenges such as speedrunning and playing for a high score will not be considered, though this guide will help with those challenges. Additionally, the focus on this guide will be on the first Elder you unlock, Matus; while this guide will help you with the other elders, they each warrant a separate, smaller guide.

The main target of this guide are players who have beaten Normal, but struggle to win on any difficulty Higher than that. Players who haven't beaten Normal would also benefit from this guide, and players who have only beaten Harder or Lower Challenge levels might be able to pick up a few things as well. This guide doesn't really cover enough to teach players how to beat the upper challenge levels.

Finally, while this guide focuses on winning, make sure to, above all else, prioritize your enjoyment of the game. DotAge is, at its core, a video game. It is meant to be fun. If I recommend something, you've tried it a few times, and you think it makes the game experience worse, don't feel obligated to keep doing it. If you tried Harder and realized you'd rather just keep playing Relax, that's perfectly fine! Don't let anything in this guide stop you from enjoying the game the way you find most fun. This guide is meant to enable players who have the desire but not the knowledge to beat higher difficulties; not pressure or coerce people to play optimally or the "correct" way.
Glossary
A list of common game-specific slang and shorthand that are commonly used by myself and/or the community, and will have multiple appearances throughout the guide:

  • Protection: The official term that refers to the collective group of health/hope/cold/heat/nature, or the numerical points that you generate to pass events. I sometimes use the phrase domain defense, though hopefully I've been able to switch over to the official term for this guide. A protection building is a building that directly produces protection; for example Puddle, Altar, and Cloakcraft Workshop.
  • Power: The official term that refers to the collective group of sickness/fear/heat/cold/cataclysm, or the numerical points that domains generate. It is also known as "Threat" though for the purpose of this guide that term will be avoided. This is the opposite of protection.
  • Efficiency: generally when I talk about efficiency I am referring to pip efficiency unless stated otherwise. Pip efficiency is how much output a building gains per working pip. For example, a Wood Pile creates 2 wood per turn per pip, which is half as efficient as its upgrade Wood Stack which produces 4 wood per turn per pip.
  • Pipturn: A term that I used that means "per pip per turn."One pipturn is thus the equivalent of one turns worth of one pip's labor. Using the Wood Pile example, a Wood pile produces 2 wood per pipturn.
  • T1, T2, T3.... "T" in this context stands for "tier", so T2 would be "tier 2." This is the language that the community uses to describe the tech advancement of a building for a particular family of buildings of similar name/purpose. For example, T1 nature is Altar, T2 nature is Large Altar, T3 nature is Greater Altar. Keep in mind that this tiering is distinct, though similar, to the official research tier system, which is how the cost of a particular building blueprint is determined.
  • Event: Officially, the term "event" covers anything that happens to the map that isn't the result of direct player action. This includes but is not limited to mini events, choice events, omen events(the purple eye), unknown events(the red question marks), seasonal events, follow up unknown events, doom events, and reckonings. In this guide, when I say "event" I mean "threat generating events," so unknown events, seasonal events and doom events. If i mean something else I will make it clear.
  • "Pass an event": When I say "pass" an event, I mean obtaining a good event with 100% likelihood. "Failing" an event is obtaining a bad event.
  • Blueprint: The things that you unlock in the tech tree. Whenever you finish researching something, you are unlocking the blueprint for the building, foundation, or task.
The Big Picture
Much of this section will be obvious to some of you, but it is worth spelling out to those new to the genre, or even for players who haven't given this much thought.

Dotage is fundamentally a PvE strategy game. In order to win, you have to survive the challenges that the game throws at you: events. If you make it to the end without dying to the events you win. Part of what makes the game interesting is that the events escalate in difficulty within the game. In order to pass the later events, you have to grow your village strong enough to handle an event that is many times more difficult than an event that occurs near the start.

Thus leads to the question, how do you fundamentally strengthen your village? In order to pass events, you need to generate protection; one of hope, health, heat, cold, or nature. The more protection you can generate, the stronger your village is. That being said, in order to generate more protection, you need resources to feed your protection buildings, construction materials to build them to begin with, research to research the blueprints for the building, and most importantly, pips to work them. Broadly speaking, the strength of your village isn't just a measurement of how much protection you can produce, but more-so a measurement of how many resources your village can produce in total.

Producing more resources is theoretically very simple. The amount of resources you produce is just the product of the amount of working pips you have and the resources produced per worker. The more working pips you have, the more buildings are generating resources, the more resources you are producing. The more resources produced per worker, or the more efficient your buildings are, earns you more resources per individual worker, also increasing your resource production. We can put this in equation form:

Village Power = Number of Working Pips x Building Efficiency

Building efficiency is a function of tech-tree advancement and adjacency bonuses. The higher tech level your buildings are, the more efficient they will naturally be. Adjacency bonuses are individual to each building, and in most cases, should be maximized unless it is absolutely impossible to do so, or if the building's adjacency bonuses are minor relative to the original output of the building(there are very few buildings that fall in this category). It is worth it to demolish and reconstruct multiple buildings, or place buildings that will never be worked in order to maximize adjacency bonuses.

Working population is simultaneously a function of how many pips you have and how many buildings you have to work. The latter just requires constructing more buildings. The former means that that more pips you have, the stronger your village will be.

This entire section can be summed into:

Ways to make your village stronger:
-Having more pips, and buildings to utilize those pips
-Maximizing adjacency bonuses
-Researching, constructing, and using more advanced buildings

Performing all of these actions come at both a resource cost and a pipturn cost, both of which take away potential resources from your short-term protection generation. Success at this game is ultimately dictated by how well you can allocate your resources between growing your village and protecting yourself from events.
Pips: The How and Why of Having More Pips.
This section is by far the most important section in this guide. If you were to only pick one section in the whole guide to read, it should be this one.

As I stated in the previous section, one of the ways you can make your village stronger is by making more pips. Creating more pips is the simplest yet most effective way to scale up your village, up to a point.

Not having enough pips is probably the most common and one of the biggest mistakes you can make if you're trying to beat higher difficulties. I commonly see screenshots of people's villages with 25-30 pips by turn 100 something. With skilled play, it is usually both possible and optimal to have more than 50 Pips by turn 50 with Matus. Here's a screenshot of me doing exactly that with Matus on the hardest difficulty(Challenge 600%):

I'll start by explaining why its optimal to hit high pip numbers. Firstly, as the equation in the previous section implies, the amount of resources you can produce per turn is proportional to the amount of pips you have. All else being equal, a village with 40 pips will be able to produce double the resources a village with 20 pips can. By "resources" I quite literally mean every resource in the game; more pips means more pips gathering construction materials, producing research, generating protection, constructing buildings, and perhaps most importantly, more pips also mean more food. Having more pips means having more of everything. Pips are the source of everything you will ever need to win the game with.

Having more pips does mean you also need more food. Each pip costs 1 food per turn to feed, but even the worst sources of food in the game generate more than 1 food per pip per turn. Thus every extra pip you make can always at least feed itself, but also at least a few more pips. Until your 59th pip, there's no real downside to making more pips, since the extra food costs are easily offset by the extra labor you have that can be used to generate more food.

The extra resources a higher pip population can produce also snowballs into more resources in the future. More resources also means more houses and more research, and more houses mean more pips, creating a positive feedback loop of pip creation. More research means you advance through the tech tree faster. Advancing through the tech tree faster means having more advanced buildings faster, which also increases your production. Thus, having twice as many working pips not only doubles your current production, but will eventually increase your production exponentially as the extra labor can be used to either create more pips and thus more resources or more research which means more efficient buildings.

Speaking of research, it is better in the early game to focus on increasing your population than to focus on research. Every new unlocked blueprint at least indirectly increases the efficiency of only one type of building. In order to increase the strength of your whole village, you have to research enough blueprints to upgrade every building you're currently working. Alternatively, you can roughly double the strength of your village by doubling your population, and just doubling the amount of working buildings.

You start the game with 4 pips; it is much easier to make 4 more pips than it is to research multiple blueprints. Each pip at the beginning makes 1 research per turn. I'll spare you the math and just outright say that it takes four total pipturns to make one pippin. Would you rather have 4 research points, or would you rather increase your total workforce by 25%?

Furthermore having more pips can easily translate to more research, but the inverse isn't true. The amount of research points you can gain per turn is directly proportional to the amount of working research buildings you have. In order to have more working research buildings you need more pips and more buildings, which you can build more easily if you have more pips. Having more researched blueprints will help, but translates into population much more slowly and less efficiently than the other way around.

Now comes the question: how do you reach these pip populations? How is it possible I was able to have this many pips within the given time frame?

Making more pips is mostly a question of diligence and, at higher difficulties, the ability to min-max in order to scrape every free pipturn you can. For lower difficulties, the hardest part is just remembering to build cabins every turn and making a pip in those dwellings when they finish. My recommendation is, starting at turn 26(the turn after the first event finishes), to always be building at least 1 cabin, creating at least 1 cabin every 2 turns, and making a pippin in that cabin the moment it finishes/when empty space becomes available. This also requires that you have one additional pip working a woodpile at all times.

In addition, you want to be expanding your food production as well as workable buildings in general to feed and employ all of these upcoming workers. In the early game, where most of your population growth will be happening, you want to use vegetables or fruit trees as your primary food source(more on that later). You want around 1 tilled soil vegetable field per 3.5 pips in your village, though not all of them will be worked simultaneously. Fruit trees are more generous, but be careful of their seasonal nature; you don't want to be caught off guard by a season change that renders all your fruit trees useless without a backup food supply. In terms of deciding where these extra pips are working, it can be literally anything you want or need, though you generally want to prioritize protection if you need it, and food and construction resources(usually wood) if you don't. Any spare pips afterwards go into research. You eventually want to be producing at least 100 research per turn.

Make sure to periodically check that you can feed your growing population before making more pips. This is especially true before you unlock vegetables/fruit trees; if you run out of food on the map before you have a renewable food source you can easily lose your run to hunger and Sickness reckoning events. Additionally, make sure you actually have a use for extra pips. If you're struggling to find jobs for all your pips, then maybe hold back on your population growth for a bit and make more research buildings.

The above screenshot is actually a good example of spiking population poorly. Even though my pip count is relatively high, I have many idle workers that I cannot put to work due to lack of buildings, and there are more pippins waiting to grow up. Meanwhile, my accumulated sickness is partially the result of accumulated hunger due to food shortages. Accumulating a little bit of sickness is fine, but having 10 or more puts you at risk for reckoning events, which is a problem if you're not ready for it. Finally, because my research building is Thinker's Post and not Study, and due to my poorly planned building placements, I won't have room enough Thinker's Post to actually utilize my population.
Overpipulation and mid-late game Population
Once you hit 50 pips this number appears on the top right:


The number is a consequence of having more than 59 pips, and is called Overpipulation Factor. Here's a table that lists the overpipulation factor for each population number up to 100 pips:

Pips
Overpip. Factor
50-59
0
60-63
1
64-67
2
68-69
3
70-72
4
73-74
5
75-76
6
77-78
7
79-80
8
81-82
9
83
10
84-85
11
86
12
87-88
13
89
14
90
15
91-92
16
93
17
94
18
95
19
96-97
20
98
21
99
22
100
23

The way this overpip factor works is that whenever there's an event that is producing power of any domain except cold, the amount of power that is being generated per turn is increased by the overpipulation factor. For example, If my village has 95 pips in it, the overpipulation factor is 19, meaning that whenever there's an active domain/ongoing event, the amount of sickness, fear, heat, or cataclysm being generated per turn increases by 19. This applies to doom events and reckonings.

That sounds terrible at first, but in reality the penalty you have to compensate for at the early stages of overpipulation is peanuts compared to the extra value you gain from having an additional pip. On average, with end game buildings, each pip is producing an equivalent of 12-20 protection per turn. Even if you assume all 4 domains are simultaneously active, it takes a long time for the penalty increase to make it not worth creating more pips; even with ~150 pips, the overpip factor increases with a rate of less than 3 per pip. From a pip efficiency standpoint, it is technically correct to have a pip population well over 150, but in reality, for most players it's probably best if they hover around 90.

The most important downside of building more pips isn't directly gameplay related: it's the extra complexity and hassle of having to manage more workers. Having more workers means more possible actions per turn, less space to work with, and more buildings to micromanage. The increased inflow and outflow of resources also makes you more prone to getting bottle-necked on construction resources or starving due to lack of food. Going above 59 pips also causes overpipulation, which is another headache, since while it isn't particularly dangerous, it makes the arithmetic for events harder. For people used to only having 20-30 pips, managing a village with 90 pips is likely overwhelming. If you've only won with villages consisting of 20-30 pips, I recommend trying to win your next run with a pip population of 59(excluding any VIPS the game gives you), and once you get comfortable with that gradually increase it to around 90 or so.

This 90 pip number is noticeably lower than 150 number that I mentioned earlier. I outlined that there the effective population limit is much higher than 150, at least in terms of optimal pip efficiency, but beware of the extra complexity and extra micromanaging that comes with having a pip population that large. Even if its "worth it" to create more than 150 pips, there really is no need to. Even the hardest difficulty is comfortably beatable with only 90 pips. Anything more than that is just extra effort for tiny gains in win rate. You're welcome to do so if you enjoy playing that way, but for most players myself included managing hundreds of pip is probably too tedious to bother with.
Events, Explained
(Note: remember that in this guide, "event" means power producing events, namely unknown, seasonal, and doom events.)

Events are the main enemy that you face this game. This section will explain some important background information about events that the game doesn't tell you.

The game briefly explains that events grow stronger over time. The way this works is that each of the four domains, with heat and cold sharing a domain, all have a "threat level" ranging from 0 to 7. Each domain starts at threat level 0, and gradually increase as the game progresses via omens. You can see what the threat level is for each domain by counting the circles at the top of the domain interface:


In the above screenshot. Sickness, Fear, and Cold are all threat level 1, while Nature is at threat level 3.

Each difficulty and threat level corresponds to a specific amount of power generation per turn while the domain is active, or when a seasonal, unknown, doom, or reckoning event is ongoing. This power generation is the same for each domain. For example, an event with threat level 1 will always produce a specific amount of power per turn, but that amount increases with higher difficulties. Higher threat levels also produce more power per turn.You can see the power generation for the each threat level and earlier difficulty levels here:

For example:
At Normal difficulty, a fear domain with threat level 3 will produce 7 fear per turn.
At Harder difficulty, a sickness domain with threat level 1 will produce 2 sickness per turn
At Easy difficulty, a cataclysm domain with threat level 7 will produce 25 cataclysm per turn.

Being familiar with these values is important to ensure that you can always beat upcoming events, and that you don't waste any resources over-preparing.

Another mechanic the game doesn't explain is that every run, one domain is designated as the strongest, or the "primary" domain. You can always tell which domain is the primary domain because that is the domain that receives the first omen event at turn 15. This domain will usually be at least one threat level above every other domain, excluding the times when other domains have a doom event. During Apocalypse, this domain will be threat level 7 while the rest will be threat level 6(assuming the other domains didn't get a permanent threat level +1).

As a warning, the Heat/Cold domain is by far the strongest and most difficult primary domain. Compared to other primary domains, having your primary domain be Heat/Cold is like increasing your difficulty by at least 3 levels. If your first omen event is heat, I strongly recommend re-rolling your map.

How to Read and Utilize the Prophecy Page.

At the start of turn 11, and after every doom event, the game shows you this(assuming you don't have skip cutscenes disabled):

(the red boxes and black letters are my personal annotations)

This is the prophecy page. It shows you which omens, events, and doom events are coming up as well as the turn they start and end. I edited the screenshots with red boxes and black letters to explain what each part means:
  • A is a seasonal turn counter. The number is how many turns you are into the current season, and the color of the vertical bars indicates the season. Green, as shown in the screenshot is spring, yellow is summer, orange is autumn, and white is winter. Each number corresponds to four horizontal bars, one for each domain, so you can tell when each event is starting/ending.
  • B is an unknown event. Outside the prophecy page these appear as yellow question marks with red banners under their corresponding domain. The glyphs below the question mark inside the red circle indicate the turns that the event persists over. In the above example, the glyphs start appearing on the line corresponding to turn 21; that means the event will start at turn 21. You can tell what turn the event will end by attempting to find the center of the circle and find the corresponding turn counter, or just by adding 4 to the starting turn. (Normal events always last 5 turns, including the turn it starts)
  • C is an omen event. An omen event is the purple eye that appears below the corresponding domain. When an omen events, a minor downside triggers in your village, and the threat level of the corresponding domain is permanently increased by 1.
  • D is the type of domain, in this case sickness. Since this domain received the first omen, this domain will be the primary domain for this run. As more domains gain a threat level, their images will also start appearing at the top as well.
  • E is a seasonal event. Whenever the season changes, there is, with very few exceptions, a seasonal event corresponding to the new season. For spring/summer, the event is heat, and for autumn/winter, the event is cold. That means you have to tackle 5-8 turns of either a heat or cold event. Change in seasons can also increase/decrease the threat level of the heat/cold domain; summer and winter increase the threat level of the domain by 1, while spring and autumn flip the domain from cold to heat and heat to cold, respectively, while decreasing the threat level by 1. The one exception is that season change cannot reduce the threat level below 1.
  • F is a DOOM event. These events are the "bosses" of the game, and last 8 turns instead of the usual 5. In addition, doom events temporarily increase the threat level of the domain by 1 while the doom event is ongoing. Doom events also become deadly events, which kills your entire village, if the total power reaches 200 during the doom event.

This seems like alot, but after a few runs most of this should become second nature. You can check the prophecy page by clicking the button with the scroll directly to the left of the domain UI:
If you're playing on Mouse and Keyboard, there's also a hotkey for this button, which is by default "P", but I highly recommend rebinding it to "Q".

The omen, unknown, and doom events listed in a particular page of the prophecy are all events of those particular types you are going to face until the next doom event. That means that the moment you are shown a new page of the prophecy, you know which domains will have which events and on what turns for the next 30-50 turns. This is a very powerful tool that, when utilized well, lets you plan many turns in advance. In addition, if you check the prophecy page at regular intervals, you can often prevent yourself from forgetting an upcoming event, which is a really easy way to throw an otherwise winning game. Once you establish a strong engine capable of beating any event, the only way to lose the game is through carelessness. Checking the prophecy page regularly and making sure you're ready for the upcoming events is how you secure your victory after a strong start.
Events 2: Basic Strategies.
Now that you know how events work, it's time to put that knowledge to use. This section will explain the basics of how to optimally beat events, as well as provide the groundwork for the nitty-gritty process of planning how you're going to beat every event you see on the prophecy page.

Always aim for guaranteed, 100% chance of obtaining a good event

It is always, when possible, better to guarantee that you pass the event with a good event rather than risking a bad event in order to penny-pinch resources. A bad event can range from benign to disastrous, to literally game losing if its a deadly event, and there's no point in saving a few resources if it will take many times more resources to recover from a bad event.

There's a very important formula that determines exactly how much protection you need to obtain a good event with 100% likelihood:

Amount of protection Needed = Total Power + (3* Power Generated Per Turn @ Normal Difficulty)

Total Power is the total accumulated power the turn that the event is being resolved.

As an example of the above formula, lets take a level 1 normal event at harder. A normal event always lasts 5 turns. At harder, a level 1 event produces 2 power per turn, lets say sickness. Five turns of producing 2 sickness per turn = 10 total sickness. At normal, a level 1 threat produces 1 threat per turn. With these values we can plug them into the formula:

Total Power = 10
Power Generated Per turn @ Normal Difficulty = 1
Amount of Protection Needed = 10 + (3 * 1) = 13

So to pass a level 1 sickness event with guaranteed success you need 13 health.

Keep in mind that total power can vary if you have other sources besides the event. Status ailments, production malus, and overpipulation are the most common examples of this.

Let's take the same example, but say 5 turns before the event starts a pip named Bob became sick. Sick pips generate 1 sickness per turn. At the start of the event, I already have 5 sickness because of Bob. In addition, during the event Bob is producing an extra 1 sickness per turn. The new total power is instead equal to 5(the sickness I had before the event started) + 5 turns of producing 3 sickness per turn(15 sickness) = 20.

Total Power = 20
Power Generated Per turn at Normal Difficulty = 1
Amount of Protection Needed = 20 + (3 * 1) = 23

Because Bob got sick, I have to produce an extra 10 health in order to guarantee passing the event.

Make sure you can exceed the power generation for (almost) any event

As I said earlier, using the table of power generation combined with the prophecy page lets you know exactly how much protection you need to guarantee pass an event.

Some of you might then ask the question: why not just calculate the exact amount needed and produce some or all of it beforehand?

You could do that, and for the first few events this can be optimal thing to do. There is a pretty specific game mechanic that prevents you from doing this for the entire game: follow up events.

Follow up events are events that can occur immediately after an event either passes or fails. They are pretty rare- you usually only get a handful of them every complete game. Follow up events immediately start producing power the turn after you pass the initial event, and they last 4 turns. Sometimes you get 2 follow up events in a row and the 2nd lasts the same amount of turns. If you're over-reliant on pre-production to pass events, these follow up events will punish you since they don't give you any time to pre-produce.

That isn't to say pre-production should be avoided entirely. If you're slow on building the necessary protection buildings, pre-production can cover you while you're catching up. For the first 50 turns, follow-up events are so rare you can take the risk. Pre-production is also used for a variety of other specific reasons that are beyond the scope of this guide, but you will likely encounter if you play long enough.

In general though, you want to make sure you can always outproduce the power generation from events, by a large enough margin that you can beat any follow up event. One simple-ish way of knowing how much production you need is calculating the total protection with the above formula for a 4 turn event, then divide the total protection by 4, rounding up. I'll use a threat level 3 follow up event at Harder as an example:

Power production per turn at Harder Threat Level 3: 14
Total protection needed for a follow-up event = 14 power per turn * 4 turns + (7 power per turn @ normal * 3) = 77
Production needed to beat the follow up event = 77/4 = 19.25, rounded up = 20 protection per turn

So for a level 3 unknown event you want to be able to produce at least 20 protection per turn to beat any potential follow-up event. Notice how this number guarantees that you can also beat the original event; the amount of production you need to beat a potential follow-up event is always higher than the production you need to beat the original unknown event if you start producing the turn the event starts. This is the simplest and most secure way to pass events.

If you're unwilling to do the arithmetic(because who likes doing math while playing video games) you can just take the power production of the event and multiply it by 1.5 to be safe. Keep in mind that this 1.5x multiplier actually goes down the higher the difficulty level.

Start producing protection the turn the event starts

If you follow the previous two guidelines, then it is best to start producing protection the turn the event starts. Producing too early is excessive and inefficient. As a general rule earlier turns are more valuable than later turns. If you can choose between spending 6 pipturns producing protection on turn 35 or on turn 40, you would choose turn 40 almost every time. Those 6 pipturns could be used to create a whole extra pip, which if done 5 turns earlier would give you 5 more pipturns for your whole run. Of course, if you start producing protection too late, then you run the risk of failing the event, or you're forced to inefficiently build more buildings to create the necessary protection in the given time span.

Don't Overproduce Protection

When an event resolves, all of the accumulated protection and power gets wiped and both numbers reset to zero. Consequently, any protection that you generated for an event does not "carry over" to future events. This means that if you have more than enough protection to guarantee an event pass any extra protection is going to go to waste.

The one caveat to this is that the level of the positive event that you receive increases with higher accumulated protection when the event resolves. The more protection you accumulate, regardless of how much power accumulated or the threat level of the domain, the higher the good event level, and in theory, the more benefits you gain. In practice, good events are mostly meaningless, and you pass events not to get good events but to avoid the bad ones. You should never overproduce protection for the purposes of getting higher level good events; the resources are best used for your village.

Make a plan for every event.

The prophecy page tells you every event that is going to happen within the next 30-50 turns. There is nothing stopping you from strategizing, the turn you unlock the new prophecy page, how you plan on beating every single upcoming event in that new page. Doing so allows you to determine how much time and resources you need to allocate to beating each event, giving you the most leftover resources possible while still securely beating events. Additionally, making a plan that checks all the boxes will prevent you from forgetting a critical detail that might otherwise cause you to fail an event. The next few sections in this guide will focus on how to formulate plans that are guaranteed to efficiently pass events.
Events 3: How to Plan
Overview

On turn 11 and after every doom event, you are shown the next prophecy page. For every event you see in this prophecy page, you should have a detailed plan to guarantee that you will pass it. This plan should answer the following questions:

  • Which specific building blueprint am I using as my source of protection?
  • How much protection/How many copies of that building do I need?
  • What are my missing tech prerequisites for that building?
  • How/where will I place the building(s)?
  • When do I need to start preparing for an event?
  • How will I gather the necessary resources to build and work the building(s)?

The following sections will go over these questions in more detail. I will be using this prophecy page for Harder difficulty as an example, (cut-off at the top is a nature doom event)
This is an example of a page 1 prophecy page, taken on turn 11. Before the first omen event, all domains are at threat level 0. The first event is of the nature domain, and it starts on turn 21, resolves on turn 25, and because of the omen event at turn 15 will be threat level 1. The second event is a seasonal heat event, and because of the seasonal change will be threat level 1. Finally, at the very end, there is a level 2 nature doom event starting on turn 42. This doom event is level 2 because it takes the previous level and adds 1.

Which protection buildings should I consider using?

This is the most important of the questions that you need to answer, as it shapes how you answer the rest of the questions.

You generally want to use 1 specific building producing protection, with multiple copies of that building if necessary. The main exceptions for this is lack of seasonal resources, Park/Gardens, or emergencies.

The quick and lazy way to decide which building to use is to follow this table I made:


This table tells you which tier of each category of protection building you should use for events of a given threat level. Each cell has either a number or a range of numbers corresponding to the tier(s) that I recommend using for the given threat level. For example, if you have a level 2 sickness event coming up, this table recommends you to use the T2 health building, which would be either Healer's Hut or Mender's Hut.

Remember that the "tier" of a building is its order in the line of buildings that produce the same resource. The easiest way to find out what tier a building is in is to look at its placement in the tech tree and count how many "ancestors" that building has, and add 1. The Altar is the earliest building that can produce nature and thus has zero ancestors so its the T1 nature building. Large Altar has one ancestor, the Altar, so its T2, and so forth. There can be multiple buildings of the same tier for a given resource.

Anyway, the table is a good starting point that will probably give you the optimal building in the majority of cases. The exceptions to that are beyond this guide, so for now just follow the table as best you can and continue to the next questions.

For the example prophecy I posted in the previous section, there is 1 unknown event, 1 seasonal event, and 1 doom events need to pass. The first event is a nature event, and will have threat level 1. This threat level 1 comes from the omen that comes 10 turns before it, giving it the +1 where it was previously threat level 0. The second event is a heat event, and will have a threat level 1 from the season change. The doom event will be threat level 2. Using the table above, these are the buildings I would use for each event:

Level 1 Nature: T1 Nature, Altar
Level 1 Heat: T1 Heat, e.g. Puddle
Level 2 Nature: T2 Nature, Large Altar.

Here are the Agepedia entries for each of the above buildings:
How much protection/How many copies of that building do I need?

This is technically 2 questions, but they're very closely interrelated so I grouped them into one.

The amount of protection you need is based off the power production of the event. The power production can be figured out easily using the table I put in Events Pt 1, and your goal should be to exceed that number with your protection production, as I outlined in the previous section.

Using the above example, I have two level 1 events and one level 2 event. At harder, a level 1 event produces 2 power per turn, and a level 2 event produces 6 power per turn. Let's also pretend that both level 1 events can have a follow up event. The total protection production I need is equal to:

Total protection to beat a potential follow-up = 2 power per turn * 4 turns + (1 power per turn @ normal * 3) = 11 protection
Protection Production per turn = 11/4 = 3.75 rounded up = 4 Protection Per turn .

So to securely pass the two level 1 events, I want to be able to produce 4 of their respective protection per turn(Nature for the first, Cold for the 2nd).Of course, the chance of a follow-up event this early in the game is rare, but at lower difficulties there isn't much of a difference between the protection production needed for an unknown event and a follow-up event of the same threat level so you might as well over-prepare a little bit.

Doom events cannot have follow-up events. Therefore I can estimate the production I need by finding the total production and dividing it by 8 turns:

Total protection to pass the doom event = 6 power per turn * 8 turns + (3 power per turn @ normal * 3) = 57 Protection
Protection Production per turn = 57/8 = 7.125 protection per turn.

Unlike preparing for potential follow up events, this 7.125 number is less rigid since I'm allowed to pre-produce, and because of how long it lasts, its easier to get away with being "late" to the event. If I'm slow to finish constructing my protection buildings in time, I need more than 7.125 protection per turn. If I finished construction early, I can pre-produce and reduce the protection production I need. This also applies to normal events, but to a much smaller extent due to their shorter duration and the potential for follow up events.

Now that I know how much protection production I need, I now need to find out how much production each protection building gives me. Looking at the agepedia entries for both the Altar and the Puddle, when their adjacency bonus is fulfilled they produce 2 nature or 2 cold per turn respectively. The above calculations told me that I need 4 protection per turn for both level 1 events. Therefore, for the first nature event I need 2 Altars to securely pass the event and for the seasonal heat event I need 2 Puddles.

Finally, for the nature doom event I need about 7.125 nature production per turn. A Large Altar provides 4 nature per turn. 7.125 divided by 4 (rounded up) is 2 Large Altars.

In Summary:
  • Unknown Nature Event: 2 Altars
  • Seasonal Heat Event: 2 Puddles
  • Doom Nature Event: 2 Large Altars
Events 4: How to Plan(cont.)
What are the tech prerequisites for your building?

There are four factors you have to consider to fully answer this question:
  • Construction Costs, Terrain Requirements
  • Profession Requirements
  • Input Resources
  • Adjacency Bonuses and Requirements

You basically need to fulfill all four of these factors in order to properly utilize the building. Often, you need to unlock an additional blueprints in order to gain access the resources necessary to fulfill these factors. For example, if your building needs stone, you need to unlock a building that gives you stone. The details for each of these factors is available at the building's Agepedia entry. Let's go through each factor one by one for the Altar, Puddle, and Large Altar.

Construction Costs and Terrain Requirements: These are the resources and terrain required to construct the building to begin with. You can see both at the top and top right corner of a building's Agepedia entry, respectively. Construction costs is obvious, but you need to be careful about the terrain requirements. Most buildings past the first few tiers requires some sort of special paving; one of Clearing, Stone paving, or Brick paving. You need be able to place the paving to build any building that requires them. Keep in mind that each paving counts for every paving before it; Brick paving will work for a building that needs a Stone or Clearing paving. In rare cases some buildings require special terrain; one of water, mountain, forest or arable soil.

All 3 of Altar, Puddle and Large Altar only require wood as its construction cost. The Altar and Puddle can be built on any empty tile, but the Large Altar requires a Clearing paving.

Profession Requirements: Most buildings can only be worked by a specific profession. All professions fit into one class category(Commoner vs Bourgeois) and one tool category(None, Simple, Advanced and Resource). Here's a table that showcases an example of all of them:


Professions need the required tool in order to be trained. You can tell what type of tool a specific profession needs by looking at their icon. Professions that need simple tools will have their icon holding a tool. You can see the 2 icons on the "simple" column holding a scythe and a mallet, respectively. Professions that need advanced tools are the same, but the tool is colored blue. Professions that are holding a resource require the resource they are holding to be trained(in the above table, paper and book).

Some professions are bourgeois professions, which means only bourgeois pips can train for that profession. These professions have a blue icon rather than the brown icon for commoner professions.

Both bourgeois and each tool type is an additional tech prerequisite for buildings that need them. When you're planning to use a certain building, make sure you have access to the right tools, resources, and possible bourgeois to use them.

All 3 buildings only require a commoner pip without a tool, so for this example profession is irrelevant.

Input Resources: These are the resources consumed each turn the building is active. This is fairly self explanatory, but keep in mind that they potentially add additional tech prerequisite(s) if you don't have a way to obtain the necessary resources. You also have to make sure you have or can produce enough of the input resources to keep the building running for as long as you need them to. Running out of input resources mid-event is an easy way to fail the event and throw your game.

The Puddle has only 1 input resource: water. This means that I need a water-producing building before I can use my Puddle, which will be either Well or Mountain Spring.

Both Altar and Large Altar have 3 main recipes for 3 different input resources: raw meat, raw fish, and vegetable. I'll just say point blank that the meat and fish options aren't worth bothering with 99% of the time. I need vegetables, but vegetables also require water and seeds. Matus starts with the forager, which can give me seeds(you can also demolish berry bushes for seeds), but I need to research water production in order to get vegetables. Ideally I also get tilled soil as well, since tilled soil makes my vegetables much more efficient.

Adjacency Bonuses and Requirements Also self explanatory. Many of the pre-requisites here will be automatically fulfilled by the other factors for tech prerequisites; it is rare that an adjacency requirement becomes an additional tech prerequisite. In general you want to max out any adjacency bonuses for almost every building that you build. In a pinch you can temporarily skip an adjacency bonus if you need the resources/protection NOW.

The Puddle has an adjacency bonus when next to a water-producer, which I need anyway since water is an input resource.

For Altar and Large Altar, the only adjacency bonus is the +1 for being next to a forest. This doesn't require any additional blueprints to unlock, and thus does not factor into my tech prerequisites(but will be important later on).

Considering all factors for tech-prereqs, Puddle needs wood+water, and both Altar and Large Altar require wood, water, and vegetables. Large Altar also requires the clearing paving blueprint. None of the buildings need any professions.

How/where will I place the building(s)?

The most difficult part of this question is figuring out a layout that allows you maximize the adjacency bonuses of every protection building with minimal space used. For lower difficulties you have more than enough space to work with, so I'm not going to dive into this too much. Just max your adjacency bonuses, and try to plan your layouts ahead of time so you don't accidentally overlap them. Just remember to consider any special terrain requirements for your buildings, and don't be afraid to place buildings that will never be worked to fulfill another building's adjacency bonuses.

When do I need to start preparing for an event?

By "preparing" I mean how early do you need to start gathering resources and researching the necessary tech prerequisites for your protection building.

At higher difficulties, when the timing is important this question is answered by calculating backwards from the event start. You figure out how many turns you have until the event starts, then calculate how many turns it'll take to construct/upgrade the building(s), and train professions if necessary. Subtract the latter from the former and that's how many turns you have to research all the blueprints you need, then allocate enough research to meet that time frame.

Of course, this is a beginner's guide and not a high challenge one. For the confident players reading this guide I do recommend trying the above out at least once. Keep in mind that attempting this can be disastrous if you mess up, and it is quite easy to make a mistake due to how many opportunities there are for miscalculations For most people playing below high challenge I strongly recommend just being lazy and to try researching everything early, then start constructing/upgrading your buildings well before you actually need them, up to 10 turns in advance. If you followed my advice on pip population as well as follow my upcoming early game build order, you shouldn't have to worry about precise timing at all.
Events 5: How to Plan(cont. 2)
How will I gather the necessary resources to build and work the building(s)

The final and most complex question. This question is related to the tech-prerequisite question and comes in 2 parts: one for construction costs and one for input resource costs.

Construction costs are fairly simple, you need to be able to build the building to use it. You need to have enough of them to build the necessary copies of your protection building, but no more. For input resources, you either have enough to last the whole 5 turns of the event, or you produce more of the input resources than you're consuming, or somewhere between those two options.

In many cases, this question is often solved automatically or very easily if you either have the necessary resources in your storage already or if you have all the buildings that produce the required resources. In those cases its just a number's game to make sure you have enough.

If you don't have the necessary buildings you should already know which ones from the tech prerequisite question. Then this question ironically sometimes has you answering the previous five questions again, but for resource buildings rather than protection buildings.

Let's return to your example with Altars and Puddles. Like I said earlier, Altars require wood, water and vegetables. Starting with wood, you start the game with the Wood Pile building, so you can just use that. You need 8 wood to build 2 Altars, which can be met by simply working 1 Wood Pile for four turns. The wood pile does not have any tech prerequisites. The wood pile doesn't have any adjacency bonuses, but does need to be placed next to a forest. I need the 8 wood the turn I need to start constructing both Altars which has to be turn 19 at at the latest if I want to have both altars ready at the start of the first event*. This would mean, if I'm only using 1 Wood Pile and I have wood in my storage I need to start making wood by turn 15. The Wood Pile has a construction cost of 1 wood.

Notice how, in that last paragraph, I answered the previous five questions, but substituting "protection" for "wood", and specifying the building as Wood Pile:

  • Which specific building blueprint am I using as my source of protection wood?(Wood Pile)
  • How much protection wood/How many copies of that building the Wood Pile do I need?(8 wood, 1 Wood Pile)
  • What are my missing tech prerequisites for that buildingthe Wood Pile?(none)
  • How/where will I place the building(s)Wood Pile?(next to forest)
  • When do I need to start preparing for an event?(turn 15)
  • How will I gather the necessary resources to build and work the building(s) Wood Pile?

Using the wood construction cost as my example is a bit silly, but it also illustrates the relative simplicity of answering these questions. Many of you reading this are already doing this at least partially; the questions I presented are just an organized, written-out version of what you're probably already doing. By writing it all out, I am hopefully making it more systematic while also filling in any holes that your current planning may have.

I could go through the whole process for water and vegetables, and in-game I probably would, but for the sake of concision I won't in this guide. The process is similar for those 2 resources, albeit vegetables has the weird exception that is has a very large delay between blueprint unlock and construction completion.

Unlike answering the same set of questions for a protection building, for a resource building there is no simple table that tells you which resource building to use. Thus answering the first question often requires answering the second question beforehand. If you feel like the amount of resources you need would require too much labor with the current tech, then you may feel obligated to upgrade your resource building. Its up to you to decide for each individual case if the cost of doing so is worth it.

Final Words on Events

I dedicated five whole sections to events, so its easy to get to this point and be overwhelmed. Keep in mind that in practice applying what you learned in these sections is significantly less tedious than how it seems based on this guide. As I said earlier, you probably are already doing at least some of it, you just need to make it more systematic in order to not miss anything important. Once you play enough games and become more familiar with all the buildings, most of this will be automatic and unconscious. There will also be cases where you can skip the detailed planning, but that also takes some experience to gain a sense for. If you properly maxed out your pip population, you're probably so ahead of the curve after turn 120 that you can skip many of the steps in the planning process.

Here's a Handy Checklist for the planning process:


You also shouldn't expect to have every plan for every event memorized to the last detail. I can't possibly memorize the exact details of how many of which resources I need by what turn for every event in a given prophecy page. I only really have the basic stuff memorized, namely which blueprints(including tech pre-reqs) I need, and when I need them, then I fill in the rest once I start actually placing buildings in my village. I periodically check the prophecy page every 5 turns or so to remind myself of everything I need to do.

I acknowledge that this event planning process can be complicated and tedious. I don't expect anyone reading this to be able to apply it to their games perfectly the first try, unless they already knew how to. It's easy to forget a tech pre-req, miscalculate how protection you need, or not realize you don't have a certain resource you thought you did. I lost dozens of runs due to those type of mistakes. This really is mandatory if you intend to climb the difficulties; the alternative is failing events randomly due to carelessness. Hopefully what I was able to do was provide a framework you work off of so you at least have an idea of how to properly beat events, even if you can't execute on that knowledge perfectly.

* For nature events in particular, it often happens that because vegetables take 5 turns to grow you won't be able to use Altars on turn 21. It's ok for nature events in particular to be "late" for the event; just make sure you have enough Altars to compensate for the loss in time.
Buildings Introduction
Not all buildings are created equal. There are different buildings that serve similar purposes but have different levels of strength, and utilizing the stronger buildings will make your games easier. For now it isn’t too important to understand what makes a building strong or weak, but here's a quick overview of the most important reasons:
  • Pip efficiency: probably the single biggest factor. Generally when I refer to efficiency I'm referring to pip-efficiency. If one building or set of buildings produces 4 food per pipturn and another building/set of buildings produces only 3, all else being equal the buildings that produce 4 are stronger. Pip efficiency can get very math-heavy to determine,
  • Spatial efficiency: only really important in higher difficulties, but buildings with complicated or cumbersome adjacency requirements, or produce very little for the tile that they occupy, are often not worth fitting into your village if you need the space for more important things.
  • Tech prerequisites: Pretty simple, the more research it costs to be able to build a building the worst it is compared to other options.
  • Construction Costs and Construction Time: The cheaper it is, both resource wise and timewise to build a building the stronger it is.

Here's a quick reference for full memories(Spoiler Warning):

Any building not listed here is "fine". Keep in mind that this isn't really a comprehensive list, mostly because I excluded buildings that were mandatory, e.g. fan or solace buffet)


In the upcoming sections I’ll discuss the different options you have for producing Food, Research, Health, Hope, Heat/Cold, Nature and everything else, and explain the ones I believe are stronger/weaker.

Keep in mind that the next 7 sections are VERY spoiler heavy. If you haven't unlocked every memory yet, and you care about spoilers, I would advise against reading the upcoming sections.

For spoiler sensitive readers those without many memories, here's a zero memory version of the upcoming sections:
  • Food: Tilled Soil -> Tomatoes(any vegetable) with Tilled Soil -> Vegetable Cauldron + Meatball Kitchen-> Large Kitchen(You only need a few eggs per turn). For winter, use the egg recipe for the Cauldron. Hunting and White Meat should be avoided until you need meatballs. Bread should also be avoided until you need to cure rebellious.
  • Research: Thinker's Post/Study Line -> Scriptorium -> School. Keep in mind that Schools require a large amount of empty space to optimally place.
  • Health: Every available option is decent. Doc House is better than Healer's Cottage, but Healer's Cottage is a decent intermediary. Make sure to stock up on Medicinal Herbs with the Herb Collector
  • Hope: Every available option is decent.
  • Heat/Cold: Most options are at least decent. Hearth is better for Heat than Public Baths, and for a long time Pool is better than Public Baths(But Huge Fan is worse).
  • Nature: There's only 1 option available at any point. For Altars the the vegetable recipe is always the best. For Shrines and Temples, copper bars are better than iron
  • Other: Sawmill/Stone extractor suck. (Wood) Workshop is usually better than Smith for simple tools.
Food
There are ALOT of ways to generate food in this game, but you only need one source of food(two once you obtain bourgeoise). Consequently most methods for food production are quite useless .

In the early game, Vegetables and Fruit Trees, both with Tilled soil, are king. You use these as your source of food all the way until you reach cauldrons. By “Vegetables” I’m mostly referring to carrots, tomatoes, and turnips. Pumpkins are also quite strong, though they don’t come in until fall. Onions are usable, but I usually avoid them.

Fruit trees tend to be more efficient than vegetables, but are seasonal so they can’t be relied on most of the time. Orange Trees are best; Pear Trees are also quite good but are worse than Pumpkins in most cases. Plum trees are generally worse than Orange Trees, but are still worth using unless forest adjacency is really valuable. Chestnut Trees are worse than both Pear trees and Pumpkins, but are still better than generic vegetables. The best way to use Chestnut Trees is to repeatedly demolish and replant them on the same tiles over and over. At higher difficulties, the Apple Tree blueprint is functionally useless year 1, though at lower difficulties it's probably possible to extract some value out of them. Regardless, if you do intend to climb the challenge levels, I would recommend not bothering with planting Apple Trees in year 1.

In the early game, any other source of food that is not one of the above is not worth using. That includes: Hunting, Chickens and Eggs, Fishing, and Butchering Animals for white meat. All of these suffer from the main issue that they’re less efficient than vegetables, and most also have higher tech requirements or suffer from limited scale.

Eventually you want to transition to Cauldrons with the red meat recipe as your main source of simple food for the rest of the game. For Cauldrons you need copper bars, so you need Copper Mine+Furnace before making them. Initially you want to use the vegetable recipe, but you want to research either Big Game Hunter and Butcher’s Table, usually both to gain red meat. As Matus you have the luxury of having an evergreen source of fruit(the Forager) so you can actually feed pigs in winter, though generally it's better to stockpile enough barley to feed your cows/sheep throughout the winter as you butcher them.

At higher difficulties this cauldron transition needs to happen before the first winter, lest you starve. If you’re reading this and you’re unsure if you’re able to stockpile enough barley and establish red meat cauldrons fast enough, butchering small animals and using campfires or barbecues is a reasonable backup option. Keep in mind that rabbits need to be fed with vegetables, so unless you have onions or a large stockpile, your rabbit pens will be useless in winter. Even better is if you stockpile large amounts of white meat beforehand(remember to disable raw meat consumption) and cook them during the winter.

For bourgeoisie, your best source of complex food is stew or cooked red meat with either a Kitchen or Large Kitchen. Your other options are soft bread, cheese, or meatballs, but they’re simply less efficient than Kitchens with stew, though they’re reasonably competitive until you obtain a Slaughterhouse and Large Kitchen. Once you obtain those 2 buildings, stew and cooked red meat blow the other options out of the water.

A note on chickens and eggs: There is a steam guide written by the omnibirb that humorously insists that eggs are the solution to world hunger. I did look at the guide, but I had unfortunately already wasted spent 2 hours of my life trying a bunch of different layouts on a spreadsheet and calculating their pip efficiency(I’ll post what I tried at the end for the curious). I came to the conclusion that the upfront cost and sheer amount of space needed to gain any reasonable amount of efficiency wasn’t worth it, and even in ideal scenarios they lose out to other food sources, either vegetables in the early game or red meat cauldrons in the late game.
Research
Research is your secondary scaling resource, alongside your population. You need to meet a minimum research advancement threshold to beat events efficiently, and being ahead in research allows you to beat events very efficiently. I call it secondary to population, because, to a point, a pip will provide more value per unit cost than research. Furthermore, research is primarily driven by pips. You can easily convert a large population into high research generation, but converting the other way is significantly more difficult.

At high challenge the path to research is really straightforward, especially with Matus. You get T2 research early(2nd unlocked tech at the latest), deal with your first event, and make your way towards T3. Once you finish your first doom event, ideally with a pip population of at least 40, you simultaneously beeline Scriptoriums while expanding your population. You then plop down ~16 Scriptoriums for 112 research per turn, and sometime during winter or 2nd spring you have 3 or more Libraries running, and that's what you use until the end of the game.

Obviously this is not a high challenge guide, and trying the above is going to fail spectacularly if you don't have the other fundamentals down pat, especially a high population count. That being said, there are some takeaways that every player can take advantage of. Firstly, every research building is useful except School. School's clunky adjacency bonus, its position on the tech tree, and its inability to make its layouts modular make it the weakest research building. That being said it is not a useless building(even though I did put it in the "useless" tier, because I personally never use it). It is still significantly more efficient than Scriptorium while have significantly less prerequisites than Library. Eventually though, you want to wean yourself off of Schools in favor of Libraries. Skipping Schools entirely and beelining Libraries and its prerequisite techs(of which there are alot) will feel much nicer than having to plan out the positions of at least 8 schools, while saving you significant amounts of space and construction materials.

Secondly, you should not skip T3 research, at least in most of your games. There is a significant time gap between when you can easily acquire T3 research and when you can place Scriptoriums. Researching and upgrading your research buildings to T3 is usually worth it in the long run. Speaking of Scriptoriums, they should be a huge spike in research when obtained. The T3 buildings have only slightly less efficiency, but have spatial restrictions that prevent you from constructing large quantities of them. Once you obtain Scripts, there should be nothing stopping you from building as many research buildings as you want.

Finally, you want to make sure you're producing a high amount of research. Ideally, you want to aim for having at least 100 research per turn after you unlock Scriptoriums, more if you obtain Schools and at least 200 research per turn once you have Libraries(equivalent of 3 Libraries). Producing this much research will require large amounts of space; Scriptoriums and its input buildings(paper, wood) should take up more space than any other production line in your village, as well as employing the most pips. You should plan beforehand where you'll place all of your research buildings, usually around the start of the game. That being said, you do not want to overextend your population by overcommitting into research. Research is a slow investment; it takes quite awhile for research to pay itself back in terms of efficiency. It makes little sense to risk failing an event or stunt your population growth by committing too many pips to research. Remember that Pips is the stronger method of scaling, when in doubt you should focus on making more pips rather than increasing research production. You should only pivot to research once you're close to hitting your population cap, of if you NEED a certain building blueprint in a specific time frame for your event plans.

In general, research buildings should be one of the first buildings you unlock in each research tier, if not the first building. Unlocking higher tier research buildings first is usually optimal since research should be your largest employer of pips. Of course, if you planned out your events such that you need to unlock a certain protection building first, then prioritize that and its tech prerequisites instead. Aside from research and protection, you want to prioritize blueprints that provide access to new resources, or provide significant efficiency boosts for the resources that you devoted more pips to producing. There is almost no point of unlocking a higher tier building for a resource you only had one pip working on. You should also take the information from the other building sections into consideration; you don't want to waste your precious research on a weak or useless building.
Health
Health buildings start out straightforward, but after T2(either Healer’s Hut or Mender’s Hut) there's some divergent paths.

In the early game you get one of: Remedy Rug, Solace Buffet, or Refreshments. They upgrade to either Healer’s Hut or Mender's Hut. Afterwards, you have some choices. You can upgrade your hut to the respective Cottage, you can take the path on the left side, or you can skip the Cottage and go straight for Apothecary/Druggist into Doc House.

In most of my games, I skip the cottage and go straight to doc house, while ignoring the left side. Generally, I only get Cottage if I have Sickness primary. If I need more health generation, I just build more Healer Huts or Mender Huts, unless my research progression is too fast for my village, then I splurge on Healer Cottage or Mender’s Cottage.

Keep in mind that Doc House requires a bourgeois class, and obtaining medicine, which is what fuels the Doc House, requires the Herbalist class which requires advanced tools. Don’t rely on Doc House if you need more health but haven’t already transitioned into bourgeois.

After Doc House you have the Hospital. The Hospital is a bait; it’s actually less pip efficient and space efficient than Doc House unless you have a +1 production boon, and even then the tiny efficiency increase does not justify the spatial needs. You do need to research the tech eventually to deal with the contagious ailment, but you only need to build one Hospital while ignoring its adjacency bonuses to handle the ailment.

Sickness is one of the three domains, alongside Fear and Cataclysm, that has a university. All three universities are basically useless, and are not worth researching. Not a single university is pip efficient when compared to other endgame protection buildings. Theoretically it has some purpose as a way to dump idle scholars that you might need for curing the terrified ailment, but I just let my scholars be idle as the construction costs and research costs for universities are too high for its relatively niche purpose.

The most important thing to consider with this domain as a whole is the medicinal herb resource. Excluding the T1 buildings(and Homeopath’s Booth, but that building sucks), every health generating building requires medicinal herbs, which are seasonal. During the season(s) where you can gather medicinal herbs, try to stockpile enough to last the year. If you can't, using infusions, bandages, of hemp are serviceable, but come with significant efficiency costs and won't work at higher sickness threat levels.
Hope
You start with Meeting Point and Seaside Bench as your two possible T1 hope generators. For T2 you have Shared Table and Peace Tent, but neither of them upgrade from the T1 buildings. Shared Table is really straightforward, but Peace Tent requires leather as a construction cost. If you need T2 hope generation but you’re stuck with Peace Tent, you must be able to obtain leather, which requires either Skinning Rack or Butcher’s Table if you have Rabbit Pen, both of which subsequently require simple tools. In the case that your first doom event Fear and your T2 hope generator is Peace Tent, your early game is likely going to be more difficult than you might have otherwise experienced since you need to unlock more blueprints in the research tree than what you’re probably used to. For those curious about the Shaman Elder, this is very similar to how Shaman always plays its early game.

Your T3 buildings are either Performer’s Stall or Wrestling Arena. I believe you can tell which one you have at the start of the game since the Wrestling Arena upgrades into Wrestling Ring, while Performer’s Stall does not have an upgrade, so there will be 3 arrows coming out of the tech slot for Wrestling Arena versus 2 arrows for the Performer’s Stall.

In any case Performer’s Stall is pretty good, but Wrestling Arena and Wrestling Ring are absolutely useless. In most cases the Wrestling Arena requires ludicrous amounts of space only to be less pip efficient than any other protection building in its research tier. The Wrestling Ring is better, but basically has the same problem. Fortunately, if you have wrestling unlocked you also have the beauty buildings unlocked, namely Park and Garden.

Park and Garden are fantastic buildings that should be built every run. Park has similar pip efficiency as other T3 buildings(the building itself has the research cost of a T2 building but the rose requirement effectively makes it a research-tier 3 building) without any adjacency bonuses or requirements, making it very flexible and very easy to use. You can slap a Park in a random tile on the corner of the map and it’ll compete in efficiency with other protection buildings of the same tier. Garden, despite how cheap it is research wise, is actually only slightly less pip efficient than some of the end-game protection buildings. With enough space and water makers you can reasonably use Garden to produce enough nature and hope for the apocalypse(though there are usually better alternatives).

The most distinctive trait about the beauty buildings is the way they generate both hope and nature. This is both an upside and a downside. The upside is that Parks consolidate both hope generation and nature generation. Instead of researching T3 hope and T3 nature and all their tech prerequisites you can instead research Rose Field and Park and use that until you need something more powerful. Often, that something more powerful is the garden which doesn’t even require bourgeois. The downside is that the efficiency of the building is effectively split between two domains. What often happens is that between Cataclysm and Fear one domain is stronger than the other. Building enough Parks to handle one domain is often overkill for the other, so you’re wasting part of the output of the building, reducing its actual efficiency.

Parks and gardens will be discussed further in the nature section(which is where they really shine).

Moving on, after T3 you have 2 additional diverging paths. The left path leads to Theater, and the right to Festival into either Pub or Brothel.

Theater is a reasonable intermediate being T3 hope and Brothel/Pub. I don’t know how its pip efficiency compares to other buildings of the same tier, but it isn’t terrible, its adjacency bonuses are really easy to meet and it has good spatial efficiency. I tech into Theater when I need a stronger hope generator quickly and I don’t have enough time to access Pub/Brothel

Usually though, Theater is skipped and I go straight to Pub/Brothel. Festival is basically ignored until the rebellious ailment becomes a problem, though unlike hospital I build 2/3 since rebellious is more common and generally affects large numbers of pips at once. Pub\Brothels are both beasts of endgame protection buildings, and they should be used as your final hope generators.
Heat/Cold
This domain has buildings consisting of 2 different tech lines, each corresponding to either hot or cold.

The early buildings for both heat and cold are straightforward enough that there isn’t really must do discuss. The only thing worth mentioning is that if your first doom is heat, it's worthwhile to, if possible, hit the T2 cold before the season change so you can use the more efficient building that you’re going to need immediately after anyway. You don’t need T3 cold production until Spring 2 at the earliest.

To me the only early-ish question that I run into is whether to stay on T2 heat production for the first winter or move to T3. I have successfully used both strategies, even at 600%, though frankly I’m not sure which is better. By the time you hit winter 1 you should have enough pips to brute force T2 heat as your solution to a winter cold doom. This probably wouldn’t work if with a heat/cold primary domain. Moving to T3 requires advanced tools, which is comfortably possible but can be a bit tight if you’re inexperienced. T3 also requires a pretty specific building layout, but it isn’t difficult to fit assuming you planned ahead.

The important building related info is mostly late game heat and cold production. Public Baths is pretty bad; I strongly recommend ignoring this building entirely. For endgame cold production you should use Ice House. Ice House is probably the strongest endgame protection building in the game assuming you have either Wells or Squeezer. Even an Ice house with only one adjacent water maker is a reasonable building, and is better than T3 cold production or Public Baths. In any water scenario, the efficiency of this building shoots up the roof if you have any snow tiles. If your first winter gave you any snow, you should save the snow until you research Ice Cutter. Once you do, you can proceed to utilize that ice to power an Ice House for your 2nd summer, often allowing you to skip T3 cold entirely.

For endgame Heat you can use either Hearth or Cloakcraft Workshop. Hearth is slightly more efficient, or much more efficient if you have a +1 production boon, but has significantly higher research requirements(though you should be able to hit those requirements fairly easily by the second winter). Hearth is technically more spatially efficient, but oh boy is that adjacency bonus a pain.

There's also Cellar, Insulated Cellar and Hot Pools. Hot Pools should be ignored entirely. The 1 heat is too insignificant for second fall and second winter, making it not worth the space it occupies. The tech cost is too high to bother getting it for the first winter, and don't get me started on the potential issues with competing for water adjacency. Cellar is also a pretty weak building, but it isn't terrible. The timing is much better than hot pools since you can hit them comfortably before the first spring, and it gives you storage space. Usually though, if I need the storage space I just get warehouses. Insulated Cellar however is an amazing late game building. I skip the Cellar entirely to save construction costs, and use the Insulated Cellar as my main source of storage for late game, while also having it help me with cold production for the second summer and apocalypse.
Nature
The first two nature buildings are locked in stone, and are unavoidable. Just be mindful of the tech prerequisites for the T1 building; compared to other domains hitting the prerequisite techs for Altar is much more difficult.

The T3 nature building, Greater Altar, is quite weak, so it is better to use Park whenever the hope doesn’t go to waste(and sometimes even still then). Once you obtain advanced tools you can start supplementing your Parks with Greater Altars, or ideally, go straight to Garden if you have Wells. Unlike Parks, Gardens have pretty strict adjacency requirements, so you should plan out your placements well beforehand if you rolled into Wells. Best case scenario, one of your Garden setups should combine with your Library setup.

There are 3 types of T4/T5 nature buildings, Forest/Mountain/Water Shrines and Temples. Each type is tied to one terrain. Given their intensify bonus, the best way to maximize their outputs is to clump as many of them together into squares and rectangles. There are 2 main limitations to this strategy. First, is that the roads from signs do not penetrate forests, water, an mountain tiles. Shrines and Temples must be placed on the terrain type corresponding to their name, not on normal land. Even if you place your sign right next to the a bunch of forest, any forest tile surrounded by forests on all four sides will not be a buildable tile. Consequently, the most optimal way to place shrines/temples is in columns 2 tiles thick. This is pretty easy if you have forest shrine/temples, but can be difficult if you have the mountain/water versions if you don't have artificial lake/artificial mountain, respectively. For those situations, you still want to clump them together, usually in lines or L shapes, but unless your map gave you really fortunate terrain you will have to settle for a 1 tile thick column instead of 2.

Now all of your temples and shrines are adjacent to at least 2 other temples and shrines. However, there are the edges of your columns that exist where there's an intensify bonus but nothing to intensify. This is where Parks and Gardens come in. Parks and Gardens are your two best options as intensify nature receivers. Parks are the easier to work with, you literally just line the edges of your temples/shrines with parks. Gardens require an extra layer of space one each side, but if you have the space for it,(and if you have Wells) they are well worth it.

Here are some examples of the optimal way to setup your shrines:


For the Forest Shrines on the left, you'll notice that I clumped 6 Shrines in a 3x2 rectangle. This is the "core" of late game nature setups, the 2 tile thick rectangle of Shrines/Temples, which in this case is 3 tiles long. Surrounding the Shrine rectangle are Parks(bottom) and Gardens(top). Notice that because of the water-producer adjacency requirement, the Gardens require an extra row of wells, but they're more efficient, even though their beauty adjacency bonus isn't maxed out. For the purposes of presentation I utilized both Parks and Gardens, but feel free to pick one or the other, or mix them in ways that best suit your terrain or preferences.

For Water Shrine and especially Mountain Shrines, is can be difficult to be able to create this 2 tile thick rectangle. You usually have to compromise by building a 1 thick line instead of a rectangle, or maybe some strange shape to maximize the amount of Shrines/Temples adjacent to other Shrine/Temples. The right picture is a good example of this; I built a bunch of Shrines on the edges of this lake, and lined the coast with Parks. Notice that the top left Shrine is not being worked, since it is only adjacent to one other building. Eventually, I would want to cut the forest on the top left and the rocks on the bottom to be able to access the whole perimeter of the lake.

Regardless of which higher tier nature building you get, more than any other protection building the layouts for the nature buildings will require the most terraforming. Once you discover which of Forest/Mountain/Water your tech tree contains, try to plan out its placement ahead of time, and be ready to cut down ALOT of trees/rocks to be able to fit it.

Finally, remember that Parks and Gardens require arable soil; if you place any type of paving on a tile you will forever be unable to place a Park/Garden on that tile. Once you know where you're placing your layout, try to avoid placing pavings on the spots for Park/Garden. If this fails, then a Greater Altar is your next best option.
All Other Buildings.
After food, research and protection the other buildings, there are only a handful of other building types left to go over.

Wood and Stone
The only reason I'm including this section is to warn you that Sawmill and Stone Extractor are both terrible buildings that should generally be avoided.

Metal and Tools
There are two type of tools, simple and advanced. Workshops are a significant upgrade over the Workbenches, but comes at a significant research cost. For simple tools the (wood) Workshop is actually comparable to the non-iron Toolsmith in efficiency, usually slightly better, so if you have the (wood) Workshop its best to keep using them even after you unlock Toolsmith.

For advanced tools Iron Toolsmith beats out the Toolsmith quite handily, but you are rarely in need of enough tools to warrant Iron Toolsmith being a high priority.

For metals, just use the mines. Metal Extractor is basically never worth it, even if you have no copper veins.

Storage
This is a bit of a strange one, but warehouse is a cheap building if you need storage for whatever reason. The most important use case is stockpiling medicinal herbs, but depending on circumstances its easily possible you need to store large quantities of something fairly early.

Large Warehouse is generally not worth bothering with. It's more spatially efficient, but it's better to save the research points for something else and build more normal warehouses if you need it.

Cellar isn't a bad building, but it gets overshadowed by Insulated Cellar. Because the construction costs use different materials, its generally better to build Insulated Cellar while skipping the normal Cellar.

Basically, use Warehouse if you need storage space early on, and Insulated Cellar if you need it late game. Generally, I build at least a few warehouses and few dozen or so insulated cellars every run.

Fabric
The efficiency for fabric is as follows(from best to worst):

Rabbit > Sheep > Big Game Hunter > Cows > Clothmaker

The Fabric building that comes out of whatever large animal you have is always more efficient than the Clothmaker. If you have Cows, using Big Game Hunter for leather is a more efficient source of leather than the Tannery, but of course you're going to be limited in how many wild large animals you have. If you have Sheep+Rabbits, Rabbits will be better than Sheep in terms of pure efficiency, but don't fall into the trap of maintaining 12 rabbits at once. You will never need 12 wool per turn. Even having 2 pens of 6 Rabbits for Wool is more Fabric efficient than 1 Sheep. The main caveat to Rabbits is that they need Sheep in order to access the Loom; if you rolled Cows you're guaranteed Tannery, and then the wool from Rabbits is functionally useless.

Terraforming
Some Terraforming options are more useful than others. The most important and powerful one is Cut Forest; this special action, once unlocked can provide so much extra space to work with while also providing a modest amount of wood. Cut Rocks is less useful, but isn't bad to pick up late game.

Remove Ashes and Remove Snow are both borderline useless. I maybe saw ashes once in my entire 250 hour playtime, and now I just ignore the remove ashes terrain entirely. Remove Snow is outclassed by Ice Cutter. Ice Cutter is a very efficient way to gain ice, and if you're lucky enough to get Snow in first winter, using Ice Cutter to gain access to Ice Maker is a very efficient source of Cold for Summer 2.

Artificial Forest, Lake, and Mountain are pretty niche but can be very handy when you need them. If you have Forest/Water Lovers, their artificial terrain can be useful if you need more +1 tiles. The most important use case I found is when you have Water Shrine or Mountain Shrine, but you don't have good terrain for shrine placement. In those cases, artificial lake and artificial mountain can be real life savers.
The First 10 turns: Early game Tech and Build orders.
In a game like Dotage where your power scales exponentially, it's important to have a strong start. Given how much freedom you have the moment your run starts, its easy to have a weak opening that can make your game harder later on. For example, I see many newer players start by building 2 or more research buildings on the first turn. I believe this is a mistake; you don't need research that early and you're gimping your pip population, which you could have used to get even more research.

Of course, there are many other misplays you can make. The easiest "solution" to fixing your early game is to simply follow this turn first ten turns build order:


To read this table, each row is one day or turn. Each Column is the action of one specific pip. Each cell represents the building that each pip is working that day. Buildings with an Asterisks means construction for that building. I'll give a few turns as examples:

On turn 1, Pips 1,2 and 3 are constructing cabins. Pip 4 is gathering food.
On turn 4, Pips 1 and 2 are mating(making a pippin). Pip 3 is constructing a research building, and Pip 4 is working the research building
On turn 10, Pips 1 and 2 are gathering food, Pip 3 is constructing a wood building(wood pile), Pip 4 is working a wood building, Pips 5 and 6 are gathering research, and Pip 7 can do a variety of different things.

For research, you always want to research T2 research first. After that you want Tilled Soil, then you want to unlock water and then T1 vegetables. You want to fit in the correct protection building when you need it; its ok to delay your vegetables if you need a protection building earlier. If you have nature first, you want to skip Tilled Soil until you unlock Altars. For the turn 25 nature events, you really need to precisely calculate your vegetable timing.

There are a few caveats with this build order. Firstly, build orders for Dotage are always awkward because research costs vary with difficulty. In Normal difficulty, Well/Mountain Spring and all T1 protection buildings that aren't Altar cost 4 research, while Tilled Soil, Vegetables, and T2 research cost 6 research. In Challenge 8(600%), the difficulty I tested this build order for, the costs are 7 and 11 research instead. Consequently, you'll probably hit your blueprints faster than I did when I tested this build order. The biggest deviation you probably have to make is that your T2 research building is unlocked much earlier. On turn 9/10, if you have T2 research unlocked you should upgrade your research buildings if you can instead of just working your current ones.

I wasn't sure which difficulty to base this build order around. I ultimately decided to design it for the highest difficulty to ensure its efficacy across all difficulties. I'd rather most players lose efficiency by using an overly conservative build order then having to relearn a build order for every difficulty level.

Speaking of conservative, this is a conservative build order for 600% difficulty. This build order will work even with a nature first event with no fruit orchards. Obviously the trade-off is that for games without nature as the first event, maps with fruit orchards, and/or if you're playing at a lower difficulty(which, if you're reading this guide, you probably are), this build order will be inefficient.

I recommend following this build order to the letter at least once. Afterwards, you're free to keep using it, or you can try to change things up for whatever reason. When you do try this build order, you should try comparing it to what you usually do and contemplate the differences. Most readers probably weren't expecting to start the game with 3 cabins. Even if you decide you don't like it, at the very least I hope this gave you a reference point to base your starting turns on. This build order was meant to be on the safe side, so you're welcome to try to squeeze in an extra cabin or 2 if you think the game warrants it. Just be mindful of potential hunger or not getting enough research to pass a potential nature event.

After you unlock vegetables, the next broad steps research-wise are T3 Research and then Scriptoriums. During that process you also want to make sure you aren't forgetting your necessary protection buildings that you need for your plans to beat the events. To build Scriptoriums you need stone and paper, which needs tools, so make sure you pick those blueprints beforehand. If your paper-producer is Papermaker, you also want T2 wood, and if you have Papyrus Maker or your T1 Heat building is Scrub Fire, you want Hemp Fields.

After Scriptoriums, there are a bunch of branching paths to take depending on a bunch of different factors, so there's little point of discussing it here.

Bringing it all Together: First 50 Turns Example Game
This section I will showcase an example playthrough for the first 50 turns to demonstrate how everything in this guide works in practice. This will be a run with Matus, with zero memories unlocked, and on 600% difficulty.

Here's my board at the end of turn 1:

The first thing I should address is that where you place your Bivouac(your starting town center) doesn't really matter at lower difficulties, especially on Matus. That being said, you should pick a spot with sufficient food, as well as enough forest adjacencies for Wood Pile and if you have Thinker's Post as your research building, then enough empty space to fit at least 2 without having to build a Sign.

For the first 10 turns I do nothing but follow the build order I listed to the letter, while researching T2 research. This is what it looks like afterwards:

The important things are the fact that I have 10 pips, 2 Wood Piles(soon to be 3) and 2 research buildings. I also have 9 research points towards my T2 research building, though for most difficulties the blueprint would have been unlocked already and you would have started researching Tilled Soil. For those who haven't seen the Study building yet, in the above screenshot they are the two buildings right next to my Bivouac, and they produce research at the same rate as the Thinker's Post.

Since this is turn 11, I also have access to the first prophecy page. Here it is:

So this run will be Fear primary. I have a level 1 Fear event on turn 25, a seasonal level 1 Heat event at start of summer(this event will literally happen in every game, and it lasts 5 turns), and this is a bit hard to see but the first doom is a Heat doom event, which will be level 2.

As I said earlier you should try to plan for every event you see on every prophecy page when you first see it. The first thing to do is to decide which building to use for each event. Looking at the table from before:

Level 1 Fear Event: T1 Hope: Meeting Point
Level 1 Heat Event: T1 Cold: Puddle
Level 2 Heat Doom Event: T2 Cold: Pond

Now, I'm actually going to deviate from what I just wrote and what I recommended earlier in the guide. For the Level 1 Heat Event, I'll use the T2 Cold building instead, the Pond. skipping the T1 building. The seasonal Heat event ends only 2 turns before the doom Heat event, so I might as well use the T2 building that I'm going to have at around the same time anyway.

Since this is the first prophecy page I can ignore the possibility of follow-up events. I can just calculate the exact amount of protection I need to 100% pass each event and be creative in how I intend to achieve those numbers:

Level 1 Event(Unknown/Seasonal): 33 protection
Level 2 Doom Event: 153 protection

(Remember that these numbers are only so high because I'm playing on the hardest difficulty. On Normal and Harder, the amount of protection needed is about one-third the above numbers)

The Meeting Point produces 2 hope per turn. I need 33 protection, but since 33 isn't divisible by 2 I need to take next lowest multiple of 2, which is 34. 34 divided by 2 means I need 17 total usages of a Meeting Point being worked. Due to the lack of follow-up events, I can be creative with this. I can build 4 Meeting Points and work one of them for 5 turns and the other three for 4 turns. I can build 2 Meeting Points and work them for 8 and 9 turns. Or I can build 3 meeting points and work two of them for 6 turns and the last one for 5 turns. This is mostly just arithmetic; in math form it looks something like this:

17 =
1 x 17
2 x 9 - 1
3 x 6 - 1
4 x 5 - 3
etc.

Where the left number is the amount of duplicates of the given building, the middle number is the amount of turns all of them are worked, and right last number(if there is one) is the "remainder."

If this math is giving you a headache don't worry, this isn't too important to be precise about. More building duplicates mean higher construction costs, while working with less duplicates require more turns and thus a higher research priority. I'm going to to arbitrarily just pick the 3x6 version. Again it doesn't really matter, its more important to just make a decision on how many duplicates of the protection building I need and make sure I have them ready on time. In this case, I need the 3 Meeting Points by turn 20, which after factoring their construction time means I need the Meeting Point blueprint and all the resources for construction available by turn 19.

Normally this is also where I go over all the tech prerequisites, but Meeting Point simply doesn't have any. I just need to put them next to a dwelling to get the +1, which is simple enough to not have to plan out this early.

That's the first event tackled. Next is the seasonal heat event. Like I said earlier, I'm going to use the T2 cold building, the Pond. The Pond produces 4 cold per turn, and again 33 isn't divisible by 4, so I need the next lowest number 36. Anyway, 36 divided by 4 cold per usage is 9 usages of the Pond. Now, I could go over the whole math process again, but keep in mind that I'm going to need more Ponds for the Doom event right after anyway, so there isn't much of a point. I just need to have at least 1 or 2 ponds ready by the start of Summer.

For tech pre-requisites, the only one is water. Since I'm going to have Tomatoes Fields before then, which require water, this isn't anything extra that I have to go out of my way to unlock.

I do need to make sure each Pond is adjacent to a water-producer. In this game I have Mountain Spring as my water-producer, which has to be on a mountain tile. I probably have to build quite a few mountain springs in order to have enough tiles that are adjacent to a water-producer(more, once you realize that tomatoes need to be adjacent to a water-producer as well). Additionally, each Pond is consuming 2 water per turn, which as you'll see is going to add up quite a bit. I could just have 1 Mountain Spring being worked per Pond, or I could stockpile water beforehand, or somewhere in between. Because I know I'm going to have enough Springs for both possibilities, I don't need to decide yet.

What I do need to decide now is where I'm going to put my Mountain Springs. I should look for the mountain tiles that are adjacent to as at least 2, ideally 3 or 4 empty tiles to minimize how many Springs I need.

Here's a more zoomed out screenshot with the whole map in view. I circled all the mountain tiles that are adjacent to at least 2 empty tiles. This is where I should put my Springs, and next to them my Ponds/Tomato Fields. Ignore the extra buildings; this was taken a few turns later then the previous screenshot:

Over the next 20 turns or so, I should branch out with signs to reach these tiles.

The final event is the Heat doom event. The previous Heat event already covered most of what I needed to plan for this event since it uses the same building. The only difference is quantity of Ponds that I need. I need 153 Cold by the end of the doom event. The event starts on the 8th turn of Summer and lasts 8 turns, and the event right before ends at the 5th turn of summer, so I have 8 plus the 2 in-between turns to generate Cold with.

153 divided by 10 turns is 15.3 Cold per turn, rounded up is 16 Cold per turn. 16 Cold per turn can be generated cleanly by 4 Ponds, but I need to make sure all four Ponds are ready to run at the end of the first Heat event. I also need to make sure I can make 8 water per turn. To make this simple, since I need all the water-adjacent tiles for Tomato Fields anyway I can just build 4 Mountain Springs to meet my water needs for the whole event.
Bringing it all Together: First 50 Turns Example Game(Pt. 2)
Okay we're finally done with the event planning. I'm going to reiterate what I said in the Events sections and say that this isn't nearly as tedious as it looks. In an actual game most of this whole process would take me less than 30 seconds. The only part that might take a while is actually calculating the exact protection I need, but if you play at the same difficulty enough you eventually start memorizing the common breakpoints.

With the event planning finished, its finally time to start playing the game again.

Turn 15

The first thing you probably noticed is that the color of the grass changed. I don't know why this happened, aside from the fact that this screenshot was taken in a separate session than the previous one, so rebooting the game probably changed the color somehow. Probably a bug, but it doesn't matter so let's move on.

Compared to turn 11, The following changes were made in the village:
  • The 2 Studies were upgrade to Large Studies. A third Large Study has also been built, and will be operational once the thinker finishes training
  • Signs were placed on the left to gain access to the Berry Bushes on the top left.
  • One Blueberry Bush was demolished to be able to place a third Wood Pile.
Its about time I start thinking about the timing for placing the 3 Meeting Points. I need to start building them on turn 19, so the blueprint needs to be unlocked by then. I'm currently researching tilled soil, with 7 research points to go and I'm producing 4 research points per turn, which will be 6 per turn starting next turn. Doing the math the timing looks like this:
  • Turn 16: Tilled Soil: 8/11
  • Turn 17: Tilled Soil Finished. Meeting Point: 3/7
  • Turn 18: Meeting Point finished. Next tech starts with 2 research points.
With my current research generation, I'm actually a turn early. In hindsight, I should have skipped the 3rd Large Study, but oh well. If I had more research, there was a also a chance I could have gotten vegetables in time before meeting point, but its also too late for that.

While in this example I calculated the exact turn I needed a blueprint precisely(and if I was going to be late I would have added more research building(s) and recalculate), for your games you won't need to be this precise since the research cost of every blueprint will be much lower.

Meeting Points cost 2 wood each, so I'm going to need 6 wood on turn 19. I have more than enough wood for that, so I decided to spend some of it making a forager(which I'll need pretty soon for seeds) and some cabins. Like I said in the Pips section, making more pips is the most effective way to scale your village. Any spare pipturns, like the ones I have right now, should be dedicated to making more pips, which means more cabins.

That being said, since I'm about to run out of food even though I'm building cabins I'm holding off on actually breeding since I have a food shortage right now. This is why I said to prioritize vegetables early, once I have vegetables I can make more food to feed my expanding population.

Turn 17

I finished researching Tilled Soil. I immediately place a Tilled Soil tile below the Blackberry bush on the top left to increase my food production. Next turn, I will place more Tilled Soil on the other berry bushes while working the Blackberry bush.

Turn 19

Its turn 19, and I started building the 3 Meeting Points. In addition, I unlocked the Mountain Spring and am building one on the bottom, on a mountain tile adjacent to 2 empty tiles.

Over the next 6 turns, each meeting point needs to be worked with a total of 6 pips(minus one usage). The other 4, (soon to be 5, since I made one extra pippin in the meantime) will be working on food collection, research, and building my Tomato Fields; this also means Tilling Soil, and gathering seeds and water.

Speaking of Tilled Soil, from this point on I will never collect fruit or vegetables from a tile that isn't tilled. Doing so would be a waste.

Turn 25

Its turn 25, and as you can see at the top, I have a 100% chance of obtaining a Good Event(which means I passed the event).

The other important things to notice is that I built a total of four Tomato Fields, and there are more to come. I stopped researching temporarily because I needed pips to perform other tasks. Once the 6 pips working the Meeting Point are freed up, I will resume researching.

I'm going to start using a more zoomed out image in order to capture everything that is happening across my whole village. I apologize if that makes it hard to see individual buildings. If necessary I would recommend popping out the screenshot and zooming in.

Turn 26

The first event has been passed, and I got efficient Meetings Points as my good event, which is a useless benefit since I don't intend on using the buildings anytime soon, or possibly ever again.

With the first event done, its time to take a step back and reevaluate. Let's start with protection.

I already planned out that I will be using four Ponds for both of the upcoming Heat Events. The next one starts in 10 turns, but I can afford to be 2 turns late on my Ponds. That gives me 12 turns total to research Ponds, build them all, and train the watchers. If I start researching them now with 6 research per turn, I should barely make it.

With that handled, the other thing I need to think of is growing my village. The obvious answer is that I need more pips. As you can see in the above screenshot, I'm already breeding 2 pips in cabins I built a few turns ago and I'm also constructing another cabin. While this is happening, I'm expanding my village with signs and placing more Tomato Fields to feed my growing population.

For both plans I need alot of wood. Each Pond costs 12 wood to build, which is 48 wood total. I also need at least 4 Mountain Springs, which cost 4 wood each, so another 16 wood. I'm building 1 cabin every two turns minimum, so that's another 2 wood per turn being consumed. I'm going to need another Wood Pile, maybe two more, pretty soon.

Turn 32

Turn 32 check in. The most important thing to realize is that since turn 26 I've made 5 more pips. I am still in the process of making more(and will be for a long time), as you can see with the new cabin that I'm constructing(2 tiles to the right and up from the Bivouac). I also expanded my food production with more Tomato Fields.

I'm also making progress towards unlocking the Pond blueprint. In the meantime, I'm gathering a crap ton of wood, while expanding to reach the mountain tiles that pointed out earlier as my spots for Mountain Springs. Pretty soon I'm going to build Puddles which I can immediately upgrade the moment I unlock Ponds.

Turn 35

This is the turn before summer starts, and the turn where I finished researching Ponds. The first immediate thing to take care of is upgrading my Puddles into Ponds, which you can see on the top left. I need 4 Ponds total, you see on the far left 2 Puddles and on the far right 1 Puddle and 1 Puddle being built. Those will get upgraded once I collect enough wood.

Speaking of wood, for the next few turns I'm going to pause building Cabins since I need the wood to finish my Ponds. I can make up my pip count later.
Bringing it all Together: First 50 Turns Example Game(Pt. 3)
By the end of turn 40 I need 33 Cold to pass the heat event. The Pond takes 3 turns to build, and the Puddle 1 turn. The time it takes to upgrade from Puddle -> Pond is the difference in construction times, so 2 turns. The training time for a watcher takes 1 turn. That means the 2 ponds on the left will be ready on turn 38, and will each have 3 turns to generate Cold. 2 Ponds generating 4 cold per turn for 3 turns is a total of 24 Cold, which is 9 Cold short. Most of this cold can be made up for by upgrading a Puddle on the right to a Pond next turn, making it available on turn 39 for 2 usages, for an additional 8 cold. The final Cold will be made by working a Puddle once.

Turn 40:

Simply following the steps I laid out above gets me here. On turn 38 I generated 8 Cold, on turn 39, 12 Cold, and now on turn 40, 14 Cold, for a total of 34 Cold which is enough to pass the event.

The only other thing I'm doing during this is making a few more pips.

Turn 41(start of turn)

Passing the seasonal heat event earned me 3 Berry Bushes on the bottom of my map, which is nice I guess.

More Importantly, the next step is passing the Heat doom event. As I outlined way back on turn 11 this is a simply process of working the 4 Ponds that I have right now for 10 turns each minus one, which will give me 156 Cold, above the threshold of 153 Cold to pass the event.

Except, I don't have 4 Ponds! After activating every Pond, I only have 14 Cold per turn, instead of 16. It turns out that I intentionally forgot to upgrade my last Puddle, leaving me with only 3 Ponds instead of the 4 that I planned to have.

Mistakes like this will happen. When they do, don't panic, take a step back, and recalculate how much protection you're currently slated to get, and construct enough emergency protection buildings to cover the rest.

With every cold building active I'm producing 14 Cold per turn. After 10 turns that's 140 Cold, which is 14 short. Alternatively, I could upgrade the Puddle into a Pond, and have it produce 4 Cold per turn for 7 turns instead of 2 Cold per turn for 10 turns. That's an increase of 8 Cold total, which brings me up to 148 total Cold, which is still 5 short. For the last 5 Cold I'll just build another Puddle and use it 3 times.

Turn 43:

Its turn 43, the start of the Doom event. As you can see on the right, i finished upgrading into a Pond and built an additional Puddle on top, like I said I would. This is a good time to double check my math to see if my current plan can reach 153 Cold.

Currently I have 24 Cold, and an making 14 Cold per turn. Starting next turn thats 18 cold per turn. 18 cold per turn for 7 turns is 126 Cold. Plus the 24 cold I have already and the 14 cold this turn I will be at 164, so 10 more Cold above the threshold. I should turn off the Puddle for 5 turns during the Doom event to save labor and water.

You might have noticed I stopped researching. This is because compared to what I'm used to, I'm low on pips but a little ahead on research. It's better to prioritize Pips over research, so I'm temporarily shutting off my Studies to have the thinkers collect wood, build cabins, and breed pips.I also just finished researching T3 research, so if possible I'd like to upgrade my research buildings before continuing to research.

Turn 49:

Its the turn right before the end of the heat doom event, and as you can see I passed the event with only 1 surplus Cold. Aside from making Cold, I've also been ramping up my pip population.Notice how my population increased from 23 pips on turn 43 to 32 pips on turn 49. With these extra pips, I now need more buildings that can employ them, so I restarted my research buildings and am on track to build more.

Turn 50:

We first need to talk about the 2nd prophecy page.

This page of the prophecy has 4 events with the last one being a doom event. Here's a quick overview of the events I'm going to face in the upcoming 30 turns:

Summer 30: Level 2 Fear Event
Fall 1: Level 1 Sickness Event
Fall ~5: Level 1 Cold Event
Fall 8: Level 2 Cold Event

When I continue this run, I would go through the planning process for these four events, but given that its very similar to the process for the page 1 events, I'm going to skip over it here.

Something that might have surprised you is that the seasonal event and the doom event are both Cold events. This is because they both occur during Fall, where the "weather" domain becomes Cold. In order to beat those events, I would need a Heat building, which could be Scrub Fire, Bonfire, or either of their upgrades.

The next step is to transition my research building to Scriptoriums. I also want to be increasing my population as far as I can without starving, and prepare to pass the four events that are in the second page of the prophecy.

I can now demolish the Pools As the prophecy page indicated, there are no more heat events coming this season. The next turn I will need Cold is next Spring, which is many turns away. I can rebuild those Pools later, right now I need those tiles for more Tomato Fields. Demolishing the Pools also give me 5 wood apiece, which is a nice bonus.

Speaking of Pools, the moment the doom event resolve I turned off every Pool, Puddle, and Mountain Spring. This is a good habit to build: whenever an event ends, turn off every building that was being used for that event. Not doing so often means that you're wasting precious pipturns on useless Protection.

Closing Thoughts

The first thing I want to emphasize is that this playthrough was done on the hardest difficulty. Your games will not be nearly as difficult. Your events will require much less protection to pass and your blueprints will require less research to unlock. You probably can't replicate what I was able to do this run first try, but hopefully I was able to give you some direction on what skilled play looks like.

I didn't talk about where to to place buildings, aside from the ones that with adjacency bonuses. In the early game, most building placements don't really matter, you can always demolish buildings and build them somewhere else later. You could save a pittance of resources with very careful planning, but frankly that isn't worth thinking about. Your attention would be better spent on growing you population, event planning, and research priorities.

I did not play this run perfectly. Aside from the obvious miscounting of Ponds, my pip population could have been much higher. There were multiple instances where I was floating wood that could have been spent on cabins for more pips. I definitely over-prioritized research in the first 20 turns. I probably could have been a bit softer on Tomato Field placements, and again the pipturns I would have saved from planting less Tomato Fields could have been spent on breeding more pips. These small mistakes have exponential costs; it costs 4 pipturns to make another pip. Had I been able to make even 1 more pip on turn 10, I could have used that extra pip to make another 10 pips, which each could have been used to make even more pips.

Even with this list of mistakes, which only includes mistakes that I was able to notice and remember, I will still win this run assuming I play reasonably. 35 Pips on turn 50 is a perfectly secure number of pips to have for even the hardest difficulty. For harder and below, it's possible to win with less than 10 pips on turn 50, but you should be able to reach a larger population by then.
A brief word on Mid-Late game.
The early game is where most people struggle, and is where most of your runs will be lost. If you follow everything in this guide so far mid-late game should be easy as you can breeze your way through the tech tree and brute force every event with overly advanced protection buildings or through sheer numbers. As such, this guide will only dedicate one section to mid-late game. Keep in mind that I'm not going to actually define when mid game and late game start; I have my own definitions, but they aren't important, and they likely differ other players' definitions.

After your first doom event, your next step is to transition to Scriptoriums. Scriptoriums is how you spike your research production to more than 100 per turn, though on lower difficulties you'll be fine with at least half that amount. Each scriptorium produces 7 research per turn, so you'll need around 15 Scriptoriums if you want 100 research per turn, or around 8 Scriptoriums if you want 56.

You'll need a large enough pip population to support this many Scriptoriums. Once all your Scriptoriums are placed, your population should be maxed out or close to maxed out.(By maxed out I mean as high as you ever want it to be)

You want to be to ready to feed yourself for winter. If you have the memories, red meat Cauldron is the way to go. You'll use either large animal pen and slaughter it for red meat while feeding it with barley. The red meat is then used to make glop in the Cauldron. If you don't have the memory, you'll use chickens instead, making glop with the egg+water meat recipe.

The biggest tech prereq for the cauldron is the copper bar construction cost. You'll want to go Copper Mine > Furnace > Cauldron when you have the time, then Barley Field > Large Animal Pen > Butcher's Workshop if you're using red meat, or Chicken Coop > Egg Farm > Butcher's Workshop if you're using chickens. Keep in mind that you'll have events to handle during the meantime; make sure to prioritize those first.

At this point the game should be smooth sailing. For lower difficulties you might already have all the tech necessary to win the rest of the game if your population is large enough. In any case, the next step is the bourgeoise transition. You want all the tech necessary to promote a pip to the bourgeoise class: bourgeoise housing, complex food, and fabric, as well as one building that can utilize the bourgeoise. This building is usually School or Library. You'll need books for both, and lumber, brick, and Brick Paving for Library. A decent chunk of the time the Brick building is your first bourgeoise pip.

Once you slam down enough Schools or Libraries, you should be able to roughly double your research production and then be able to research most of the tech tree in a few seasons. This stage is mostly just a systematic process of picking up blueprints that you'll want for upcoming threats, while dealing with events that are probably below your tech level in terms of danger.

After your second winter, which comes with a Doom event on the last turn of the season, you face the Apocalypse. If you've been following the guide up to that point, you should have been cruising through the events for a while now, and the apocalypse isn't going to be much different. The apocalypse is just 4 simultaneous events, one for each domain, which the events lasting 6, 11, 17, and 25 turns. The first 3 events are threat level 6, and the last one is always from your primary domain and is threat level 7. This shouldn't pose much of a challenge if you made it that far, but you do have to wary about the mini-omen events that occur a few turns before each event. These mini omens are unavoidable omen events that don't increase the threat level but have the ability to inflict status ailments on large portions of your population. Before the apocalypse, make sure every important profession in your village have backups in case they become disabled due to a mini-event, and make sure you can cure every curable status ailment. Once you defeat a domain, any production related to that event can be turned off. Additionally, once you defeat the sickness domain you no longer need any simple food.
Miscallaneous Tips
A list of random tips that I deemed important enough to include but don't fit into the other sections of the guide.

Boons

You probably noticed that I haven't talked about boons at all. That's because a) they aren't important and b) I can fit everything you need to know in a small list:
  • First boon: You should always pick Healthier Crops. The other 2 options simply don't do enough
  • Second and Third Boon: None of these really matter, but dwelling size +1 is pretty useful. Licorice Eaters(your pips can eat wood) and Water Diet(your pips can eat water) aren't useless if you don't have the red meat memory unlocked, or can serve as a decent crutch if you're struggling to hit cauldrons before winter. Strongwood(building hp +1) isn't bad either.
  • Fourth Boon: The most important boon choice. Forest Lovers and Water Lovers(+1 production if adjacent to forest/water, respectively) are both amazing boons that are autopicks if you see them.(forest is usually better than water, though I've never been offered both simultaneously). Aside from those 2, Wooden Piers is solid. Everything else is pretty useless, though you should be able to pick from one of those 3 options most of the time.
  • Everything Else: The fourth boon appears just a bit after the game should theoretically be decided, so the boons past that don't really matter. That being said, Trust the Domain is generally better than Anger the Domain. The boon that gives your pips 50% status immunity is the only other boon worth mentioning as it's pretty useful for helping you resist the mini-omens from the Apocalypse though it shouldn't matter.
For Healthier Crops, upon picking it every non-exhausted vegetable field and fruit tree gain +2 usages immediately. If you can you should leave every vegetable field and fruit tree at one usage minimum so they can benefit from this +2.

Buildings

Aside from Shrines/Temples, I haven't given optimal building layouts. I think it is best if players try to figure these out themselves, rather than me giving layouts to memorize since they tend to be pretty simple, and in my opinion figuring out layouts is part of the fun of playing the game. That being said, I will give a few layouts for the more complex buildings. Keep in mind that all of my layouts will not include path to Town Centers and Pavings.

School:

If you're using Schools, the above is your best bet. When you place scriptoriums, place them in a 4x4 square with Papermaker/Papyrus Cutter in the corners. Ideally the paper building is adjacent to either a wood/hemp building, but if not you can always put your paper buildings somewhere else. When you unlock Schools, upgrade the inner four Scriptoriums into Schools. Even after you unlock Schools, its generally best to keep working the Scriptoriums so you can produce enough research without filling up your whole map with Schools.

The hardest part of this layout is finding the space. A 4x4 empty space isn't easy to come by, so if you're planning to use Schools I recommend planning their placements well in advance. If you're lucky enough to have an entire 7x4 empty space, you can use the more ambitious setup on the right.

The spatial inefficiency of Schools is the primary reason why I don't use them at all, and just skip to Libraries.

Library


The beauty buildings can only be placed on arable soil.

Chickens


Look if you really want to use chickens this is the best way to go.(Or at least, the best layout I could find in 2 hours). Even with the above setup begin significantly more efficient than the generic 4 Chicken Coop + 1 Egg Farm setup, it's still worse than vegetables/fruit in the early game and worse than Cauldron in the late game.

Here are some other layouts that I tried out


Out of the 7 layouts that you see, the 12:8 option is almost strictly better than the other 6 layouts. i calculated the efficiency for every possible seed producers, including the Seeds Fields with varying adjacencies. If you were willing to expand it out, you could probably squeeze a bit of extra efficiency, but its already reaching the point where it gives more eggs than you'll need, and finding a 5x4 space is already difficult enough.

A list of building related tips that should make your life easier:
  • Buildings that are out of season cannot fulfill the adjacency bonuses/requirements of another building. The one exception to this is the Hemp Field, which seems to be able to fulfill the adjacency bonus of Papyrus Cutter even during Winter.
  • If a building requires a specific paving, then placing it on a tile without that paving will increase the construction time by 1 turn and, if it's a Stone/Brick Paving, increase the construction cost by 1 stone or 1 brick, to factor the turn it takes to place the paving. If the building's blueprint hasn't been researched, you can place the paving to effectively speed up the construction of the building by one turn.
  • Before you make your bourgeoise transition, you should try to checkerboard your cabins around your town center to more easily place buildings that have the +X per adjacent dwelling bonus, of which there are alot of.
  • The forager is considered both a fruit producer and a hemp producer, and the highest tier Hope producers are Leisure buildings.
  • You can attract animals to animal pens even if their wild versions aren't on the map
  • Buildings that butcher animals can butcher animals from any pen on the map, not just adjacent ones.
  • For animal butchering, it is better to have a second butcher building than to have every pen at maxed out capacity. The cost of making wheat, fruit, vegetable or seeds is much higher than the cost of having a second, inefficient butcher.
  • As far as I can tell, every tamed animal spawns and grows the same way. I think you need a little more than 3 animal pens to be able to butcher 1 animal per turn, though animal growth might be bugged.
  • Demolishing buildings returns half of the construction cost resources. The exceptions are field buildings, which always return 4 seeds.
Miscallaneous Tips(pt. 2)
For this list, I want to reemphasize the golden rule: don't feel obligated to do something that makes the game less enjoyable for you. Enjoying the game is orders of magnitude more important than winning.

  • The game always rounds up in your favor.
  • I recommend for newer players to never give up your run. Until you try to claw back victory from every seemingly lost position, you won't know what situations will lead to losses and which situations are recoverable. One loss event or even one doom event is easily recoverable at lower difficulties.
  • After a few runs I recommend turning on Fast Turn Pass or Super Fast Turn Pass in the settings. This will make the game either speed up or skip entirely the end of turn animations, which can take awhile.
  • Disable Cutscenes turns off the prophecy page cutscene, so I recommend keeping this setting on just as a reminder even if some of the cutscenes annoy you. Eventually you'll develop the habit of checking the prophecy page periodically and after every doom event, which is when you can safely turn this off. Disable Dialogue can be turned off comfortably once you finish the story.
  • In the special actions menu, you should enable "Show Action Slots"
  • You can shift click to place building blueprints anywhere without actually constructing the building. You can utilize this feature to plan out your placements many turns in advance, but keep in mind that the buildings' "shadow" goes away after closing and reloading the game.
  • The map isn't infinitely large; the edges of your map will be one of Thick Forest, Impassable Mountain or Deep Ocean tiles. You cannot use Cut Forest on Thick Forest, Remove Rocks on Impassable Mountain, and you cannot place Wooden Piers on Deep Ocean. You can actually place buildings on Thick Forest or Impassable Mountain, for example Forest Shrines or Quarries.
  • You can hover over the domain during an ongoing event and it'll tell you how much extra protection you need to 100% pass the event. This number assumes that the power production is constant, and it takes into consideration the current turn's production. Be very careful relying on this number; while it can be a helpful it makes many assumptions that don't necessarily hold.
Conclusion
Before I end the guide, I want to thank discord user Fudcake, for sharing advice on the official DotAge discord server. I definitely learned a few things from him, some of which made it to this guide.

I also want to thank the developer who I'll refer to by his discord handle, Catman, for developing this amazing game, and continuing to support it after its release.

If you have any feedback or questions, I'd be happy to hear it either in the comments or in the official dotage discord server, where I'm fairly active. I'll try to respond quickly.

I'll try to keep this guide updated for any major balance updates, for as long as I keep playing this game. Most of this guide's content should be relatively stable, barring any fundamental changes to core mechanics.

That's it for me. Thank you for reading and making it this far. I hope this guide was able to improve your Dotage experience, and I wish you best of luck in your future runs.

10 Comments
arjensmit79 22 Dec, 2024 @ 2:05pm 
Dont spare any math.
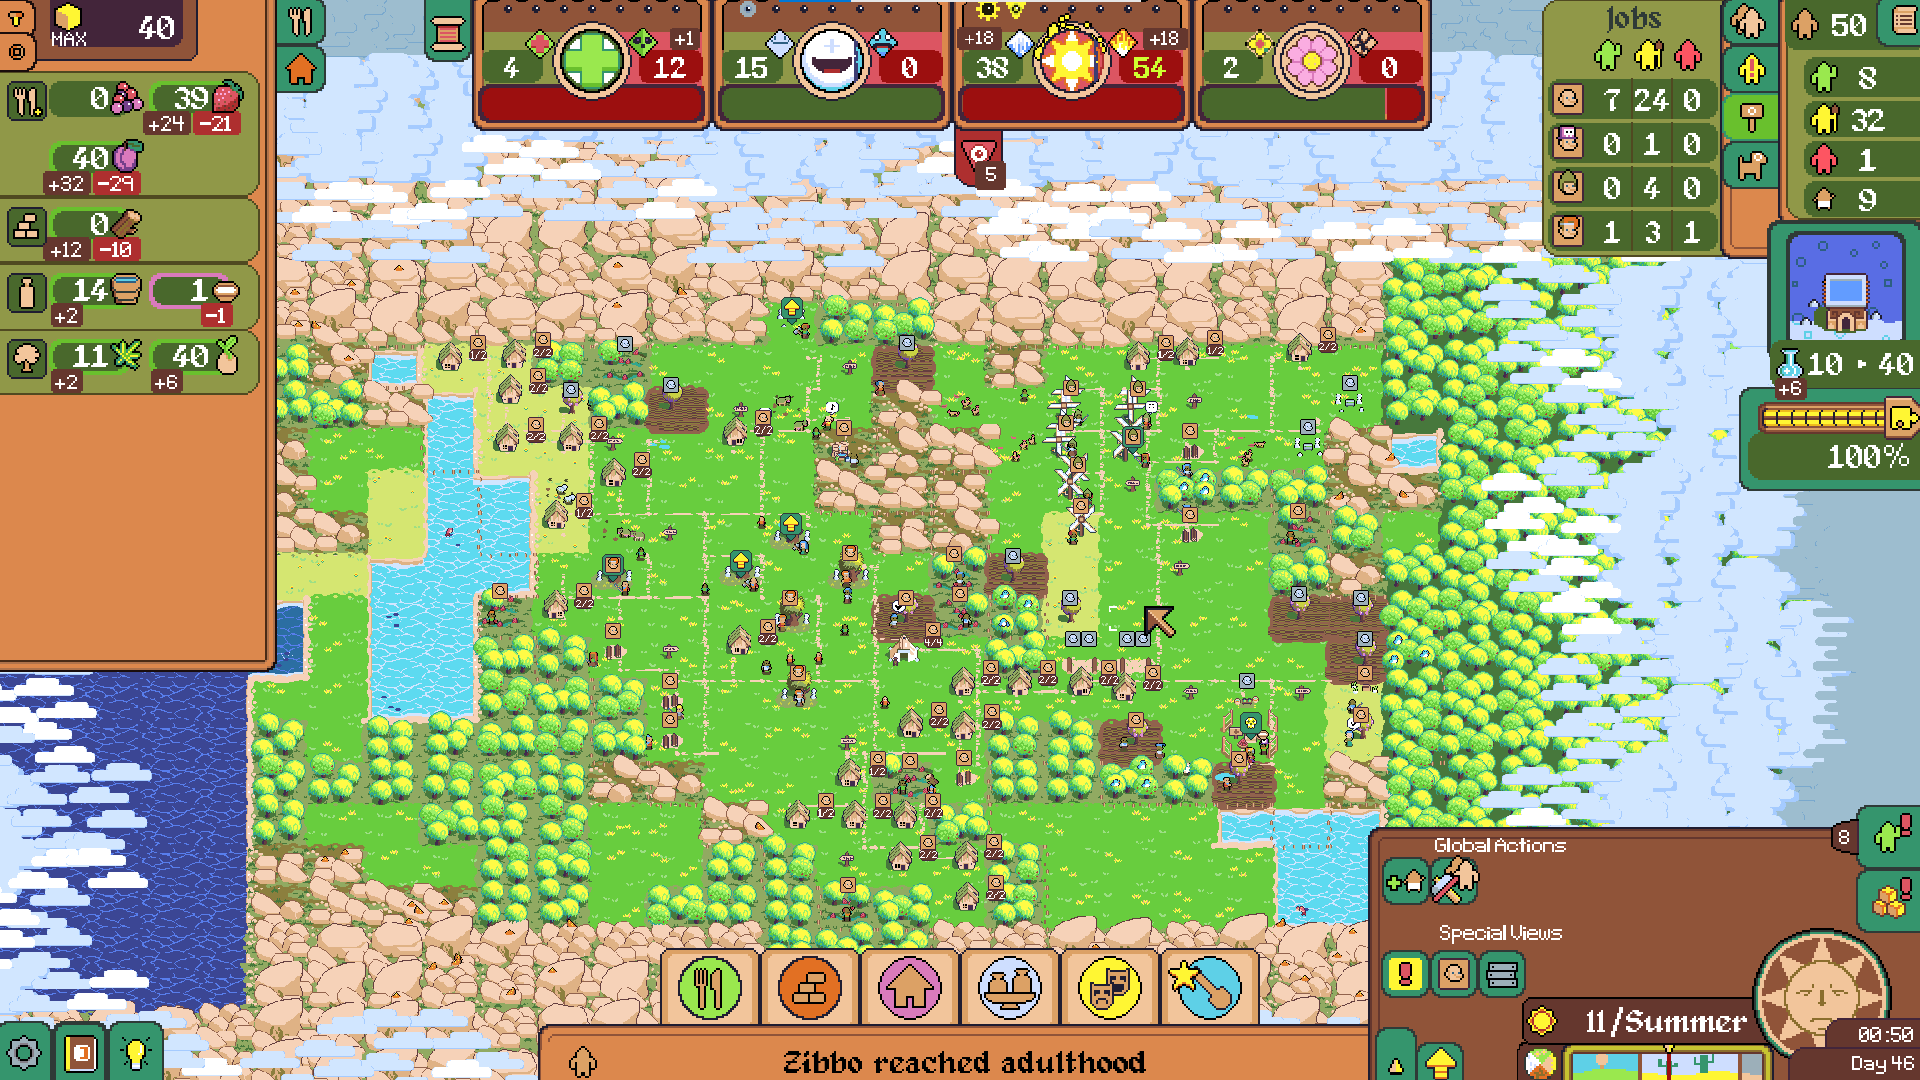
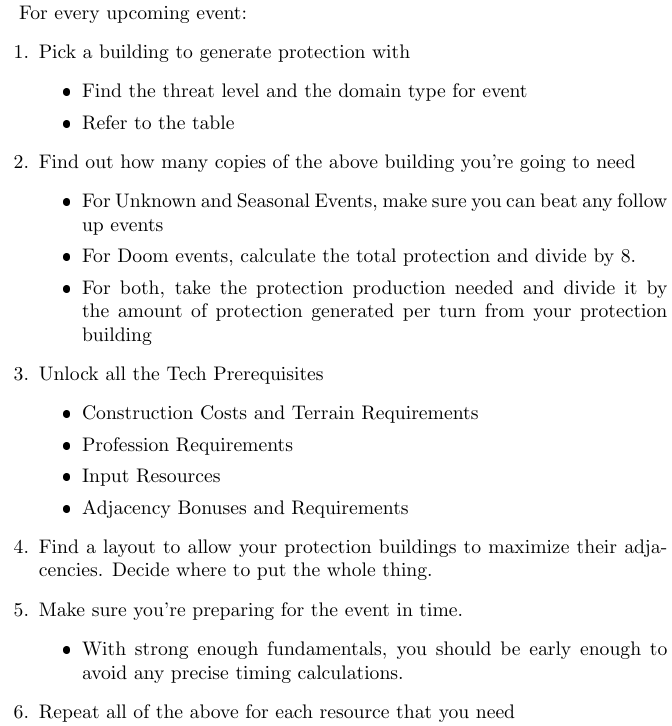
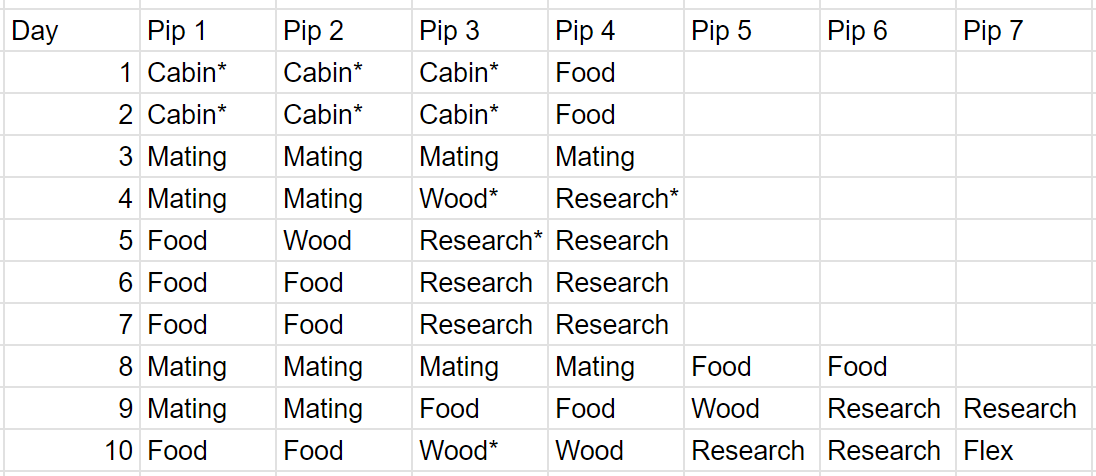
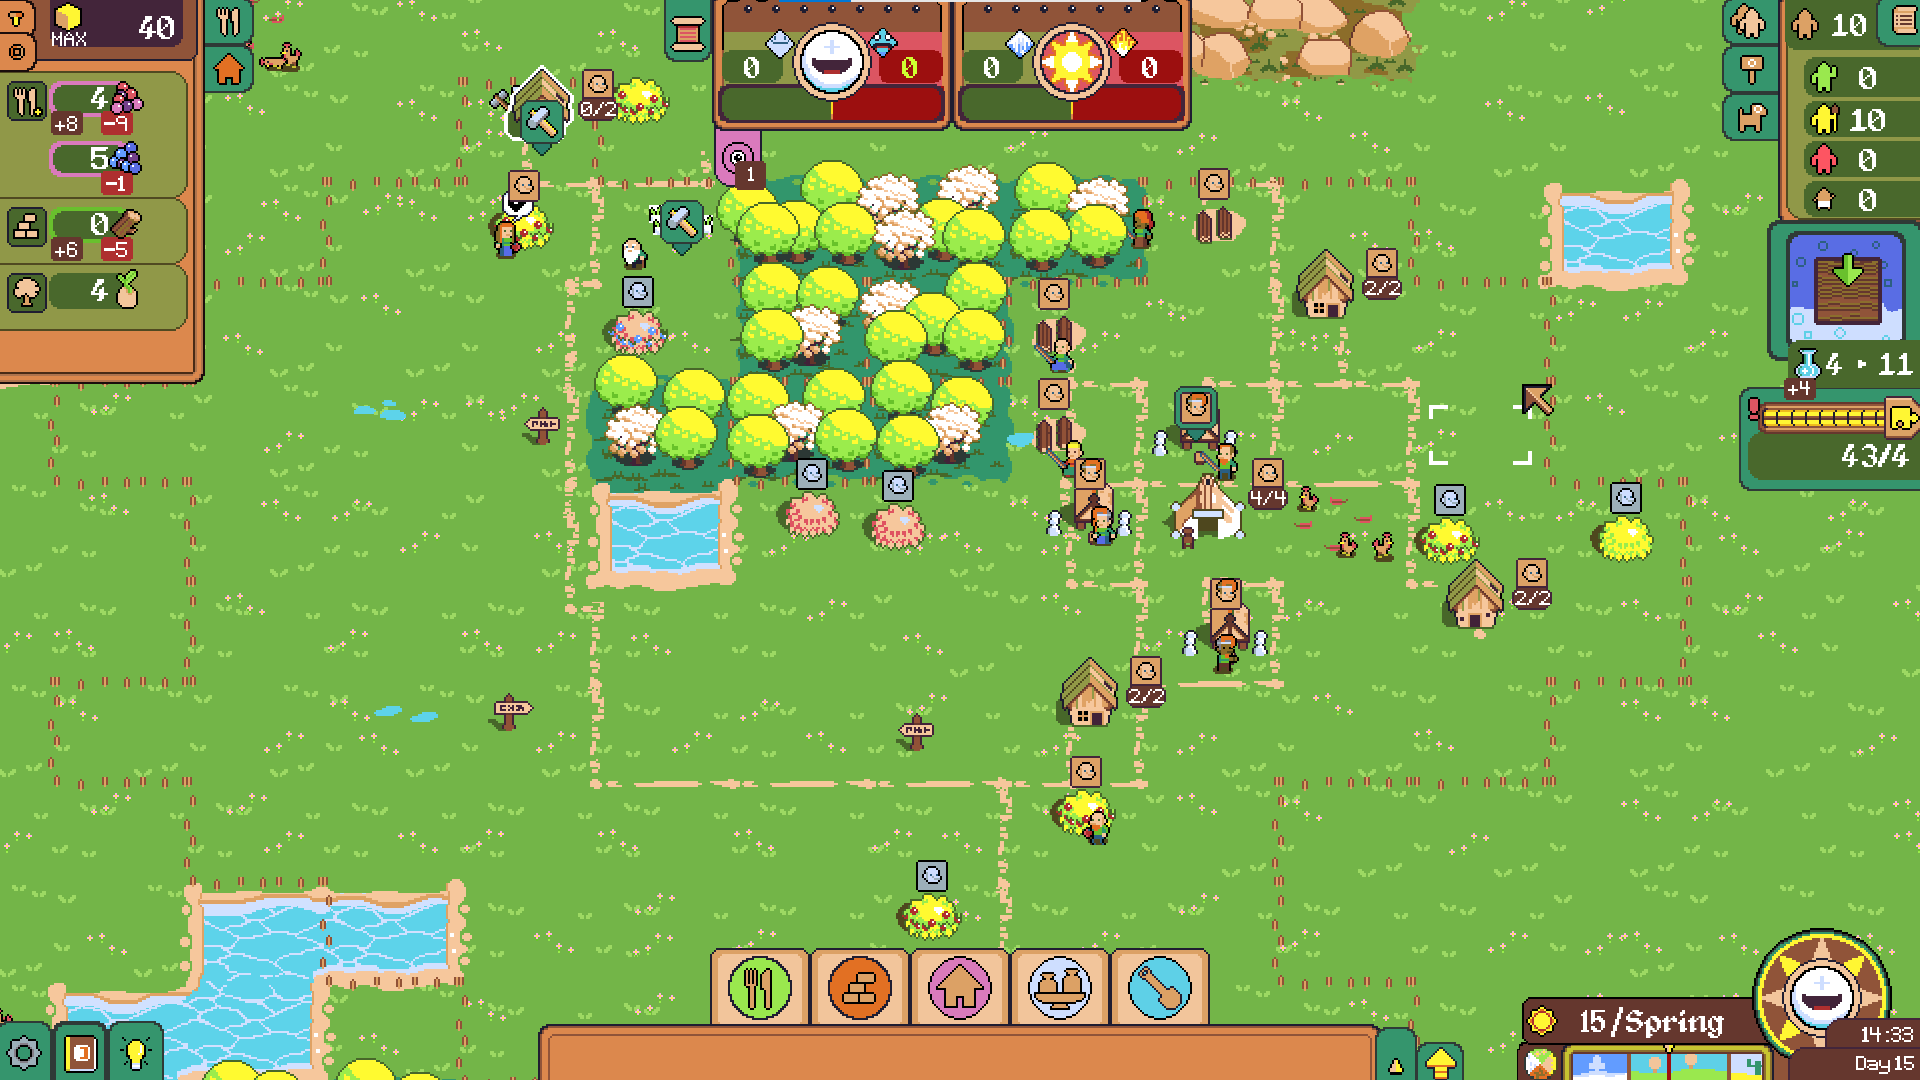
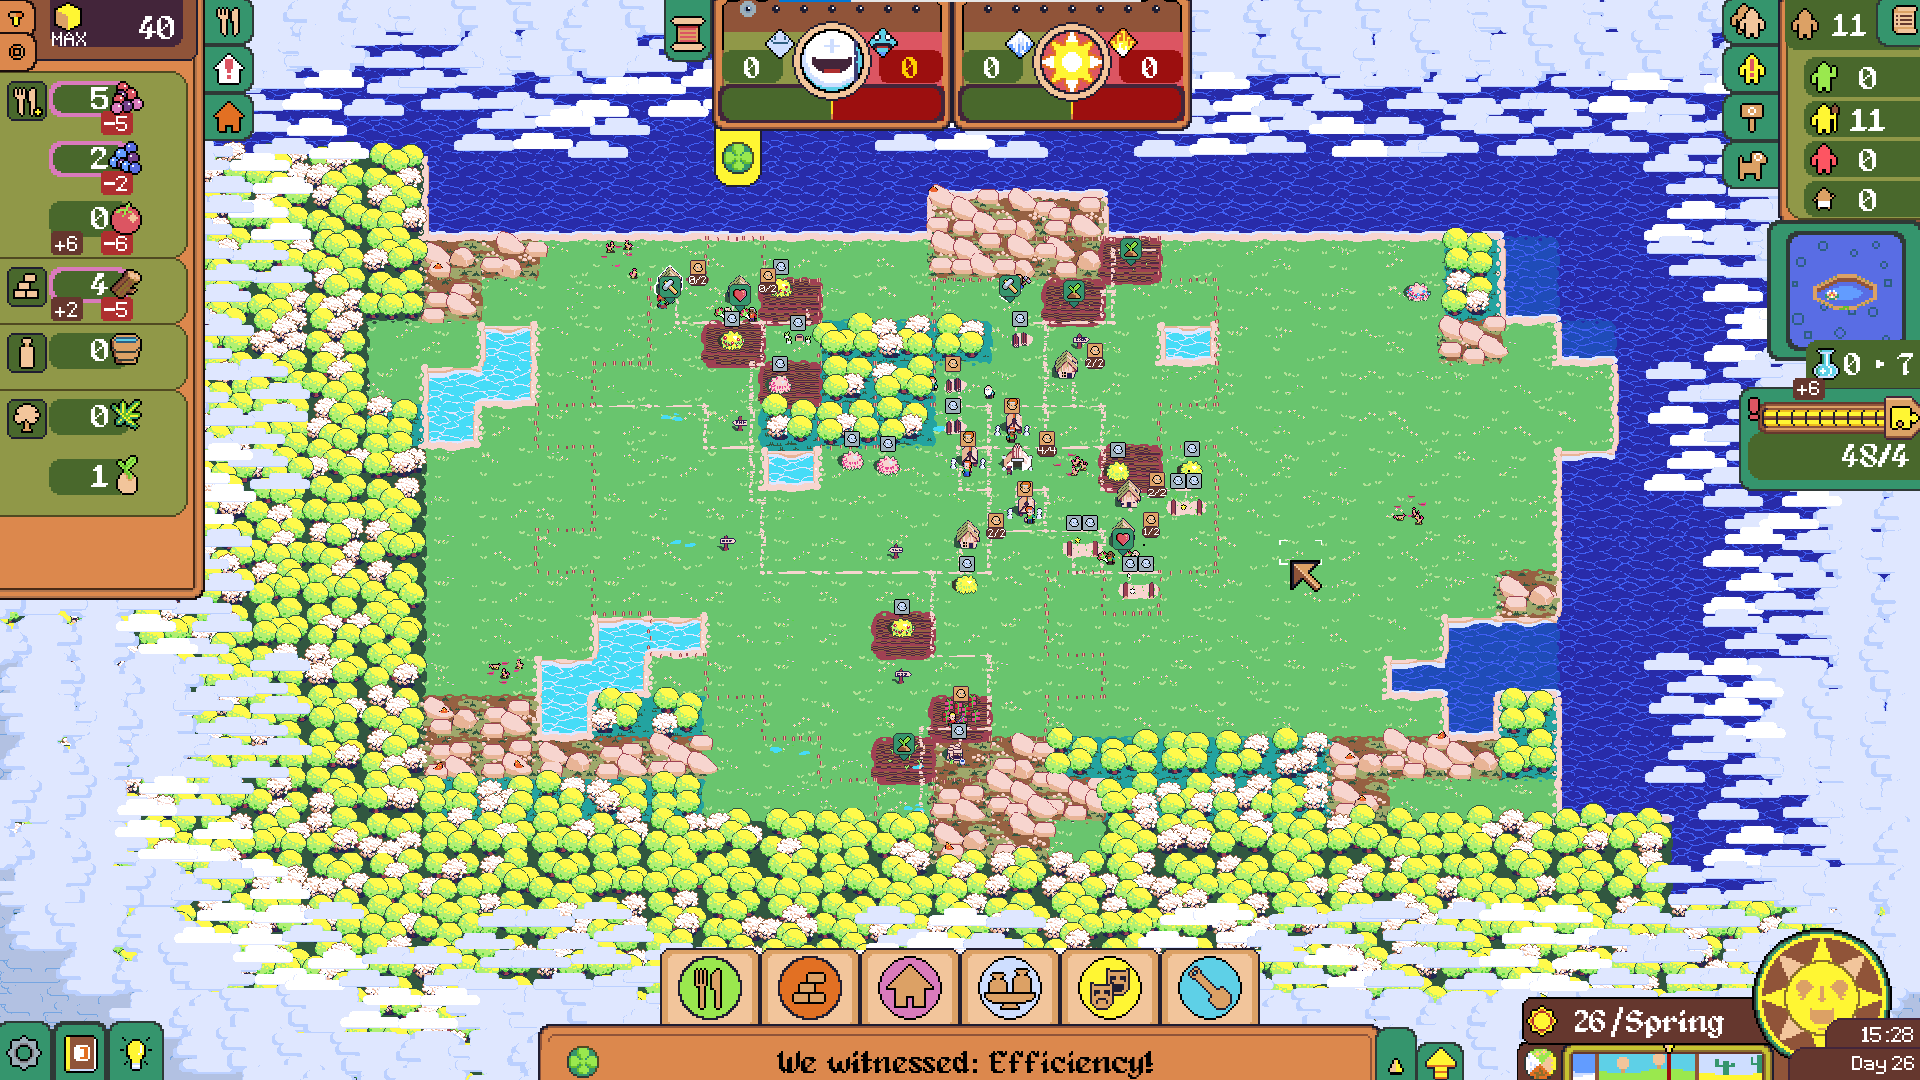
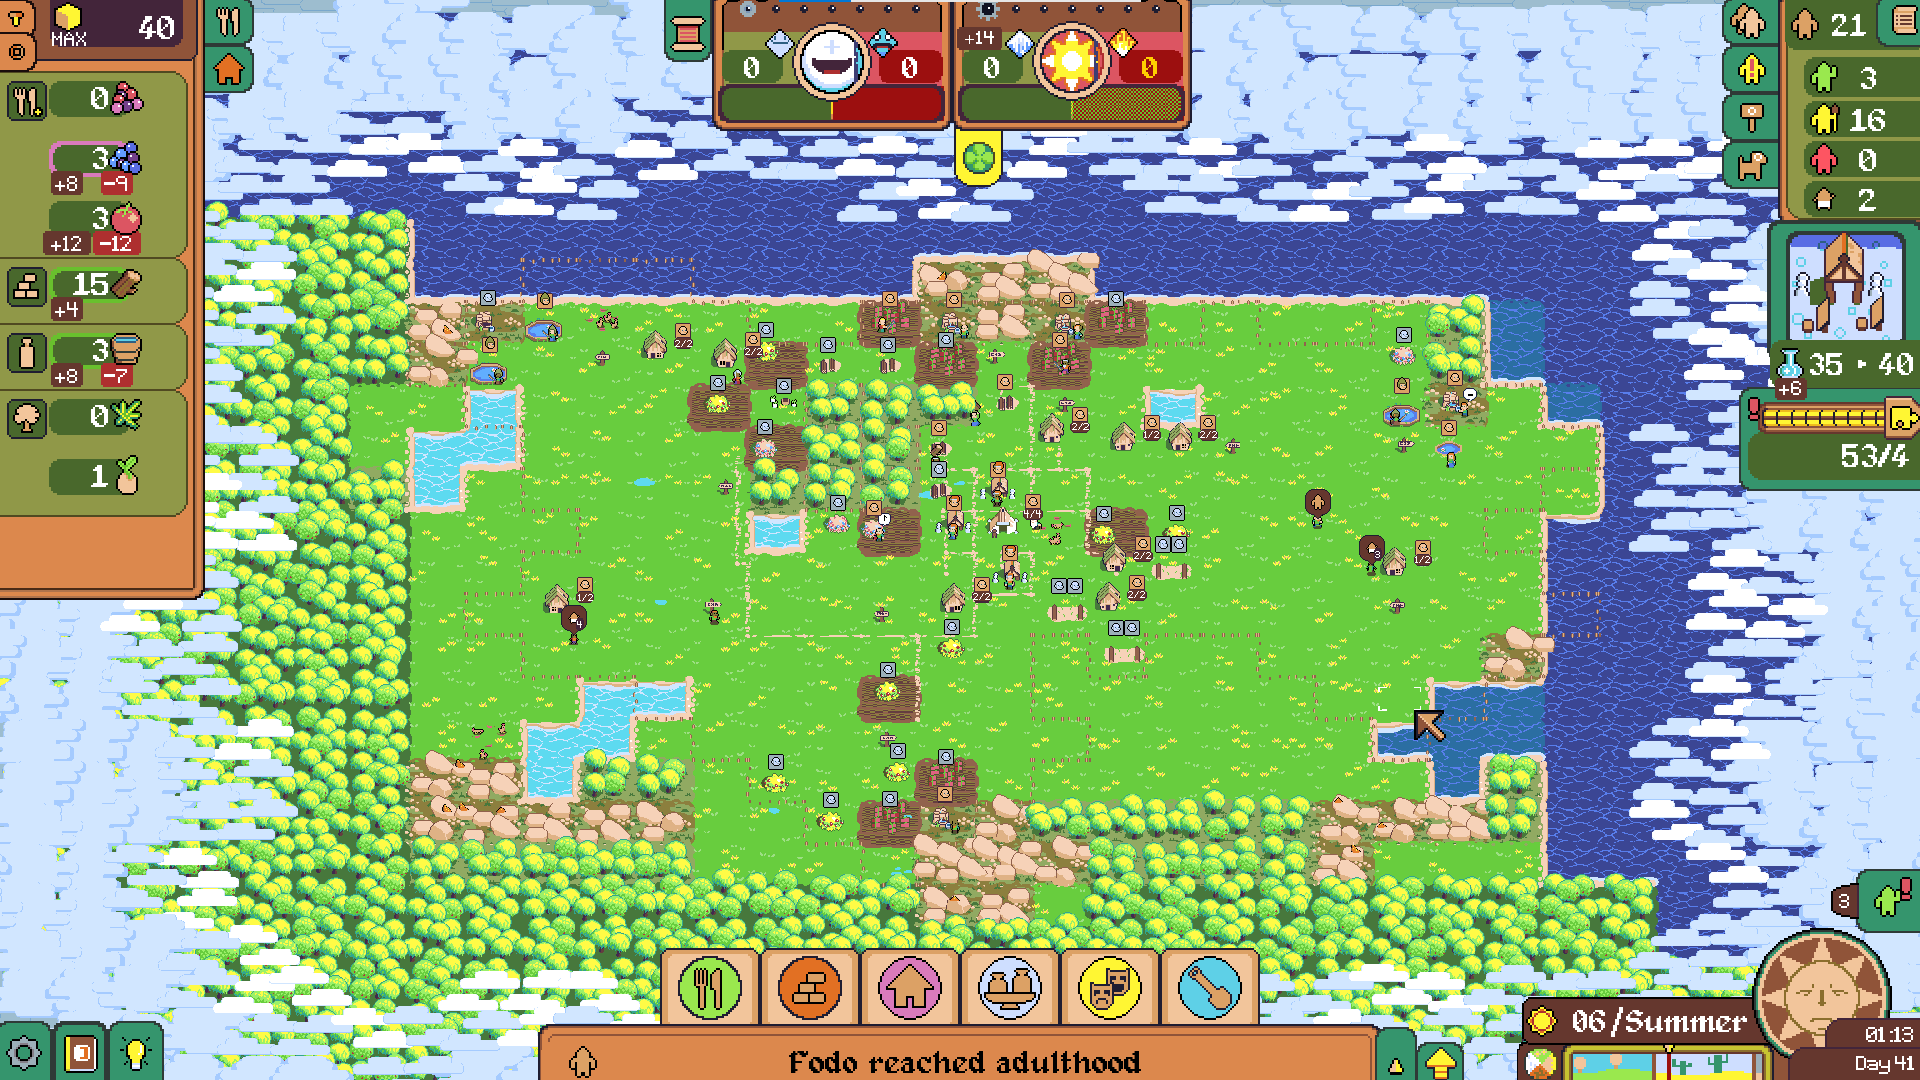
In early game, a pip seems to cost 7 pipturns as per my following logic

1 builders
1 woodcutters
2 lovers
3 food gatherers

That makes 7 adult pip + 4 children making 1 pip per turn.

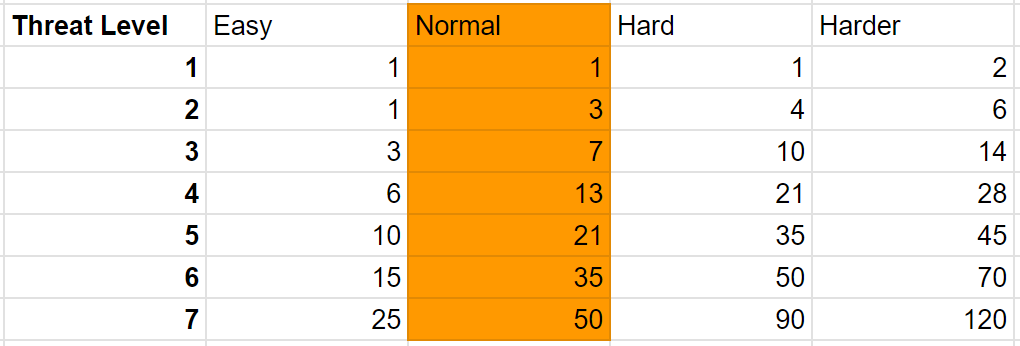
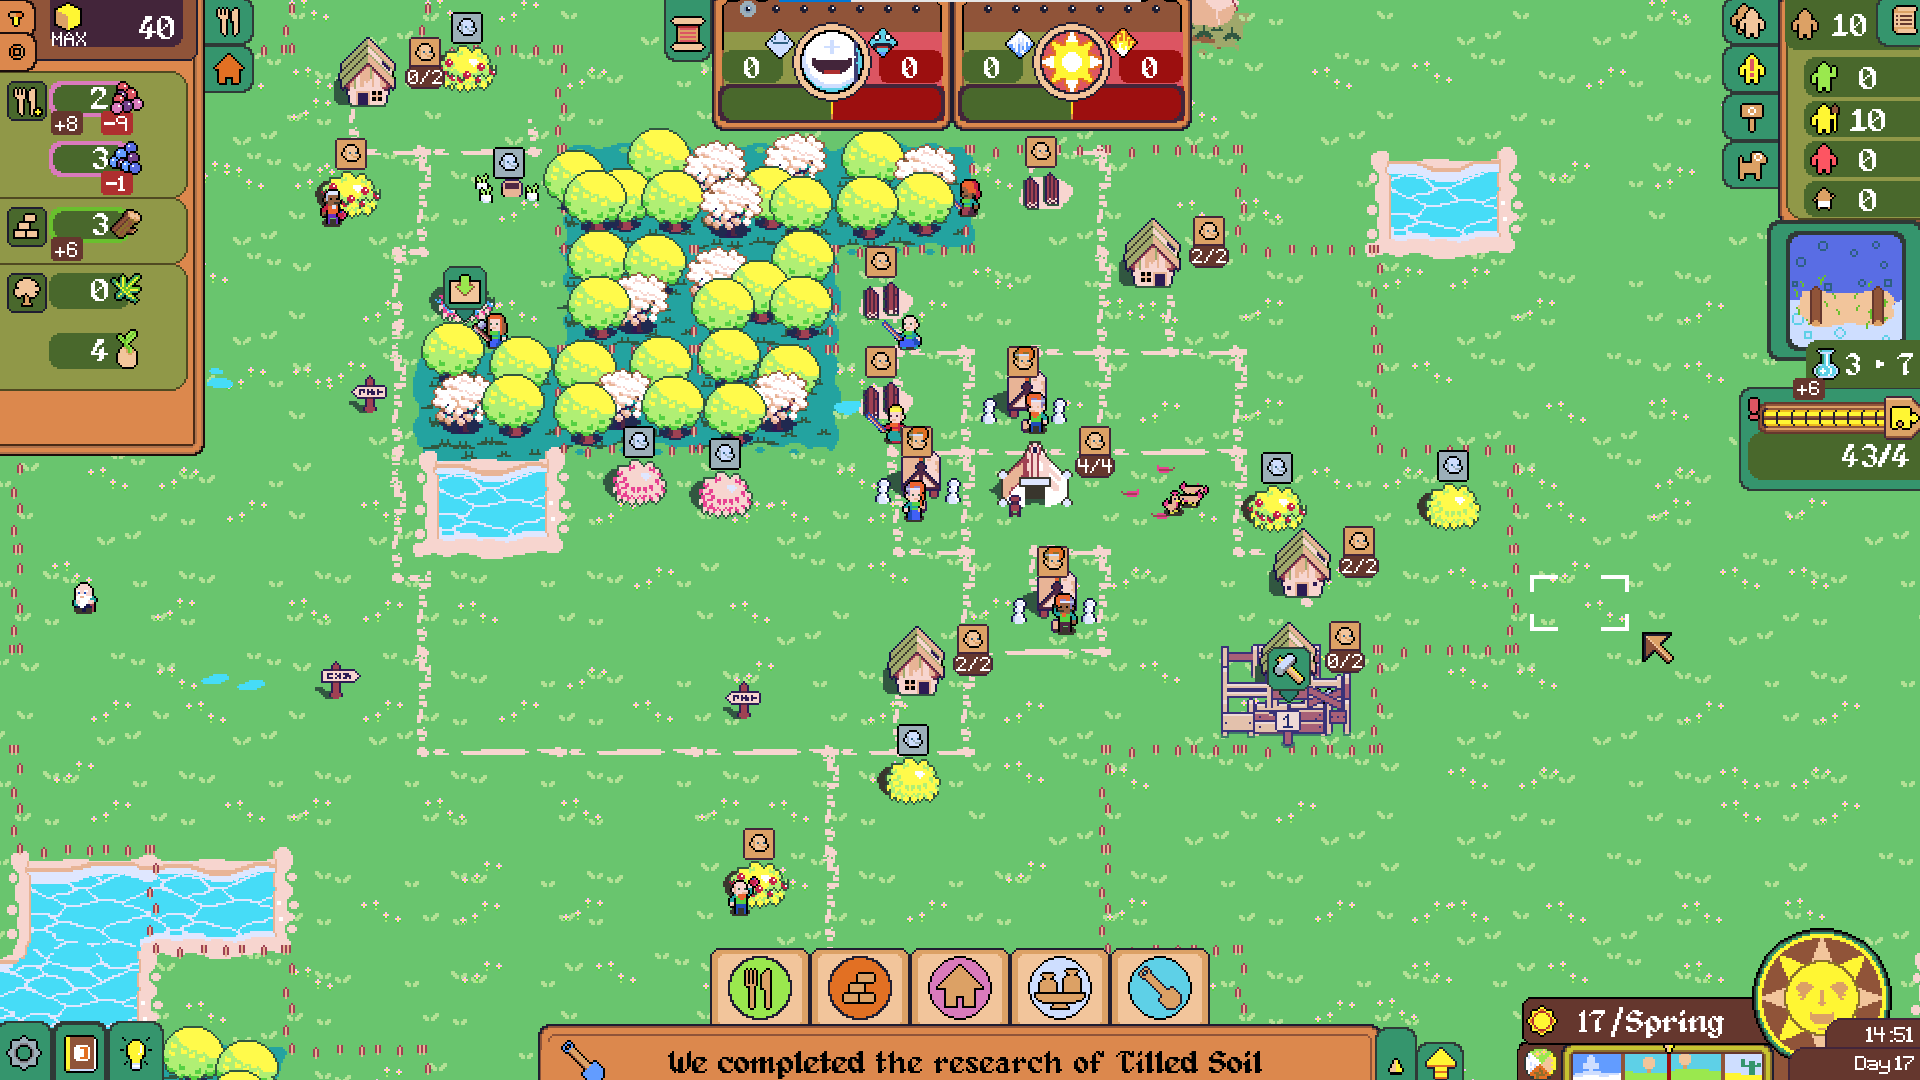
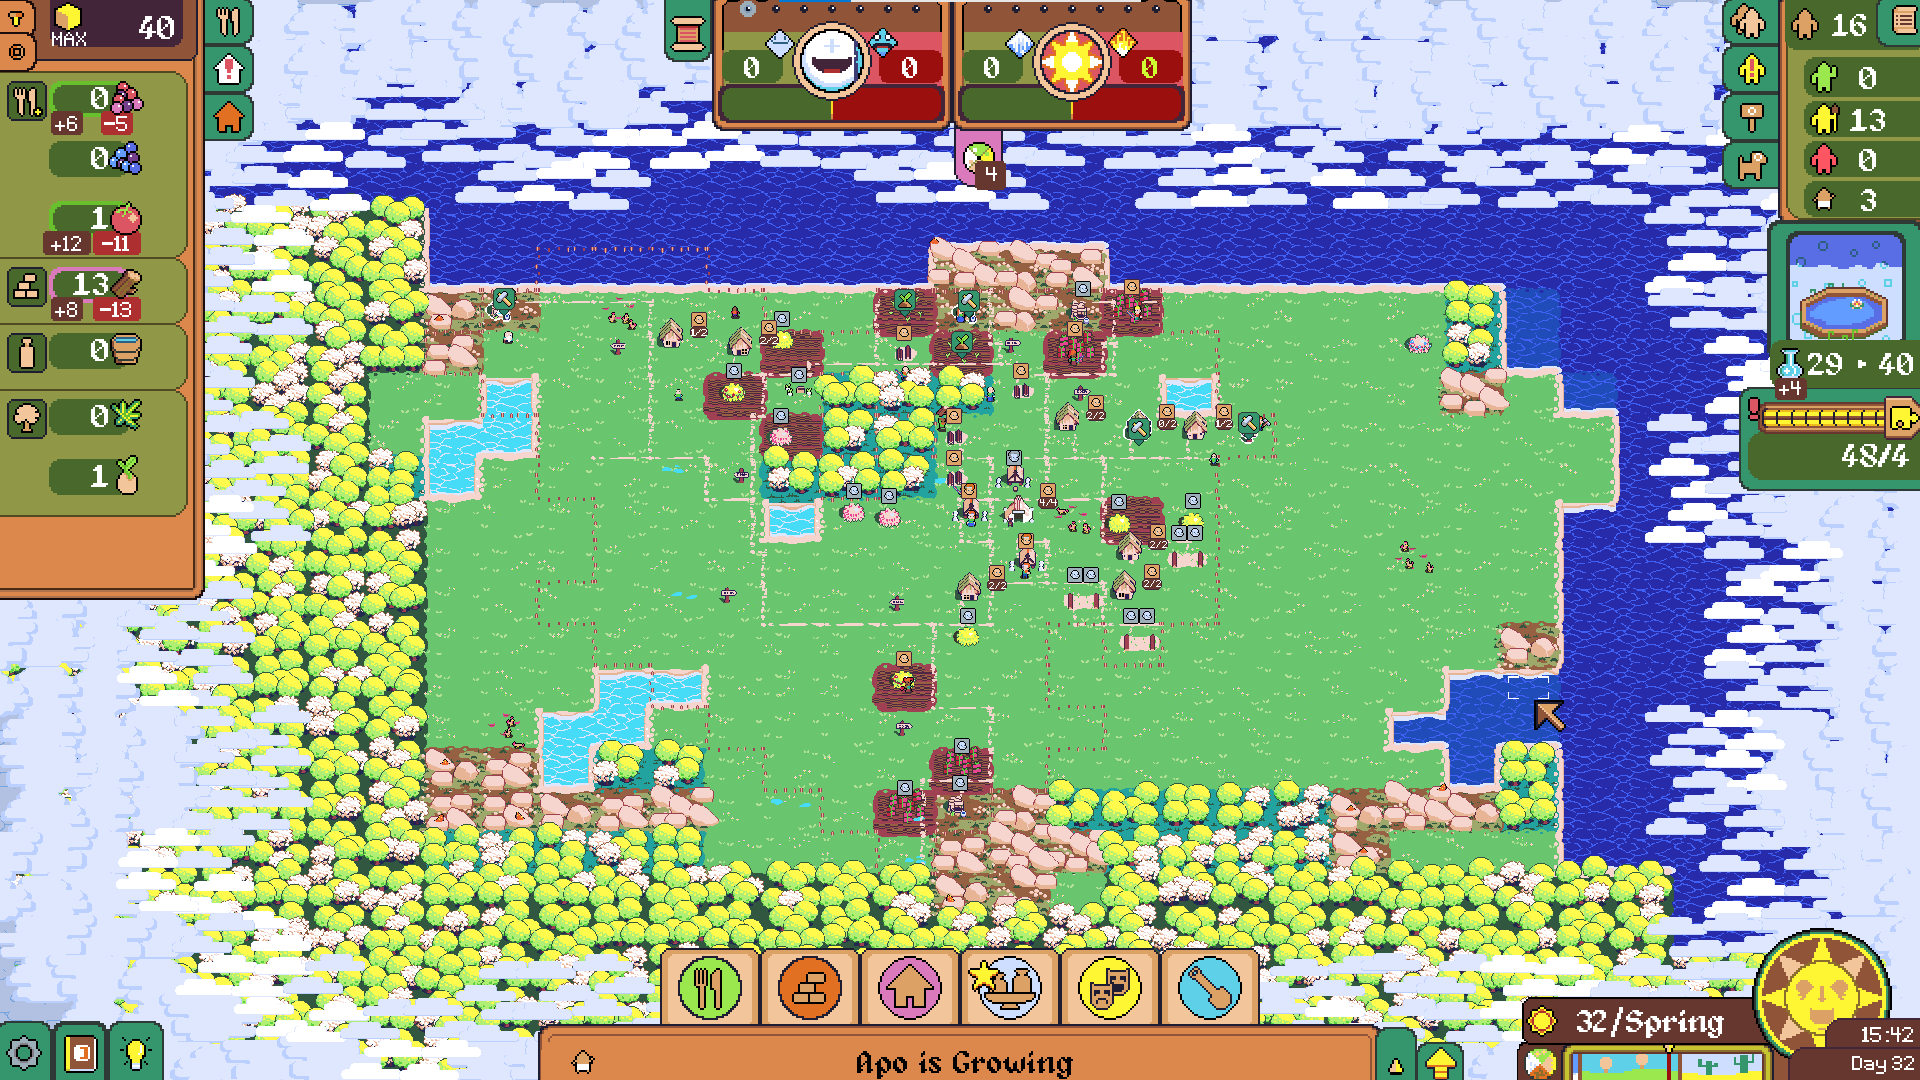
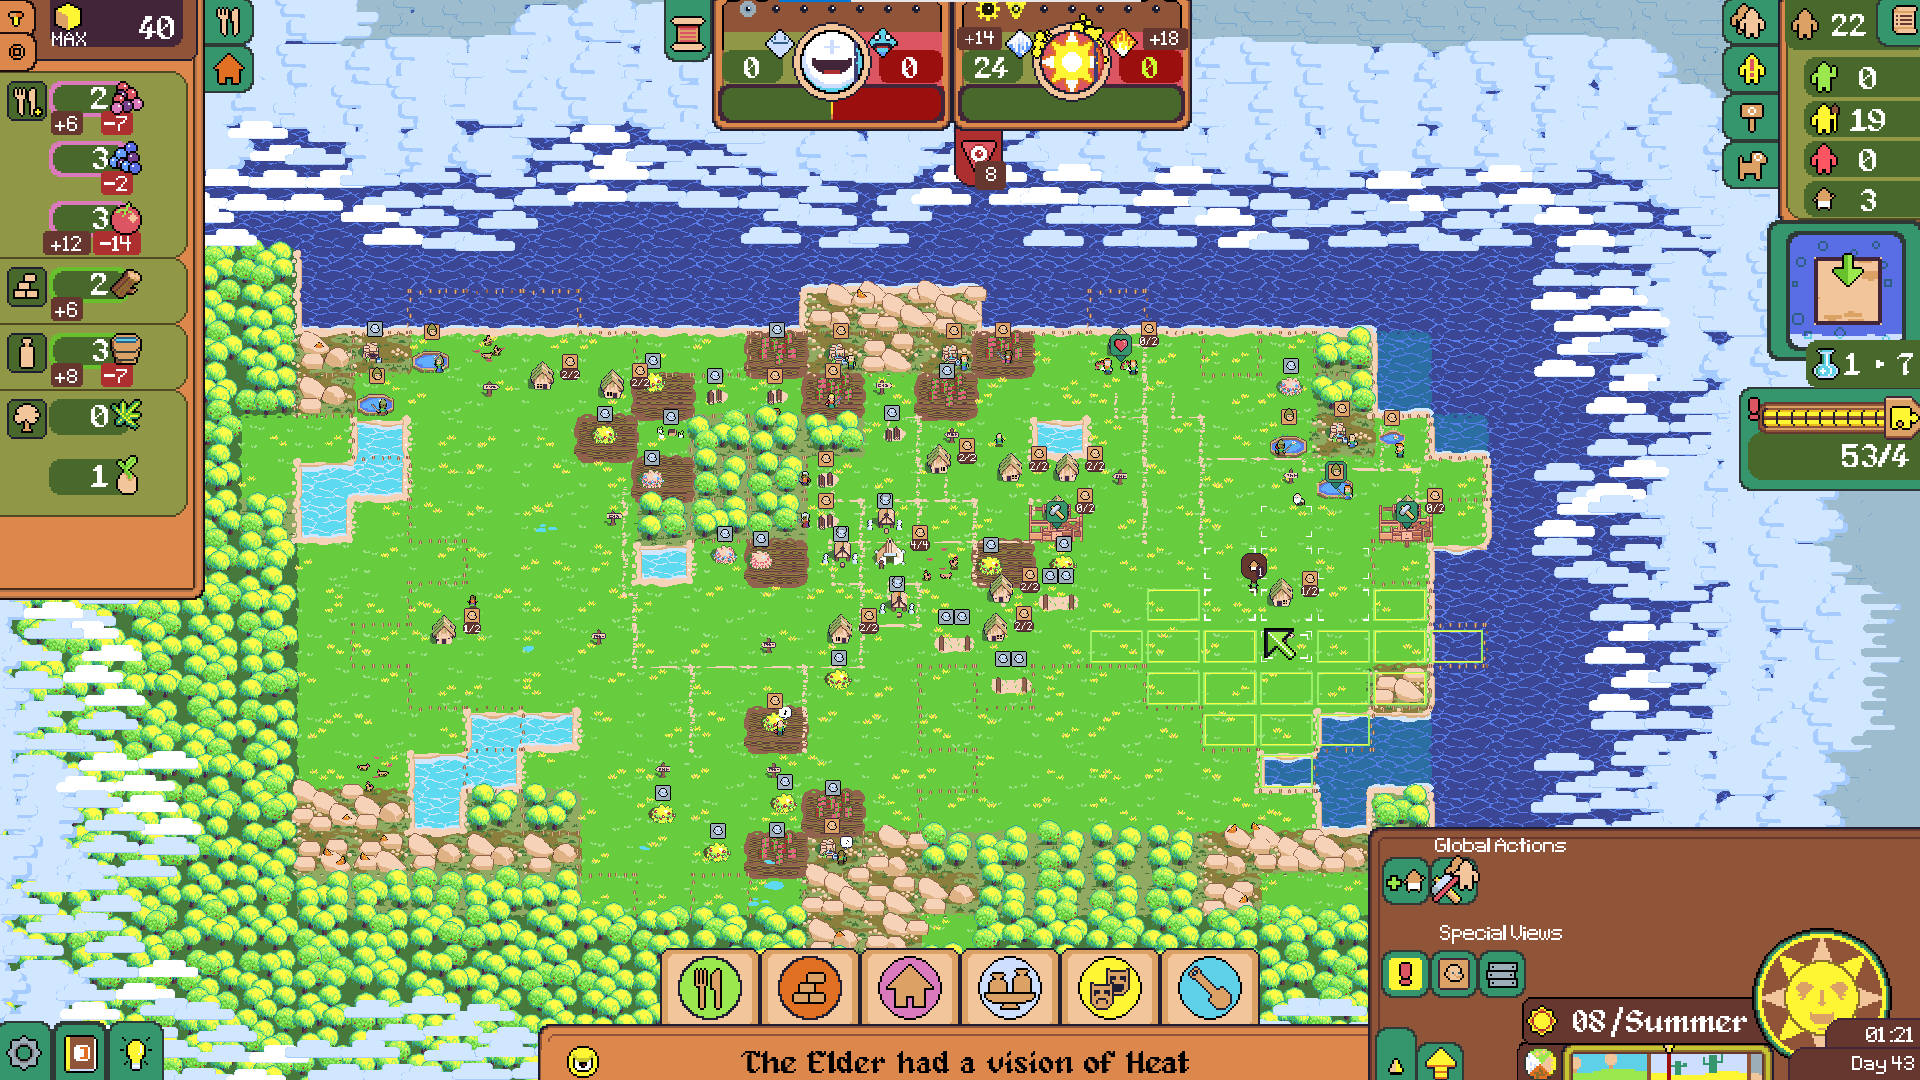
PS: you keep talking about population being so important. It actually surprises me that you sacrfice growth for science so early. But i guess that is this conservativenes for high difficulty level.
墨镜绅士 6 Jul, 2024 @ 5:48pm 
overpipulation is triggered at 30+ instead of 50+ at version 1.2, mind to have the guide updated?
阿茗茗 16 Jun, 2024 @ 9:09pm 
Great guide thank you for saving me! I played 19 hrs but still couldn't complete easy mode hehe :D
Valdemort 14 May, 2024 @ 5:35pm 
Great guide! I imagine with the update that overpipulation dropping is the most applicable? Curious to see how things play out with that. thanks!
Catman  [developer] 16 Apr, 2024 @ 5:24am 
This is so cool!!!

Hope the upcoming patch does not mess it too much eheh :D
Grreenie 12 Apr, 2024 @ 8:14am 
Huh, perfect timing! Recently started this game, and was looking for a way to speed up my early game, so I struggle less later on. Thanks!
Mmm 10 Apr, 2024 @ 9:20pm 
Meaty guide!
ThatOtherDude 10 Apr, 2024 @ 11:40am 
Thanks ! I was trying too hard to avoid the penalty I guess.
Ryder17  [author] 10 Apr, 2024 @ 9:55am 
@ThatOtherDude I avoided talking about Shaman and Captain since this is intended to be a Matus guide. Both of those elders require a separate guide to discuss in adequate detail. I might write those guides eventually, but if I do it won't be anytime soon.

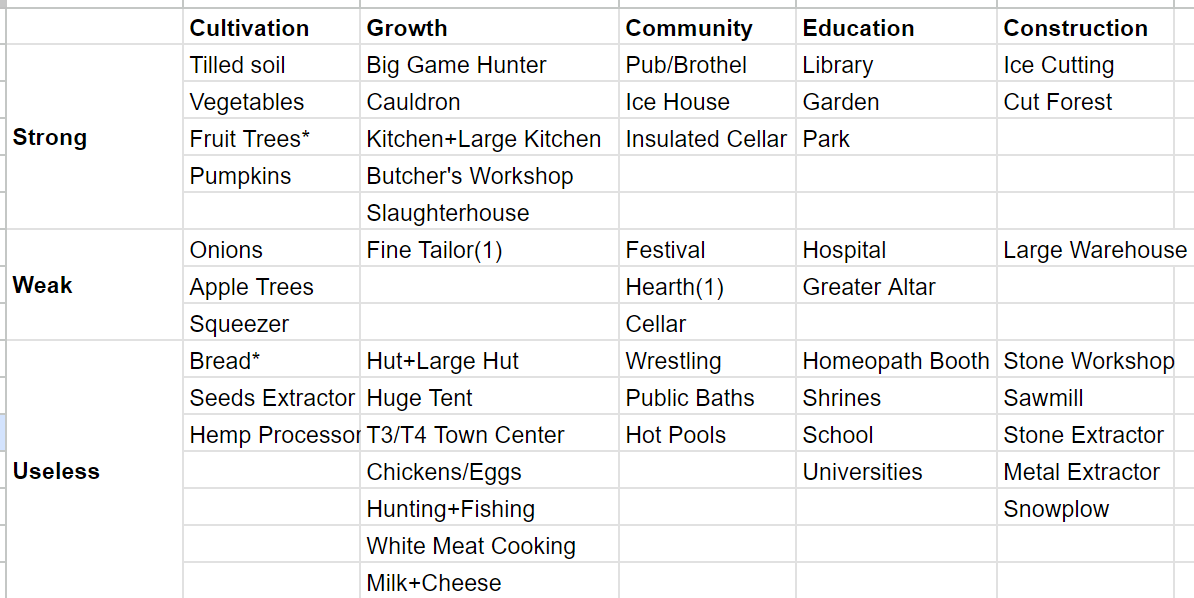
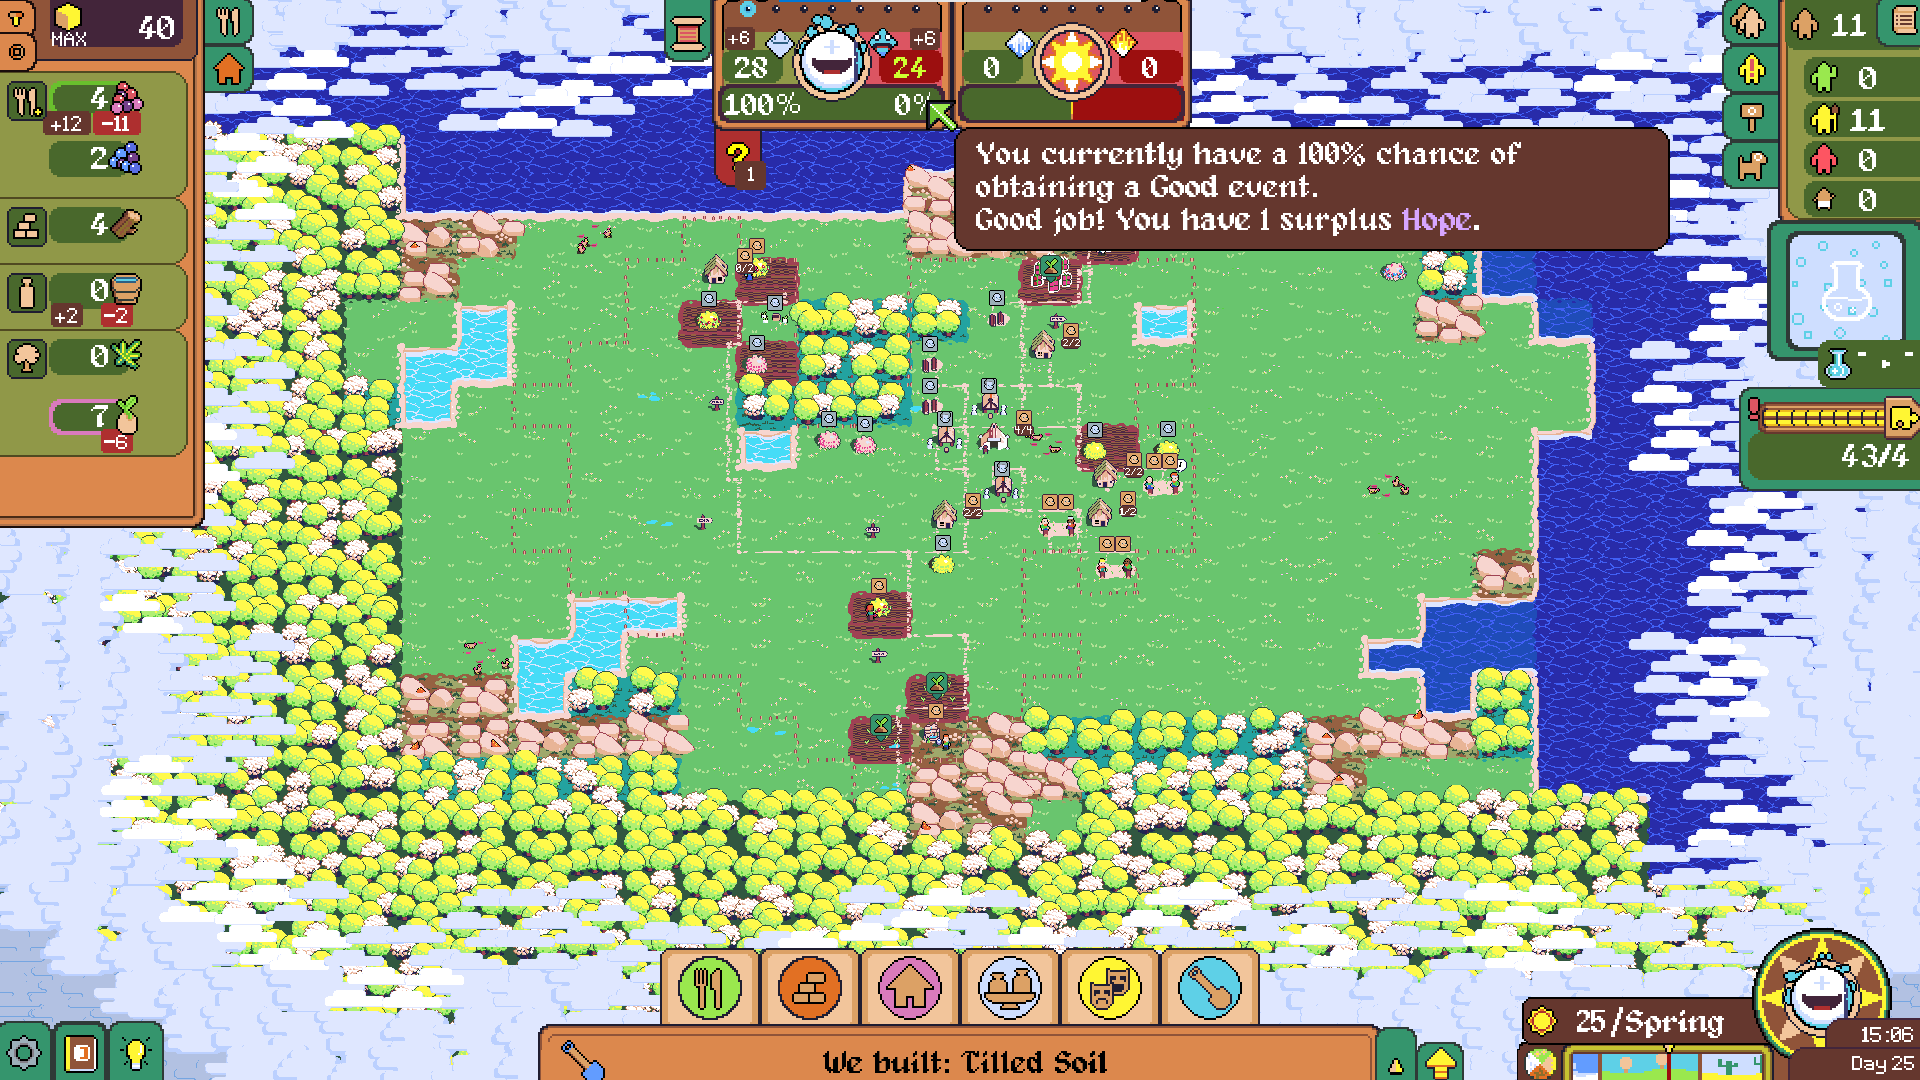
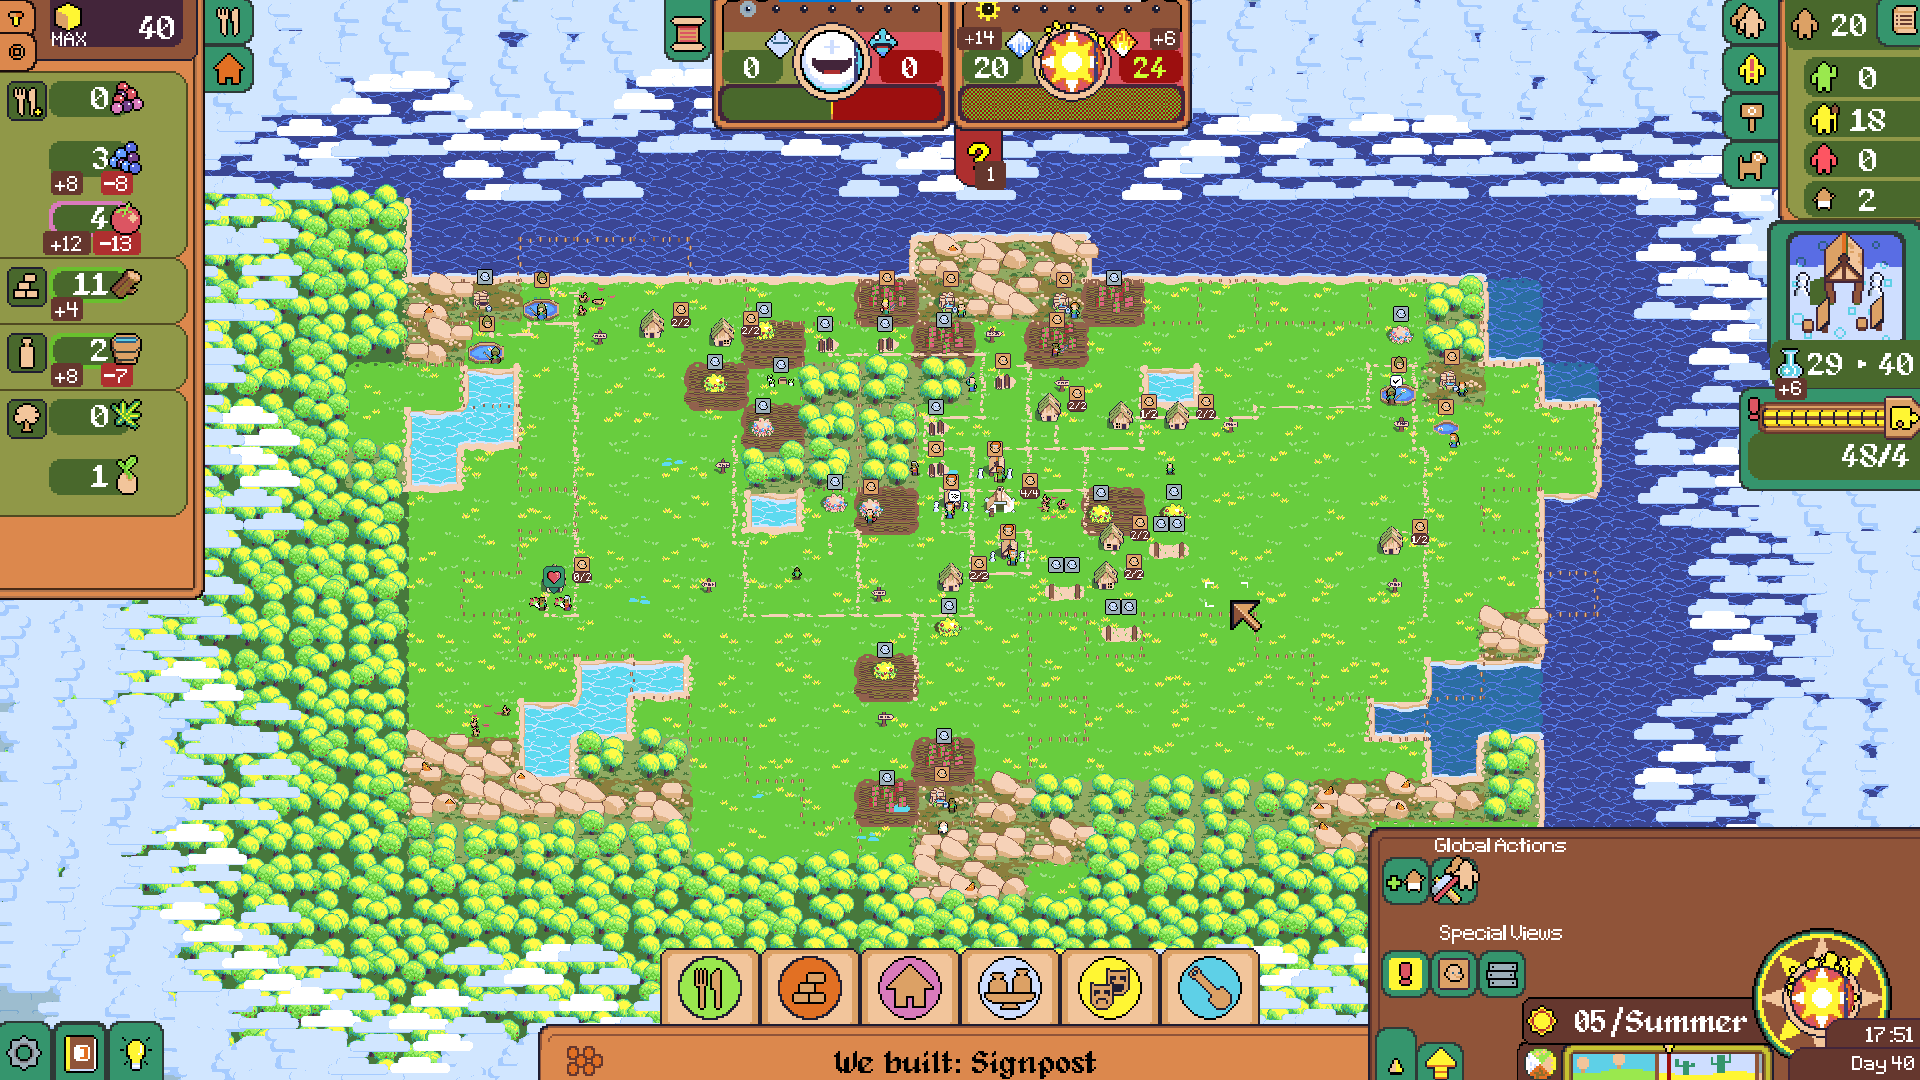
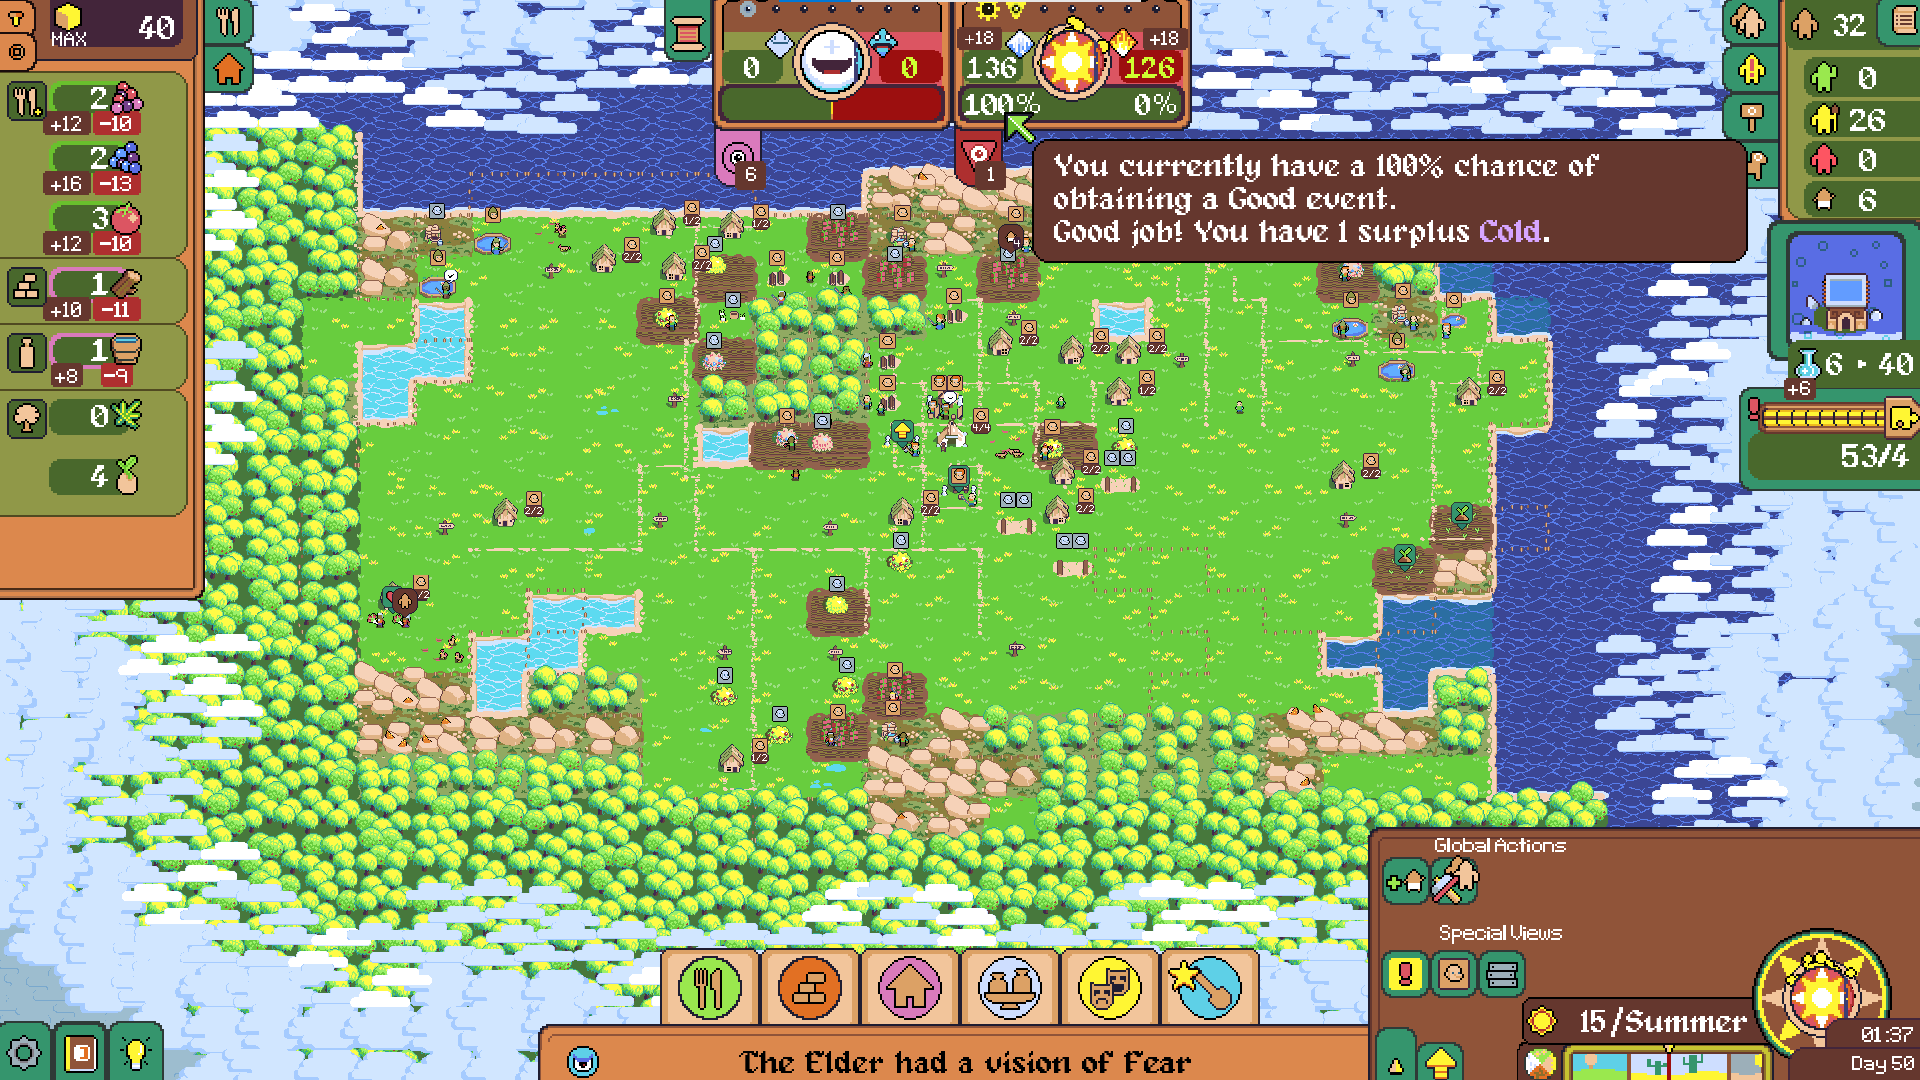
For your particular question, I still use Red Meat Cauldron for Winter on Shaman. It's worse for Shaman than it is for Matus since you need to produce hope to offset the fear gain of killing animals, but is still the most efficient simple food source mid-late game.

If you're looking for more tips on Shaman and Captain, I recommend asking the community in the official Dotage discord server.
ThatOtherDude 9 Apr, 2024 @ 10:34pm 
Could you add a few tips for the differents ancients ? Like how to handle winter with the animal-loving one ?

Excellent guide otherwise, learned a lot !