Kingdoms and Castles

Kingdoms and Castles

62 ratings
The Ultimate Kingdoms and Castles 6x6 Layout
By JT1527
Hello All!

For those that are OCD like me, and want everything to be neat and organized... plus efficient, then this is the guide for you.
This guide will also be helpful and beneficial for new players as a good ground to start off with, or veterans who want to challenge themselves and go into hard/survival mode.

This guide will show you a pretty optimal setup for a 6x6 layout.
I encourage everyone to leave some feedback!
2
2
2
   
Award
Favorite
Favorited
Unfavorite
Keep Square


First up will be your keep square.

The layout is fairly simple; Place your keep where you see fit. Once placed, build roads 1 tile away from 2 corners. I like the aesthetics of the stairs so i base it off of that. Make sure you leave a 1 tile gap on 2 sides of the keep for walls.

Then, you place your chamber of war to 1 side (mines on the left)
Under the chamber are 2 small treasure rooms and 1 well.
Having a road inside your walls should bring the diplomats there, but that is not always the case.
Agriculture
Key Notes: Be aware that these builds do not include their own reservoirs. In my build, I use a large one with my norias/bath house which covers about 2.5 6x6 squares, so you should be able to cover them pretty easily.

If not, I would suggest building one with aquaducts and replace a farm in one of the outermost corners (small reservoirs can completely cover the 2 closest 6x6 squares wherever you place it).


  • Starter
To start, this will be the most optimal setup. No fuss and simple. Pork will come later once you've established iron/blacksmith to get tools.


  • Wheat Focus
This will be if you're starting to see you're short on wheat. The large granary can be replaced with small if you need the 2 extra farms. I've found extra storage is always best for trying to balance your food/villager ratio.


  • Fruit Focus
This will be when you're low on fruit. Typically, you always will be. So you may end up building a couple of these depending on your land limits. No real option for flexibility here. Keep in mind that if your reservoir doesnt cover 1 tile of the 4 tile orchard, the entire orchard wont get the bonus.


  • Yall smell bacon?
This will be the pork build. Fairly simple but you may need a couple of these too. Good thing to know; If you want to keep your agriculture together/close (which is smart), you can find the weak spots in your reservoir coverage and orient the swineheards over them as water provides no benefit to them. You can also swap the fountain for a well if needed.


  • Fish Build
This one is quite flexible and really depends on your map seed. But, the build stays the same. It's very easy to enclose the huts so they dont get destroyed by vikings. Make sure the fishmongers are close by to maximize output. I've found 1 fishmonger per 3-6 huts work best but if space doesn't allow, I've placed 1 for 8 huts.

Build them right on the edge of land next to water, I'm showcasing 10 here because the 6x6 rule doesn't really apply; build as many as land/fish density allows. Then, build a couple piers out on the edge for walls, and enclose them with sea gates.
Housing


  • Housing
This is the best build I was able to come up with. In the middle you have fire brigade, well (or fountain), and baker. Also, make sure your gardens receive irrigation, they get 1 extra happiness from it. The one on the left is not irrigated. The Tavern also has a cottage in this picture, but it's entirely possible to put a large tavern there if your villagers want more tavern.

Tavern
The tooltip says they "want a tavern" but if you upgrade to a large one, it will suffice. There's a villager count/tavern ratio to it that i'm not sure what it is, but 2 smalls are basically the same as 1 large. However, 1 large gives more happiness than 2 smalls and in a larger radius for 2 more staff.

Church
Churches give pretty low happiness, and are small radius. You can swap the clinic/market with it, and in your next neighborhood (in this case, left side) you can then place market/clinic next to tavern and add a manor. Lots of options for flexibility.

Clinics
It's important to note that this build doesn't have a clinic. That's because in this case, my library can span over to the left side and cover all of it but 1 tile. So then, you'd add a clinic instead on the next neighborhood. Alternate them as you build, or just build a couple extra hospitals
Iron/Stone
Before we start, It's important to know these are completely random and the placements will have to be adjusted according to your game. This build is for a random map, if you choose to make your own then you can optimize location.

Ideally, your stone/iron will be inside the road square but if the large one cuts off the road, that's fine too. If it's cutting into another 6x6 square, make adjustments and utilize that square for something less significant or for others that have flexibility (like wood/coal)


  • Stone
So, the important things to build here are the well, fire brigade, 3 masons, and 1 storage. It doesn't have to be a big one, just something to hold stone. The rest of the space is flexible for your kingdom's needs. I'm showcasing here an extra charcoal maker, blacksmith, hospital, and even cemetary with plots. It's really what you'd like to do with it!

My advice would be if you have plenty of blacksmiths and clinics, put all cemetery here as it's typically going to be away from your neighborhoods due to the noise, and cemetery caretakers are efficient workers.


  • Iron
The Iron build is less flexible than the stone build. You want to fit as many blacksmiths as possible, then fill the 1 tile gaps (where they cant fit) with well, fire brigade, 3 storage units, and 1 charcoal maker. The clinic is optional, can be replaced with another charcoal. The 3 storages should be for Iron, Tools, and Armaments.
Army


  • Army

This is the layout for build your armies. Important to note; Once you build the great hall, you can remove it for the hall of diplomacy.

I personally only use siege to take out the aggressive AI, then I don't bother. That space can then be flexible for whatever your kingdom needs. The storage size is flexible as well; if you want an extra stock of armaments, then take a large one. Make sure you have a storage here though for armaments. I'm just showcasing 2, you only need 1.
Wood/Coal


Fairly simple layout. Foresters go on the corners, 4 Large Charcoal Makers go in the center of them, and 1 side has a well/fire brigade, the other side has 2 storages. 1 storage for wood, 1 for coal. Each forester will have 5 tiles to work with, 3 of which will be shared by all of them (the middle 4 tiles are shared)

Works very well, and provides a hefty amount of charcoal. You will only be getting about 35-60 wood each year (after the charcoal makers) but wood is an early-mid game resource, there isn't much use for it late game. If you need more, just shut down a charcoal maker or 2 if you have plenty of charcoal.

I emphasize on charcoal because I use the greek fire guys for defense. They demand alot of charcoal.

This will be the biggest resource bottleneck. If you need alot more wood to expand early-mid, I would advise to build some temporary foresters next to trees you haven't cleared yet and place a road to them.
Treasury


  • Treasury
The treasury is also fairly simple; walls along the outside, 2 roads inside (for fire brigade) with a well, and a total of 7 large treasury rooms.
Pair this with the 2 small treasuries, and you'll have a 19.5k gold stock which should be more than enough. Walls need to go around these buildings as some vikings will head straight for them if left out in the open.

If you need more, you could always build a second square.
Amenities
So now you've gotten a few neighborhoods, your foods all dialed in, plenty of wood and coal for the winters ahead.. You're steamrolling the iron and stone, you've got a small army for defense.
But then you noticed your villages want a bath house!


  • It's time for some luxury!
I present to you the bath house build. Nothing fancy, but some real key features here.
The main one is the bath house which is some much needed happiness. Not only does it remove the debuff, but it also provides 9 happiness in a huge radius (covers literally all 6x6 squares touching it).
I cannot stress this enough, this needs to be in the center of your neighborhoods. Get as many as possible around it as land permits.

Obviously, if there's some real key fertile land in 1 square, don't sweat it. Keep your agriculture there!

It comes equipped with 2 norias (you need to build 3 moats to place the noria in), a fire brigade, fountain, theater, 3 extra tiles (i used for grave sites) and a large reservoir.

The large reservoir spans about the same distance as the bath house. It'll provide irrigation for all your neighborhoods so you can place fountains in them. It'll also irrigate your agriculture squares if some squares are for that.

*Key note: As you expand more, you will need a 2nd bath house at 1001+ pop. If you've filled all squares around this with neighborhoods, youll hit 1k easily. It's possible to replace the theater with a 2nd bath house if needed. I would just build a 2nd square like this if your map size and land is big enough. It also allows for better Noria distribution.


While we're on the topic of Norias.. if you need more of them but cant fit them on your land, this is a simple build.

Find some fresh water, and place them on the edge. Place roads where the connectors are, then aquaducts, then gates over the aquaducts. This allows water to come into your city without breaking your wall defense. They will be vulnerable to attack, so check in on them after the viking raids.

Make sure you have a 1 tile gap between the wheels and you'll be good to go!


  • Great Library
Not my favorite amenity, but definitely a huge one. It's a bit tricky with it being 4x4, no other amenities can fit in here except for the church. The Church is mandatory to build a Cathedral if you want one. If you dont, all of these tiles are flexible outside of the fountain. At this point there should be multiple fire brigades nearby, as such they wont be really needed here.

I'm not sure if you keep all the researched upgrades after removing it. If you do keep them, I would 100% remove it and turn it into the jousting arena.


  • Jousting Arena
My personal favorite, The jousting arena. It demands a 6x4 radius, so there's not much more to build with it. I'm only showcasing all of the possibilities here, use this land for your kingdom's needs. The fountain/well is mandatory though.

Please note that the jousting arena is in no way a necessity for a good kingdom, it just provides alot of happiness in a wide area. It also gives the AI an option to have their jousters compete with yours for RP. I just love it for the aesthetics and if I lived in the medieval times, I'd definitely go to a jousting match over a theater.


  • Cathedral
Ugh, the Cathedral. I don't use them. But for the sake of a guide, here's a good build for them.
They do provide a small amount of happiness in a wide area, and have the chance to convert vikings to peasants if they get in the radius. It's such a useless building imo, if vikings got in it's radius, i'm doing something wrong. It requires 20 workers, even the jousting arena requires less.

The things here are (again) just being showcased. I would keep the fountain and theater where it is, and the fire brigade (or clinic) as well. The rest will be up to you.
Dock


  • Dock
This build gives you a small port for ships to enter, and 4 docks. It's also advisable to place storages nearby for the docks to have easy access to fill logistics based on what you want to sell. It also helps having some spare storage for more food in general. A tavern goes here because it saves you space in your neighborhoods for more housing and pop.

The port is a 2x4 of moats starting from the gate in the middle.


Just a real quick and dirty explanation of how docks work.
The current/desired of each resource means how much it currents has, and how much you want it to have. You can change the desired to whatever numbers you want to sell or just store. The default total for all resources is 500, the dock can hold up to 630 so you can add to it as is.

the little boxes on the right of each resource can be clicked to "lock" in the resource, meaning your dock workers fetch the desired resource, and your kingdom cant use it until it fills over the desired amount. This makes sure you have that resource available for when you want to trade it to other AI Kingdoms or to the merchant ship for gold.

I also like to rename mine either Inbound/Outbound or Export/Import. It lets me keep track of which docks I use to take from to trade (export), and which ones I want to drop off goods for my kingdom to use (import).
Storage and Transport


  • Storage
Some may integrate this into all other builds, which makes sense. But for a 6x6 layout, I opt for small ones at the site, and then stock up these bad boys for the end game.

What you store on them is completely your choice, and they should be changed around depending on your projects. Ready to build that big stone wall? Set 2-3 of these guys on stone. You like using Greek Fire? Definitely going to need 2-3 of these stocked with coal to not let your neighborhoods suffer.

My word of advice is this; have 1 dedicated to each resource, which leaves 2 to use for whatever big project you have going on. For end game, have the 2 spares for coal. It sounds ridiculous, but those greek fire guys will ruin your coal industry. Trust.


So much like the dock, you can change the desired amount on storages. The default is 900 for each resource, and it can only hold 990.

I would change them by deleting the numbers on other resources, keep 1 resource (like I did here for coal) and rename it for that resource to use with transport carts. The 9 workers do gather resources on their own, but they hold like 3-4 at a time and are slow.


  • Transport Carts
Hands down, the most underrated tool at your kingdoms disposal!! (when used properly)
These guys cost no pop, little resources, and provide a huge benefit.


So, to break this down.

You can see the color coordination (sorry for my colorblind peeps, this part kinda sucks) in conjunction with the logistical part of it.

Press the + sign at the bottom to add a new bubble/path and move it to the desired storage location. Match the color with the name (which is why renaming your storages is important) of the storage(s) you want to transfer from. Here, I want to transfer Wood/Coal from my main storages that are right next to the foresters/coal makers to my storage square.

This allows me to stock up on these resources much faster; small storages can clean out the builders much quicker, allowing the builders to just keep producing instead of clearing it out themselves (which is what they do if their building is full). Once they fill up, they stop doing that.

So the transport cart (and the big storage workers) come and take from them to help them out.
In order to do that, you need to set up pickup (arrow pointing down) and drop off (arrow pointing up) amounts. The transport cart holds 70 max, so here I set the cart to pick up 35 each from the wood/coal main storage lines and dropping off at the spare storage. I set them both to 70 because once I had into an issue with a merchant ship where it had too many of 1 resource somehow and didnt clear it out.

Speaking of merchant ships, they function the exact same way with docks. The only difference is merchant ships hold 270.

Wall Defense


A little extra point, Wall defenses come in all different shapes and sizes. There is no 1 size fits all for any game. A good rule of thumb is to line them up all around the edge of your land/kingdom. Creativity goes a long way here. I placed mine 7 tiles high all around, with max range for my towers.

The important key notes; Greek Fire requires 5 walls high for max range, Ballistas require 9, Archers require 10. The ballista min range circle also increases the higher you go up. So if you want a smaller minimum range and don't mind sacrificing some max range, you can just lower the wall height.

This is the best placement for a 6x6 layout; ogres are always my biggest problem so i go ballista heavy. 1 on each corner, and 2 in the middle of archer towers. Greek fire on every gate (vikings seem to like gates if you have everything closed off perfectly).

Obviously you want to place more greek fires where vikings tend to land but CAUTION: doing this uses ALOT of charcoal. I mean a ton, and it doesnt show up in the charcoal tooltip. So have plenty of it stocked.
And there you have it!
This is the end of my guide. Thank you all for checking it out, it took me a couple days to piece it all together. I have only used these builds once personally as of now, because before I always made big maps and customized my land so I can make huge 7k+ pop kingdoms with 9x9 layouts. But, I'm on year 600+ and it's working very well.

Now I'm doing more islands so I can start off with limited space, and have to make settlers to go overseas and conquer new lands. The 9x9 layout doesn't work good with smaller kingdoms, which is where the 6x6 comes into play.

Enjoy the information! If you have anything to add, any questions, or a comment feel free to reach out via the comment section. Good luck and have fun!
6 Comments
Light Of Ra 11 Jun @ 10:14pm 
i think there should be more anti dragon guides :steamfacepalm:. they are making me quite uncomfortable. thanks for the guide :steamthumbsup:
JT1527  [author] 16 Apr @ 3:53pm 
@DigitalLeo87

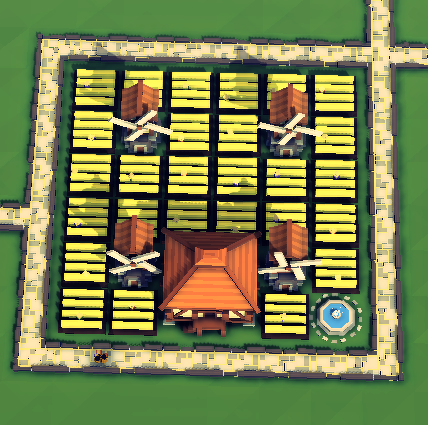
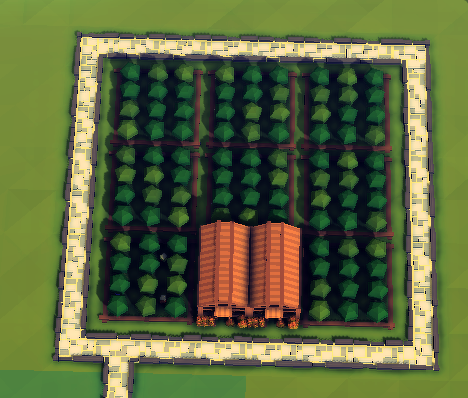
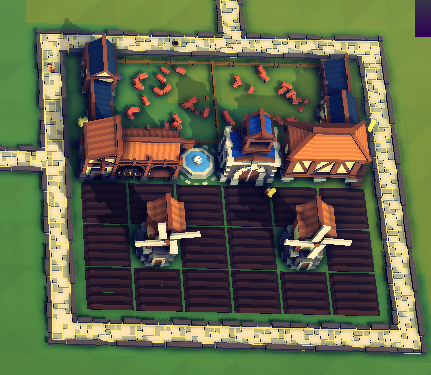
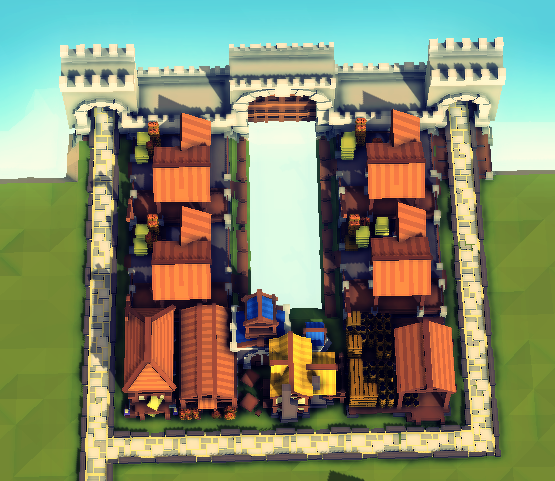
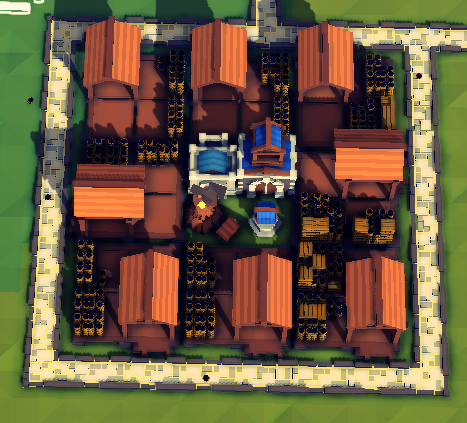
I did some testing, and if you only allow the same exact 6x6 to have trees grown in them with all tiles allowed (IE nothing else inside of that 6x6 square), the wood harvested per year only changes by about 10%.

So the 5 tiles per forester is plenty to work with while optimizing space. Wood is a early game resource, falling off as you transition into mid game. and then its only used to upkeep coal costs + load up for greek fire.
DigitalLeo87 12 Feb @ 7:38am 
for the wood/coal setup, how are we supposed to grow enough trees if all the tiles are taken up by charcoal and other buildings?
wobblyboost 26 Jan @ 8:55am 
Awesome, was having trouble finding a good recent layout guide, learnt a few things I didn't know even after 1K hours and the 6X layouts look very sensible and can't wait to try them.
darroneagle24 3 Dec, 2024 @ 7:15pm 
Thank you for this awesome guide.
kulagun 28 Nov, 2024 @ 8:49pm 
Ty for making this guide, it must have taken a while. I really do appreciate it