Dyson Sphere Program

Dyson Sphere Program

52 ratings
StevenApe's introduction to malls
By steven
A mall automates the production of buildings, to help you play more efficiently.

Over the years several different mall designs have come up, all with different advantages and disadvantages.

This guide catalogues different types of malls, and discusses their pros and cons, as well as how to design and build them. The goal is to provide an overview of the possibilities, and to provide an in-depth understanding of each design's fundamental features and quirks. This should help you find the most appropriate solution for your game. It may also provide inspiration to come up with new ways of putting things together.
7
3
2
3
2
   
Award
Favorite
Favorited
Unfavorite
Introduction
I am a mall aficionado. I have designed a dozen or so malls, and I am always interested in new approaches, new features to add, or new ways to optimise. A couple of my designs I consider strong. Inevitably, this guide will be biased towards my design sensibilities and draw heavily on my own mall building experience. However I've done my best to give as fair an overview as I can provide, and to do justice to other people's designs and viewpoints as much as possible.

Automating the production of all buildings in the game is a complex problem, and over time several rather distinct approaches have been developed. In this guide I will call such a design a mall (even though certain high profile youtubers don't like that term and prefer other terms like "manufacturing hub").

Malls can produce any item, but they are normally used to produce items that have a low or medium production rate: most malls involve just a single or just a few assemblers per produced item. This is what makes them especially effective for making buildings, although other low volume items can also be included, such as logistics drones, vessels, and bots, as well as attack drones.

For items that are used in greater quantities, such as foundation, fuel cells, ammunitions, graviton lenses, space warpers, proliferator, carrier rockets and solar sails, it is normally better to use a dedicated production chain. Whether or not such a separate design is viewed as part of the mall or not is up for debate, but this guide will mostly consider the production of low volume items. The production of higher volume items is briefly touched upon in the section about hybrids.

Currently there are 61 items listed on the "buildings" page of the replicator, and there are 8 types of drone, so a full mall produces 69 different items, which I will collectively call "buildings" even though not all of them are actually buildings. These buildings are produced from around 40 different input materials. So the problem that a good mall has to solve is how to connect 40 input materials to at least 69 different assemblers. Of course the input materials themselves ultimately have to produced as well; early game malls often include this initial processing and can work solely based on raw ores, which is very convenient. But later in the game that production becomes unwieldy, and how much you need depends greatly on play style, so late game malls typically assume that those materials are made available by another part of the factory.

The best way to categorise malls is in terms of the technology they use to solve the core logistical problem of hooking up the right inputs to the right assemblers. Over time, several solutions have been developed, each leading to a different type of malls. Each mall type has its own dedicated section in this guide, where I will describe the core concept, give examples of how to build it and discuss strengths and weaknesses. The most common mall types are:

  • A bus mall has a number of parallel belts, each carrying one building material. The assemblers obtain the materials they need from this "bus".
  • A box mall uses a sequence of stacked mk1 storage boxes to distribute materials; three different materials per storage box. The assembler is attached to the storage box at the bottom and can access anything that is available in the entire stack.
  • A bot mall uses logistics distributors to collect the right input materials for a building.
  • A sushi mall uses mixed belts, or sushi belts, that contain multiple distinct materials types, to be able to present many different materials to the assemblers of the mall using only a few belts.
  • A PLS or ILS mall uses logistics stations to import the materials required for a building.

There are also choices about how to make the produced buildings available to the player. Since these considerations are mostly the same for each mall type, I have postponed most of this discussion to a separate section at the end. So, for the majority of this guide, we will look at the part of the mall that requests ready-made input materials in the way most convenient for it, produces buildings, and sticks those buildings in storage boxes. What happens before and after that is discussed in greater detail in later sections.

Each mall type has different properties. Some of the most important properties are these:
  • Tech level: what tech do you need to unlock before you can build this mall?
  • Max throughput: at what rate can this mall supply the assemblers? Is perfect saturation guaranteed?
  • Area per building: how much space do you need for each building in this mall? This only counts parts that are repeated for each building in my reference mall, including one output box. Note that all malls may need additional space to export produced buildings. Malls other than PLS and ILS may also need additional infrastructure to make all buildings available properly.
  • Resource lock-up: if the mall is idle, then how many resources are locked up in storage buffers and boxes inside it? (These numbers are an estimate based on my own full fledged mall designs of each type; they include PLS buffers of about 1000 materials per slot, materials sitting on belts as well as inside storage boxes.)

Another relevant issue is whether a mall design supports full proliferation. You can gain the extra products effect or the speedup effect on the production of any building that does not have another building as input material. However, upgraded buildings that take a lower tier building as input can only be proliferated for speed. Whether or not proliferation is worth it can vary even within a single mall type, depending on the details of your design, so this is discussed for each mall type individually.

For a first quick overview, see the table below. For more detailed information, see the section for the mall type you're interested in.

Type
Tech level
Max throughput
Area per building
Resource lock-up
Bus mall
blue
high
44 - 276
50k
Box mall
yellow
high
48
320k
Bot mall
red
moderate to high
68 - 96
70k
Sushi mall
blue / red
moderate
52
50k
PLS mall
yellow
very high
300
140k
ILS mall
yellow / purple
very high
440
140k
Which mall should I care about?
In case you're not browsing this guide out of idle curiosity, but actually looking for guidance on how to build a mall, right now, in your actual game, then here are some recommendations.

If you have little experience with the game, or with malls:
I recommend placing down a mall that you can understand and make your own, rather than downloading a blueprint and using it as a black box.

The most straightforward malls are the five belt mall, the full bus mall, and the bot mall.

  • The five belt mall is the most straightforward. You can start building the five belt mall once you have blue science research unlocked, so pretty early in the game. It is easy to build and it is effective until the late mid-game. At that point you will have more experience with the game and a better infrastructure, so you'll be able to switch to another mall design easily at that point, if you wish.
  • The full bus mall is also easy to understand, it can also be built on blue science, and it can take you all the way to the late game. If you want to use this mall, you might also want to watch Nilaus' video about it; you can find the link in the appropriate section. Keep in mind though that this mall will be very large; you will definitely need to unlock foundation before trying to build this.
  • The bot mall is a solution that many players find intuitively. You can build it once you've unlocked logistics distributors, which requires red science matrix research. Bot malls have few downsides, and like the full bus mall, they can be built out gradually. I would recommend using the bot mall segment blueprint from the bot mall section, or designing your own bot mall segment blueprint. You can then add buildings one at a time without too much hassle.

If you have more experience with the game or you wish to broaden your scope:

In this case you are probably already equipped to make up your mind which mall you'd like to try.

I am personally very proud of my sushi mall design, which can also be built from a very early stage in the game, and which is completely reliable and effective until the late game, so I can't resist plugging that one. I have another guide specifically about how to build that mall. Alternatively you can use a five belt mall until the late mid-game and then stamp down the blueprint, obviously.

If you don't like sushi, fair enough; in that case just read through the different designs and see which appeals to you the most. I have the least experience with the bento box mall and I think of it as somewhat niche. I really don't recommend building it unless you are already in the late mid-game and are producing at a substantial scale, or you want to experiment and see how it works for you.

Bus mall: five belt design

This may be the most iconic type of mall in this game, which pretty much every serious player has built at one time or another. It works by creating five belts with the most important materials for early game buildings: gears, magnetic coils, circuit boards, iron ingots, and stone bricks. These belts run along a line of assemblers, three belts on one side, two on the other. Each assembler gets all the materials it needs from this bus, and then reaches across the two belts to store its output in a storage box. The storage boxes initially have their storage capacity restricted to 1 cell, so that the mall doesn't make insane numbers of every building.

This allows you to build mk1 belts, mk1 sorters, tesla towers, wind turbines, splitters, mk1 storage boxes, mining machines, assemblers, gauss turrets, smelters, and thermal power plants. What is especially nice is that you can simply connect all assemblers to all bus belts, and as soon as you select any recipe supported by the bus, it will start working.

To stock the five belts, typically 2 assemblers each are used to make the gears, magnetic coils and circuit boards, respectively. A full belt of iron ingots is necessary. For the stone bricks, anything between 3 and 6 smelters can be appropriate.

This mall can be made very early in the game, even before blue science has been researched. It greatly facilitates early expansion, and tends to produce enough of the buildings it is making.

Squeezing in more buildings
With some hacks, it is possible for this mall to support a number of additional buildings:
  1. Have one mall assembler make electric motors, and use direct insertion to make water pumps and mk2 sorters.
  2. Eventually switch out gears on the bus for glass, to make first traffic monitors, then matrix labs and liquid storage tanks.
  3. Switch out magnetic coils for plasma exciters, and iron ingots for steel to make liquid storage tanks, wireless power towers, oil extractors, oil refineries and chemical labs.

Preparing for the midgame
It is possible to build this mall in such a way that it remains usable throughout the game, although frankly, you might find it easier to simply ditch it at some point and build a new version when you're ready.

If you do know you'll want to keep using the mall, there are a couple of things you need to pay attention to from the start:
  • Make sure that the mall is placed somewhere on the planet that you feel comfortable with later on in the game. You might not want to place it smack on the equator, because that is prime building space you'll want to use for other things. A good place is one tropic line out from the equator. Place the boxes 15 cells from the tropic line, and the assemblers further out from the tropic line still, so closer to the pole. It may be difficult to find a good spot at the very start of the game, when the planet is covered by ocean and you are looking for a location with convenient resource nodes nearby.
  • Keep one extra space in-between the assemblers, so place them on the highlighted grid lines 5 cells apart. This is necessary so later on you will have enough space to add one interstellar logistics for every five assemblers.
One interstellar logistics has been unlocked, you can simply upgrade all the belts to mk2 or mk3 if you haven't already, and supply all the components the mall needs from a logistics station. See the section "Delivering the buildings" for more information about how to set up the ILSs.

Variations
  • If this mall is intended to be very temporary, it is possible to skip the stone bricks altogether, so this mall only requires copper and iron ores. In this case, the production of materials is also typically scaled down to only one assembler each for gears, magnetic coils and circuit boards. This can be set up more quickly, but it does mean that items like smelters now have to be hand crafted. It is an effective temporary solution though.
  • Some players use three belts on either side of the assembler column. This makes it impossible for the assemblers to directly access their output boxes, so instead, belts run from in-between the assemblers, over the bus belts, to allow the produced buildings to escape.

Throughput and dependencies
If all assemblers are working at full tilt, the first few may consume an entire supply belt, starving later assemblers. In particular, this will happen when the mall is starting up for the first time. Later, when a lot of the storage boxes have filled up and the corresponding assemblers have stopped working, the materials will progress further down the belt and later assemblers can get started.

For this reason, you might put more important buildings closer to the start of the mall, although in practice, these dependencies tend not to be too bad under normal use, and you can mostly ignore this issue.

Spikes in the demand for any particular building can be smoothed out by using storage boxes towards the start of the mall that buffer the belt materials. Place the storage box on top of a splitter so you don't need to worry about sorter throughput. If the production speed for one of the materials is lower than the consumption rate, the buffer box can top up the belt. (If the mall is bottlenecked by the belt speed, you can obviously upgrade the belts.) These buffering storage boxes are also convenient in the early game because they allow you to grab the materials easily for handcrafting.

Sorter bottlenecks
While you're working with mk1 sorters, you have to be wary of sorter bottlenecks. A mk1 sorter delivers only 1.5 items per second, divided by the space between the two things it is connecting. You can click on the sorter to see its actual throughput.

So the sorters connecting the assemblers to the output boxes can only deliver 1.5/3 = 1/2 buildings per second. For buildings that produce quickly, like belts, which are crafted at 2 per second, you might want to upgrade the output sorter, or use two sorters instead of one. Do keep in mind though that this also increases the risk of consuming the iron supply prematurely!

Proliferation
Of course the five input belts can be proliferated if desired. However any building that relies on direct insertion cannot be proliferated, which means that quite a few assemblers will not normally gain a proliferation boost. You also have to make sure to proliferate all the places where you switch out the material on a belt for another material.

I have usually not found it worth it to proliferate this mall, and I recommend against it, but some players do prefer to. If you want to do this, make sure you leave some space for the spray painters when you build this mall to save yourself some pain.

Links
Bus mall: full bus design

The five belt mall of the previous section is convenient, because it doesn't take a lot of space or materials to build, and can make a lot of vital early game buildings. However you can't easily extend it beyond twenty-something buildings without the design turning into a big bowl of spaghetti.

For a long time, most players considered larger buses to be ineffective in Dyson Sphere Program, and people would produce more advanced buildings using other techniques, mostly using ILS malls, and later, bot malls as well.

However, as the number of buildings in the game kept increasing with each update, there started to be more demand for easy, flexible solutions that would easily extend into the mid- and late game.

The youtuber and twitch streamer Nilaus then developed a larger bus-based design that was heavily optimised for ease of use: the design goal clearly was to make it as easy as possible to build and extend a large mall, from very early on in the game.

The main idea of the mall is to have the belts of the bus run elevated by one grid cell, and with one grid cell in between them. This allows splitters to be placed at regular intervals on each belt; materials can be branched off very easily to supply the assembler.

While the design did catch on and has become quite popular, there was also criticism:
  • As the top picture shows, the bus quickly becomes very large, taking up a huge amount of good buildable land, which is not yet abundant in the early game.
  • To be easy to use, the blueprint includes all splitters, which means that there are a large number of unused splitters sitting around. Dyson Sphere Program does not simulate splitters very efficiently, so they are associated with slowdowns in late game play.

Building

You start the mall by finding a good location (see below), and placing the following blueprint that starts off the mall. (You can find the blueprints with my take on Nilaus' design in the links below, if you don't want to build your own.)


It serves as an importing and buffering station: the boxes will help smooth out fluctuations in production, and store materials that you can later use for hand crafting.

The supply infrastructure for the belts of the bus can be built gradually. For example, you could take the production blueprint for the five belt mall and hook it up to the first five or six belts, and then add more products later, as you start producing them. It can also be convenient to use logistics distributors on top of the buffer boxes to import materials when you unlock the technology later on in your game. Ultimately you would probably want to use logistics towers.

Once you've populated some belts, you can place down the second blueprint that extends the bus with two assemblers, like this:


Make sure to align the corresponding belt icons with the buffer blueprint you placed earlier, so that the blueprints connect seamlessly. You can now start making buildings. Pick one of the assemblers and set it to the building you want to make. Check what ingredients that building needs and find each of those on the bus. Then drag a belt for each of those ingredients from the splitter to your assembler, picking the materials closest to the assembler first. Done!


Which materials go on the bus?
In principle you can extend the bus as far as you like and put any material that is ever used in any building on there. However, to keep the space requirements at least somewhat in check, and also to keep the blueprint in the 300 facility limit, the version of the mall presented here is limited to the 19 most common materials.

This means that there will be some buildings for which the materials are not available on the bus. For example, the planetary logistics stations require titanium ingots, which aren't on the bus. In that case, you can place a box with a logistics distributor next to the splitter that is closest to the assemblers, to import any additional materials that your assembler might need. (In the picture on top of this section, you should be able to make out this additional storage box.)

Obviously, importing additional materials for high-end buildings is a bit uncomfortable and goes against the idea of the design. You will have to find a solution that matches your play style. The section "hybrids" has more discussion of these kinds of issues.

Where to build
Ultimately you will want to expand the mall with interstellar logistics stations (ILSs) that can export your buildings across the cluster. You need to take this into account when deciding where to build your mall. The ILSs will be placed 10 cells behind the storage boxes that hold the buildings; so you might consider placing the storage boxes 15 cells out from the equator, so that the ILSs will end up 5 cells from the equator.


This way your mall only uses one hemisphere, and still has plenty of space. Since the assemblers are spaced 6 cells apart, and each ILS can export 5 buildings, the ILSs will be spaced 30 cells apart. The first ILS should be aligned exactly with the third building, so it is nice if the third assembler is placed on one of the thicker grid lines: then every ILS will be on an intersection of thick grid lines.

Variations
Of course, people have played around with this design. Here are a number of variations I have come across. They all present reasonable tradeoffs, usually reducing the large footprint of the bus substantially, at the cost of some ease of use.
  • The belts can be placed closer together, saving a lot of space. However, if you do this, the splitters do not fit next to each other anymore, and so cannot be included in a template blueprint, making this variation a bit harder to build.
  • You can also place assemblers on both sides of the bus, again saving a lot of space. However, again, this means that you might have some trouble with belts getting in each other's way. Also, this makes it impossible to add new materials to the bus at a later stage.
  • You can stack the belts vertically atop each other to make a vertical bus, thus saving a lot of space. However, it quickly becomes a visually confusing tangle of belts to work with. It's also tricky to branch materials off such a bus. One solution is to use a stack of storage boxes next to the belts; you can then attach the relevant belt to the nearest storage box and access the material from the bottom storage box. However these connections can only be made at even elevations. Another solution is to use the new option for belts to run at extreme angles, and run a belt straight down from the vertical bus. This can work, but you need to research super-magnetic rings to unlock the extreme belt angles, and figuring out how to build the belts is a bit tricky.

Links
Bento box mall

Box malls rely on a chain of stacked storage boxes to distribute materials to the assemblers. The assembler is connected by a sorter to the lowest level of storage boxes, but conveniently, by the mechanics of the game can also access materials that are stored in boxes higher on the stack.

The picture below shows part of a box mall with two layers of storage boxes. The bottom layer carries iron, copper, and titanium ingots. The top layer transports magnetic coils, circuit boards, and processors.


Box malls became possible when a game update introduced the possibility to restrict storage box spaces to specific materials. Without box filters, each storage box could potentially fill up with just a single material, leaving no room for additional materials to be transported. With box filters, three cells in each box can be set to three specific materials, so they cannot get in each other's way and there is always space to store some of each. In the picture, you can see that the top box filters are set appropriately.

Each box must be connected to the next box using sorters. Again, it is vital that filters are set on these sorters, or else the sorters connecting box A to box B might grab the same material, which box B is already full of: then the sorters would stall even though B might be out of another material that is still available in A. So, we need a separate sorter with filter for each material to connect two consecutive boxes properly. This also means that we cannot easily transport more than three distinct materials per box layer, unless you want to run additional belts between boxes.

While several players were experimenting with box malls immediately after the update, they did not immediately become widely popular. I think this is because while the approach seems simple enough to be useful in the early game, the concept is actually only effective in the late game. The reason for this is twofold:
  1. Each material that is carried in the boxes uses up one storage slot per assembler. Most materials have a stack size of 100 or 200. This quickly adds up: my reference box mall stores about 320k materials. Needless to say, for the early game, this is prohibitive. For the mid game it is still quite expensive. But in the late game, this may not be as much of a concern anymore.
  2. The rate with which materials can be added to the box mall is limited by the speed of the sorters. This limitation is severe: even with mk3 sorters you could transmit each material at a rate of only three per second from box to box! This is a very low throughput even for an early game mall. To make this mall work, you absolutely need to use the pile sorters, which have speeds up to 120 items per second. However, pile sorters are only available from the mid-game onwards.
(The first design along these lines I saw was by Reddit user MrVagabond, referenced below.)

Which materials?
For every material that you put in the row of boxes, you will lose at least 7500 of them in storage slots. This may not be worth it if that particular material is used by only one assembler.

In my implementation I chose to omit all materials that are used by only one assembler. I connect such assemblers to the logistics station directly. This applies to 16 out of 47 materials, reducing the height of the stack of boxes from 8 to 5.

A drawback of doing this is that it complicates adding new buildings. You might need to add belts to a PLS somewhere to supply any materials that aren't carried by the boxes. So to keep it simple you could decide to simply put everything in the boxes. This would make it possible to set any assembler to produce any building without having to change anything else in the mall.

How to build
First place a row of assemblers. Then put down a box next to one of the assemblers, and add pile sorters from box to assembler and from assembler to box. Set the box's storage capacity to 3 and its contents filters to the tree materials you want to transport. Then copy the box to an adjacent location along the row, and add three filtered pile sorters between them. Now copy one more of the boxes, this time including sorters, to get three connected boxes. Finally, shift click to copy the middle of those boxes, with sorters on both sides, and drag it along to build the box row 15 boxes at a time.

Adding a layer above ground level works almost the same, except of course the boxes are not connected to the assembler. Also you unfortunately can no longer drag to place multiple boxes at once, you have to click down each one individually.

Attach logistics stations to three of the boxes to supply the materials for this column. In my mall design the boxes are in a circular arrangement so it doesn't matter which box in the circle the logistics stations are attached to. The box we hooked up is the first box; it is important to remove the pile sorter leading back from the last box into the first box.

Throughput
Pile sorters can transmit an insane number of 120 items per second (as compared to 3 per second for mk3 sorters). This means that the mall will be able to supply any material up to that rate. This is more than enough for any realistic use case.

If you are absolutely hell-bent on increasing the throughput even higher, you can get up to 240 items per second if you supply every material in two directions, going outward from a central box in the box row. There are then two final boxes at the opposite end of the circle. This has the potential of increasing the throughput of this mall, but it is harder to build since you need to worry more about sorter directions, and the throughput is already high enough as it is.

Proliferation
While materials can be proliferated before they are put in the boxes, as mentioned before a lot of materials are sitting idle in those boxes, which will then have been proliferated for no reason.

This mall also uses direct insertion to make some buildings; for example the assembler making sorters mk1 is directly connected to the assembler making sorters mk2. Any assembler that uses direct insertion cannot be proliferated.

I personally prefer to not proliferate malls that use direct insertion, but I have found that opinion is divided about this topic. Of course you can get proliferation on quite a few buildings by proliferating everything before it goes into the boxes if you like.

Footprint
This mall is tiny, due to the vertical nature of the design and the fact that materials can teleport up and down the stack of boxes thanks to the mechanics of the game. Also note that any box in the stack can do double duty as an output box, further reducing the footprint. A logistics distributor on the top box can distribute any item in the stack of boxes.

To make one building, you need just 4 x 11 = 44 cells of space for an assembler and two boxes. Of course you also need a logistics infrastructure around that to import and export everything.

Links


Bot mall

The principle of a bot mall is to import the materials for each assembler using logistics distributors. There are many designs, that are mostly distinguished by whether or not they share imported materials between assemblers.

The topology of a bot mall, and sharing resources

The most straightforward design simply has one box for each input of each assembler, thus decoupling all assemblers completely and making it very easy to add new buildings whenever needed. This requires between two and five boxes, depending on the building that is being made. Here are two buildings made in this fashion.


There are many different ways to organise the boxes, mainly distinguished by whether or not materials are shared between adjacent assemblers, and if so, how this is done and how many boxes are available to import materials per assembler. The obvious advantage of sharing materials is that the mall becomes smaller and fewer materials are buffered in boxes all over the place. The disadvantage is that doing this creates dependencies between the buildings, and it make it more difficult to plan out a proper mall.

For example, the picture above may suggest a hexagonal pattern of laying out the boxes; by committing to that shape and squeezing the assemblers a bit closer together we can make a mall that is organized like this:


As you can see, every assembler can access all six boxes around it, which seems luxurious. However, one of those boxes will be needed to hold the assembler's output, and one is used to hold the output of a neighbour. The remaining four boxes are all shared with one of the neighbouring assemblers. On average, every assembler can determine the contents of only two input boxes. Therefore there will have to be quite a bit of clever planning to make sure all buildings can be made.

With this setup, a trick that can make this easier is to run belts in between the assemblers with the most important materials on them (iron ingots, steel, and so on), so that every assembler can always pick up the most important materials from there, freeing up input boxes for other materials. Of course that is somewhat against the spirit of the design, but it's still not a bad way to go about it. Again, see the "Hybrids" section for more discussion.

In practice, setups that average only two import boxes per assembler, like this one, are hard to plan out and optimize. While it is possible, and it may seem attractive to build malls as small and efficient as they can be, it is actually important that malls can be easily adapted on the fly. I therefore recommend giving each assembler space for at least three input boxes, some of which can ideally be shared.

Building a bot mall
My favourite design looks like this:


This blueprint connects to itself and can easily be extended to form a full mall that makes every building. Every copy of the blueprint has room for five assemblers with three input boxes each. As you can see, the design has a number of very attractive features:
  1. The design is still quite compact.
  2. Each assembler has access to 6 material belts: three are shared with its left neighbour, and three with its right neighbour.
  3. The design uses no direct insertion so every assembler can be proliferated very easily.
  4. If it is necessary, belts with input materials can run behind the assemblers to do even more sharing of materials. I find this unpleasant and I haven't used it in my own design, but it is nice to have the flexibility.
  5. Being able to import 3 materials per assembler gives the right tradeoff between space and resource efficiency on the one hand, and ease of use on the other hand. It is almost always easy to place buildings in such an order that there is some overlap between the inputs of adjacent buildings.

Below you can see a detail of the bot mall from the first picture, made using the mall segment blueprint, that shows how it looks when you set up a couple of buildings:


This will already get the bot mall going, provided that all materials are already available on the logistics distributor network. If they aren't, you additionally need to set up planetary logistics stations that import all the materials, and put them in logistics boxes. While that may seem a bit indirect, it does have the advantage that you can deliberately place this very close to the mall, so that the logistics bots never have to travel far.

The picture below shows the part of the mall that imports materials; the relevant bits are on teal foundation. Note that the design was made in an older version of the game; today I would definitely use pile sorters to stock the boxes.


Properties of bot malls
When designing your own malls, there are a couple of things to keep in mind:
  • You will see a constant swarm of logistics bots fly all over the place. It is up to you to decide whether this looks cool, or messy.
  • Bot malls are well suited for proliferation, since every assembler outputs its building into yet another box with a logistics distributor on top. So, instead of direct insertion, you can easily fly the buildings to the input box of another assembler, and proliferate them properly. Think about whether you wish to proliferate your mall. Keep in mind that most upgraded versions of buildings can only be proliferated for speedup, not for extra products. This may still be a desirable feature, but it does mean that you might want to set the assembler for the mk1 building to proliferate for speedup as well, so that the higher tier assemblers don't get starved.
  • Bot mall designs might be the most flexible of all mall designs, and can often be hybridized with other mall types, such as bus or box malls. See the section on hybrid malls for more about this.
  • Bot malls offer a pretty strong decoupling between buildings, meaning that one assembler can't easily starve another of resources. This is a nice reliability feature that also helps reduce the start-up time of the mall. Bot malls tend to be a lot smaller than PLS or ILS malls, and while they cannot build buildings as quickly, they are still more than fast enough until the late game. It is possible that players who use planet-scale blueprints might need higher throughput for belts and sorters, though.

Links
Sushi mall

A sushi mall is a mall that distributes materials to the assemblers using sushi belts. Sushi belts, or mixed belts, transport multiple material types on a single belt. Compared to a bus design, sushi belts allow a lot of different materials to be transported to the assemblers with only a few belts.

Two issues make reliable and effective sushi designs difficult. First, after the sushi belts have made their tour along all the assemblers, they will have been depleted of some building materials but not others. The belts need to be restocked, and fresh materials need to be introduced in the right ratios. This requires a device called a "rebalancer". There are several ways to design rebalancers, but not all of them are equally robust, and this has confused and annoyed quite a few players trying their hand at this.

Another issue with sushi malls is that since the belts are shared by many different materials, it can easily happen that materials are not delivered to the assemblers sufficiently quickly, or just the first few assemblers hog one of the materials, so that a later assembler is starved and cannot continue producing buildings.

These two issues make the sushi mall a rather technical option. However all these issues can be solved quite well. Moreover, sushi designs are small, they don't absorb a lot of materials, they are fun to add new buildings to because every assembler can make anything, and if well designed, they can also be fast enough for the late game. I've written a separate guide that describes in detail how to build a full fledged sushi mall starting in the early game (see the links section below).

Rebalancers
Rebalancers work by first separating out the mixed belt into one separate belts for each distinct material (also called "demultiplexing"), topping up the separated materials by supplying new ones as necessary, and then repopulating the sushi belt.

There are roughly two styles to do this: you can use sorters to do the demultiplexing, or splitters. I have found that using sorters is not ideal, for two reasons:
  1. On power failure, sorter-based sushi designs will fail to demultiplex the sushi belt, which leads to the belt stalling. In most designs you need to manually unclog the belt and start it back up when this happens.
  2. Many sorter-based designs are not robust to materials being temporarily unavailable.
To mitigate this, I recommend a splitter-based design instead. The images above show a splitter-based three-way rebalancer that's built as follows:
  1. Demultiplex the sushi belt by leading it through a sequence of splitters. Each splitter is connected to the next splitter in the sequence, and has one output to the side, which has its output filter set to one of the materials on the belt.
  2. Place empty storage boxers on each splitter. As it turns out, the game mechanics are such that these storage boxes will only store the particular material that matches the splitter's output filter. They will mostly stay empty, but they will act as buffers, ensuring that the system does not stall even when there is a temporary excess of some material on the sushi belt (this can happen for instance when another material was temporarily unavailable so the sushi belt had more space to absorb more of this one).
  3. Top up the demultiplexed materials with fresh materials. Use a T-junction so the demultiplexed materials from the mall have priority.
  4. Potentially use a pile sorter to make sure that the demultiplexed belts are piled to height 4.
  5. Use some more splitters to re-multiplex the sushi belt. By connecting the splitters in various ways you can achieve different distributions of materials on the belt.

The incoming sushi belt should come out of the last splitter completely empty. If something goes wrong, for example if you forgot to set one of the splitter filters, then some materials will come out of the last splitter anyway. By removing such items, you will be able to get the system working again. You can also use a traffic monitor to raise an alarm when materials come out of the last splitter.

In my experience of several playthroughs with zero issues, this rebalancer design is 100% reliable, even under supply issues or power fluctuations, so I think it's the best choice for malls.

Throughput
Sushi belts necessarily have a lower throughput than a bus design, so when you design a sushi mall you need to make sure to consider whether you can supply all the necessarily materials to your mall sufficiently quickly. The following measures can help achieve this goal:
  • Do not put all materials on the sushi belt with the same frequency. Especially high demand materials should be relatively frequent on the belt.
  • Use mk3 belts and make sure your rebalancer piles all materials to height 4 on the belt.
  • Use more than just a single sushi belt.

Proliferation
The items on the sushi belts can obviously be proliferated if desired. However, you will probably not want to put lower tier buildings on the sushi belts, which means you will use a lot of direct insertion. That being the case, all higher tier buldings cannot be proliferated, which is usually enough reason for me to forego the proliferation.

Footprint
Especially compared to a bus design, sushi malls can be made very small; instead of one belt for every distinct material you only have a small number of sushi belts. This also reduces the number of materials locked up in the mall. It is therefore an efficient solution.

Links
PLS and ILS malls

PLS and ILS malls are rather straightforward; they use a logistics station to obtain the required materials for a building.

Most of their complexity lies in how such malls choose to make buildings available, which is the same for all mall types, and discussed in the section "Delivering the buildings". But we will go into some issues specific to these types of malls here.

The main advantage of PLS/ILS designs is that they offer potentially very high throughput, and that they are very flexible, as they generally allow for proliferation, and any building can be produced independently or almost independently of other buildings. On the flip side they require that you're at a reasonably high tech level, and that you have a lot of space and materials to build. They are as such very suitable for the late game, where materials and space are not scarce.

PLS and ILS malls are also convenient in mall hybrids, where a PLS/ILS section can be used to make those few buildings that require high throughput, like belts, sorters, or foundation, or that don't fit in the other mall design comfortably.

PLS or ILS?
The ILS cannot be placed close to any other logistics station and as such will lead to the least compact malls. On the other hand, you will need ILSs to export your buildings across the cluster anyway, and if you're interested in making a recycling mall (also see section "Delivering the buildings"), the importing ILS can do double duty by also recycling the building that is being made; this can lead to efficient designs.

PLSs can be spaced much more closely, but they can only import four materials at once, which can be a hassle because there are buildings that require five. Also, the PLS cannot import materials globally.

Now, in general it is a good idea to have the materials for your mall locally available anyway, because this will make your mall world self-contained and not dependent on production elsewhere in the cluster. And the issue with buildings that require five materials is mitigated if we make the design somewhat compact and adjacent PLSs can share each other's materials at least a little bit, which increases the mall's efficiency anyway.

All in all, a PLS mall is the recommended option if you want to make a large mall that makes a lot of different buildings at least somewhat efficiently, while an ILS mall might be the better option if you have another mall design for most of your buildings, but you want to make only a small number of buildings specially because they don't fit in your main mall design very well, or if you simply don't care about how large and expensive it gets.

How to build a PLS mall
Since you need to be able to support buildings that need five materials, you cannot make every building completely independent of everything else. And since the advantage of PLS malls is that they can be made more compact than ILS malls, it becomes attractive to place assemblers somewhat close to each other, and allow them to share belts. The picture at the top of this section shows a tileable blueprint with which this can be achieved. Below is a closeup:


Note that the design is fully proliferated. Every column of assemblers makes one building, so there are four assemblers per building in this design. This is overkill for all but the most hardcore powergamers; obviously feel free to adapt the design to your own preferences and play style. There are five belts in between two columns; three input belts for the assembler column on the left, then one input belt, the output belt and another input belt for the column on the right. The center belt can be accessed by both columns, and can thus be used to supply assemblers that require five input materials.

Ultimately the produced buildings are buffered in a box and one ILS for every five buildings takes care of exporting everything across the cluster (see the section "Delivering the buildings").

If you want to be sure that your mall has the production to support whatever crazy shenanigans you get up to in the late game, then a design like this might be for you. If you also include recycling, the finished product might look something like this:


How to build an ILS mall
To really lean into the advantages of the ILS, we are not going to worry about space at all and use a blueprint that can make, export and recycle one building while avoiding all dependencies on any other part of the mall. This means that we will require two ILSs per building. This way we can import all required materials, proliferator, space warpers and the produced building for recycling purposes, all without any external dependencies.

My version of such a blueprint looks like this:


Note that the assemblers have access to (up to) five proliferated input materials. The output belt, directly below the three assemblers, also serves to recycle the building: it is imported by the ILS on the left and exported by the ILS on the right.

If you stamp this down for every building you want to make, you can easily make a high throughput, proliferated, recycling mall where all buildings are independent of each other. If you make such a blueprint and place a lot of them to make your complete mall, you can offset them with respect to each other to make the mall a bit more compact: place the second copy 20 cells to the side, and offset by 15 cells.

Links
Supplying the required materials

The way you supply your mall depends on which stage of the game you are in.

In the early game, you don't have logistics solutions unlocked yet, and you need to supply your mall directly by processing some ores into the materials you need.

Later in the game, your materials will be delivered using either logistics distributors, or logistics stations, with the latter allowing for a higher throughput.

Early game production
The image above shows a blueprint that I use with the five belt mall. It fits in the 300 facility blueprint limit, and it makes a reasonable amount of the materials that you need for early game buildings: 3/s magnetic coils, circuit boards, and stone bricks, 1.5/s gears, and 6/s iron ingots.

This same blueprint can also be used for other early game malls, such as the full bus mall, or even a sushi mall. (My separate guide on building a sushi mall in the early game uses slightly different, but similar designs.)

Some players prefer to produce in a little bit higher volume than this from the get-go, but that tends to result in lots of blueprints that need to be chained together, which I never like as much. But if you build from scratch, that is not a drawback, and you could choose to make full belts of each of those materials, as well as copper, glass, and steel.

Logistics distributors
The first more sophisticated logistics option that becomes available are the logistics distributors, when you are producing red science matrix.

It is often tempting to use logistics distributors to hack additional buildings into a onto a mall design that is not very suited to it, like a five belt mall, or designs where it is not convenient to make absolutely every material available, which is the case for the full bus mall, the box mall, and possibly for the sushi mall as well (although in my own implementation the sushi belts do contain all building materials).

There is nothing wrong with this as long as your base stays relatively clean, and adding buildings still feels easy. But if you start getting spaghetti, you might want to consider if you should maybe bite the bullet and build a genuine bot mall rather than pretending to build something else.

If you are building a bot mall, logistics distributors are the method by which your mall ultimately should be supplied. So in this case, you might find yourself tempted to organise a large part of your base with logistics distributors, and produce not just buildings, but also some of the lower volume intermediate materials that way. If you do this, then make sure that your end products are ultimately produced somewhere close to your mall, so that they can be shipped to the right assemblers quickly.

It is more common and usually better to use planetary logistics stations to organise production of intermediate materials. This means that to supply a bot mall, you need an interface, where 12 or so PLSs import all required building materials and make them available using logistics distributors. The section on bot malls shows an example of this.

Planetary and interplanetary logistics
If you use planetary or interplanetary logistics stations to organise your production from the mid-game, as most players do, then the next question is obviously: how much of everything do I need to feed the mall?

This is difficult to estimate because it depends a lot on your play style. (That's also the reason why I think it's useful to decouple production from the actual mall design.)

Another reason why it is difficult to give clear guidelines about this is that you usually start building your mall when you are still on your home planet. So your starting planet often ends up turning into your mall world. However, you often do other production as well on your starting world. For example you might do some science matrix production on your home world, or make the first few carrier rockets. If that same production infrastructure also feeds the mall, it becomes hard to disentangle.

Not a bad way to estimate realistic production ratios is to make an estimate of how much of every building you will use per minute, put all of that in factoriolab[factoriolab.github.io], and use the ratios it gives you. However at the time when you build your mall, perhaps in the early mid-game, you might still find yourself on a single world, using intermediate materials not just for the mall but also for other kinds of production. So you could also decide to just add production on an as-needed basis. Although this is a bad strategy in the late game, because it leads to the dreaded "bottleneck chasing", it tends to work out okay in the early and midgame.

The late game and decoupling production
While it is normal that during the early and midgame, you have different kinds of production on the same planet, going into the late game, I strongly recommend taking the opportunity to decouple different production processes from each other as much as possible. In this context that means: decoupling production for the mall from all other production.

To do this, you need to do the production for your mall on the same planet as the mall itself. That way, you can make sure that no materials for the mall are exported anywhere else, and your mall world only imports raw ores.

So for example, say you've built almost everything on your home world, but now you've reached the late game and you are ready to start scaling up science production. Then you move science production off-world, so that it cannot eat into the production from the mall anymore, or vice versa. All the quantum chips that you were making on your home world for green science you keep making, but now they are all just for the mall, which is great, because it means the mall has a robust supply stream for the late game when you will be taxing it more.
Delivering the buildings
Once all buildings are being produced, the next and final step is to make them conveniently available. The mechanism used to do this ranges from barebones to very sophisticated. Each method builds on the previous one, so we will discuss each in turn.

Level 1: stick everything in a box
The simplest method of delivery is to just put the produced buildings in boxes.

In the early game, if there is a lot of space between the assembler and the box, be careful that the sorter doesn't become the bottleneck of your design; for example a mk1 assembler makes 2 mk1 belts per second. If your storage box is 3 cells removed from the assembler, as in the picture, a mk1 sorter can transport only 1/2 belts per second, so production is slowed down by a factor 4. You may want to upgrade your sorters or use multiple sorters in such cases.

It is also important to set the storage capacity of the box to the number of stacks of buildings you want to make; otherwise you may quickly end up with large numbers of expensive buildings. If you're unsure, set the storage capacity to 1, and only expand as you decide that you want to collect a few more of a specific building.

Level 2: logistics distributors
Once you unlock logistics distributors it becomes very convenient to give some or all of your storage boxes a little hat. This allows all construction materials to be shipped to Icarus automatically, a great quality of life improvement. As long as you're rummaging about on your home planet, you won't have to run out of belts or sorters.

You only benefit from logistics distributors if you are regularly physically present near the mall. The next levels are about distributing your buildings across the cluster. You might only rarely pay a visit to such malls, in which case the logistics distributors might not add a lot of value. Your mileage may vary.

Level 3: the interstellar logistics network
Once you have unlocked space warpers, you will want your mall to ship buildings all over the cluster using interstellar logistics stations (ILSs).

ILSs can store and transport up to five different buildings. Since the station has its own storage, it's tempting to think that all the storage boxes we used before to hold the buildings can now be safely removed. However, it is better not to, for a technical reason. Say you are working on some remote planet, and you decide you want to have some miniature particle colliders delivered. So you put down an ILS, set a slot to particle colliders, set the storage maximum to 100, and select "remote demand". Unfortunately, you will find that 2000 or so particle colliders are delivered (with that number depending on your logistics carrier capacity upgrade level). The reason is that when a logistics vessel leaves an ILS, it always takes along as much available product as it can carry, regardless of how much was required.

So to make sure that your buildings are shipped in reasonable numbers, you have to set the storage maximum in the mall ILS to the number of buildings you want to ship in one go. For many buildings, this will be the minimum of 100. For some buildings, like belts and sorters, or maybe solar panels and logistics drones, you may want to send a bit more in one go. Subsequently you must also set the "min. load of vessels" to 1%, so that vessels will actually depart with that number of buildings even when they aren't full yet. I also set the entry for each building to both local and global supply.

Once a shipment has left the mall, the ILS should be restocked as quickly as possible, in case you want to request more buildings. That's why it's useful to hang on to the storage boxes from before. The storage capacity of the box should be set so it holds roughly the same number of buildings as the ILS. It's important to stream the items out of the box quickly; this can be achieved by using a pile sorter or by placing the storage box on top of a splitter.

The logistics station should be equipped with logistics vessels and space warpers, so that when you're stranded on a barren planet with no power, as soon as you put down an unpowered ILS and request a building, a vessel will leave the mall and fly right to you. Depending on the design of your mall, you might be able to daisy-chain the warpers through the ILSs with belts, so that only one ILS needs to request them. Alternatively sometimes people use logistics distributors to supply warpers to ILSs. I usually set the ILS to both "local supply" and "global supply", but I don't equip drones, just vessels.

Traffic monitors
Now that you use your mall from all over the cluster, you might be present at the actual mall less often. That makes it more important to flag issues with building production as early as possible. This can be done by placing traffic monitors in-between the storage boxes and the ILSs that export the buildings. To minimize the likelihood of false alarms, set the cycle time to 60s. Set the target rate to 0, the condition to ">", and raise the alarm on "fail and no cargo". You can use a default alarm icon for all traffic monitors, making them easy to place everywhere, or you can customize by setting each alarm icon to the relevant building. This way, if any building stops producing properly for any reason, an alarm icon will appear in the top of the screen, and you will be able to click it and follow the guiding line to the relevant location in the mall, where you may be able to troubleshoot the problem.

Level 4: recycling
Recycling means that the mall will not only send out buildings upon request, it will also take them back when you have too many of them. If you're somewhere in the cluster and you have buildings that you don't want to use, you can put them in a logistics tower, set to "global supply", and a vessel from the mall will come to pick up those buildings. The mall should then hold those buildings for you and prioritise using them over producing new ones.

Recycling malls require a lot of additional ILSs to make work. However, depending on how you value space and simplicity versus sheer convenience, it might be worth it anyway.

There are two main recycling designs. The most straightforward one is in an ILS mall, where the ILS that imports the materials needed to construct the building also imports the building itself. Those buildings are then led onto a belt onto which the assemblers can also put their newly produced buildings. If the recycler has received buildings, the assemblers will thus automatically stall until all the recycled buildings are used up. You can see how this works in the section on PLS/ILS malls.

Another way to do it is to replace the storage box / ILS combination in any type of mall with the design shown in the picture above. It shows the settings of the ILS on the left, which imports the buildings. They are then fed into a splitter together with the output of the corresponding assemblers. The belt that comes from the recycling ILS has input priority. The buffer boxes that store the buildings can now be placed on top of these splitters, and finally the buildings are led into the exporting ILS on the top-right in the image.

The importing ILS must globally demand the exact same buildings as the exporting ILS supplies. Like the exporting ILS, it must have warpers and logistics vessels, and its slots must be set to "local storage" and "global demand".

Congratulations, you've now reached the pinnacle of consumer comfort :)

Links
Hybrids
All mall designs have weaknesses, and sometimes by combining two different designs you can try to mitigate the weaknesses of both. Most of the time, a hybrid mall will still have a dominant organizing principle: it will still be recognizable as a bus mall, or a bot mall, and so on. But some techniques from another mall type are applied to try to improve the mall in some way. Below are some of the limitations of each mall type and how hybridization can be attempted to mitigate those limitations.

Dedicated mall for belts, sorters, or foundation
First of all, most mall designs focus on producing low throughput items, but there are things that you want to make globally available that aren't really low throughput. The most obvious offenders are belts, sorters, and foundation.

It can therefore be helpful to have a dedicated section of the mall for production of these higher throughput items. This can be done using any mall design; the picture below shows production of belts, sorters and assemblers, which might accompany a five belt mall. It uses a hybrid itself, of a bus carrying iron ingots, gears and electromagnetic turbines, combined with additional materials imported by ILSs and delivered to the relevant assemblers directly.

During play, when you upgrade these items it often happens that you end up with a lot of lower tier items in your inventory; the design allows you to put those items back in the output boxes for those lower tier items, as a cheap early form of recycling.


Bus mall hybrids
The drawback of a bus mall is that you have to have a long belt for every building material that you want to use, even materials that you want to use only very rarely, or for only very few buildings. Thus, it can be helpful to remove some of the belts with rare materials, and supply those materials to the relevant assemblers in a more targeted way. Typically, they would be brought in by logistics distributors, PLS or ILS, making these solutions hybrids with the bus as main theme, but with elements of bot mall, PLS mall or ILS mall.

Box mall hybrids
Box malls are like bus malls in that it is attractive to reduce the number of materials to be carried by the boxes. This time it is not so much to save space, because box malls are always tiny, but because the boxes will store an enormous amount of the rare materials, just for the one assembler that needs them.

While the concern is a bit different, the solutions are the same as for bus malls; the box mall section actually shows a box mall design with PLS mall elements.

Bot mall hybrids
Bot malls can scale quite well without any hybridisation. However it can still be tempting to try to reduce the number of boxes that is needed per assembler.

One way to achieve this is by running belts with important materials along the assemblers. Sometimes these belts fit snugly in spaces between the boxes and assemblers, like in the hexagonal design shown in the bot mall section, but it's also possible to run one or two belts in between the assemblers and their output boxes.

Another way is to use box mall tricks instead. If the design of the bot mall is such that the boxes of neighbouring assemblers can reach each other, they can pass along materials in the same way that this happens in box malls, thus allowing an assembler to access many materials at once from its nearby box.

By trying to optimise bot malls this way, it becomes possible to develop designs with at most two input boxes per assembler. However such designs tend to be complex and hard to expand with new buildings; it loses a lot of the flexibility of the basic bot mall idea, which is fine if you want to just stamp the thing down as a blueprint, but not great if you want to add to it organically as you play.

Links
13 Comments
steven  [author] 22 Nov, 2024 @ 8:21am 
@HaddockA: that's fine, of course. I didn't really intend this to be something you just copy into your game and that's that; my hope is more that presenting all these different options helps people come up with new ideas of their own, or understand solutions better that they already did copy from other people.

But I can definitely respect if some players are wary of spoilers and want to discover stuff on their own.
HaddockA 18 Oct, 2024 @ 7:08pm 
I had a quick glance at the screenshots, but I generally prefer not to rely on guides or pre-made blueprints.

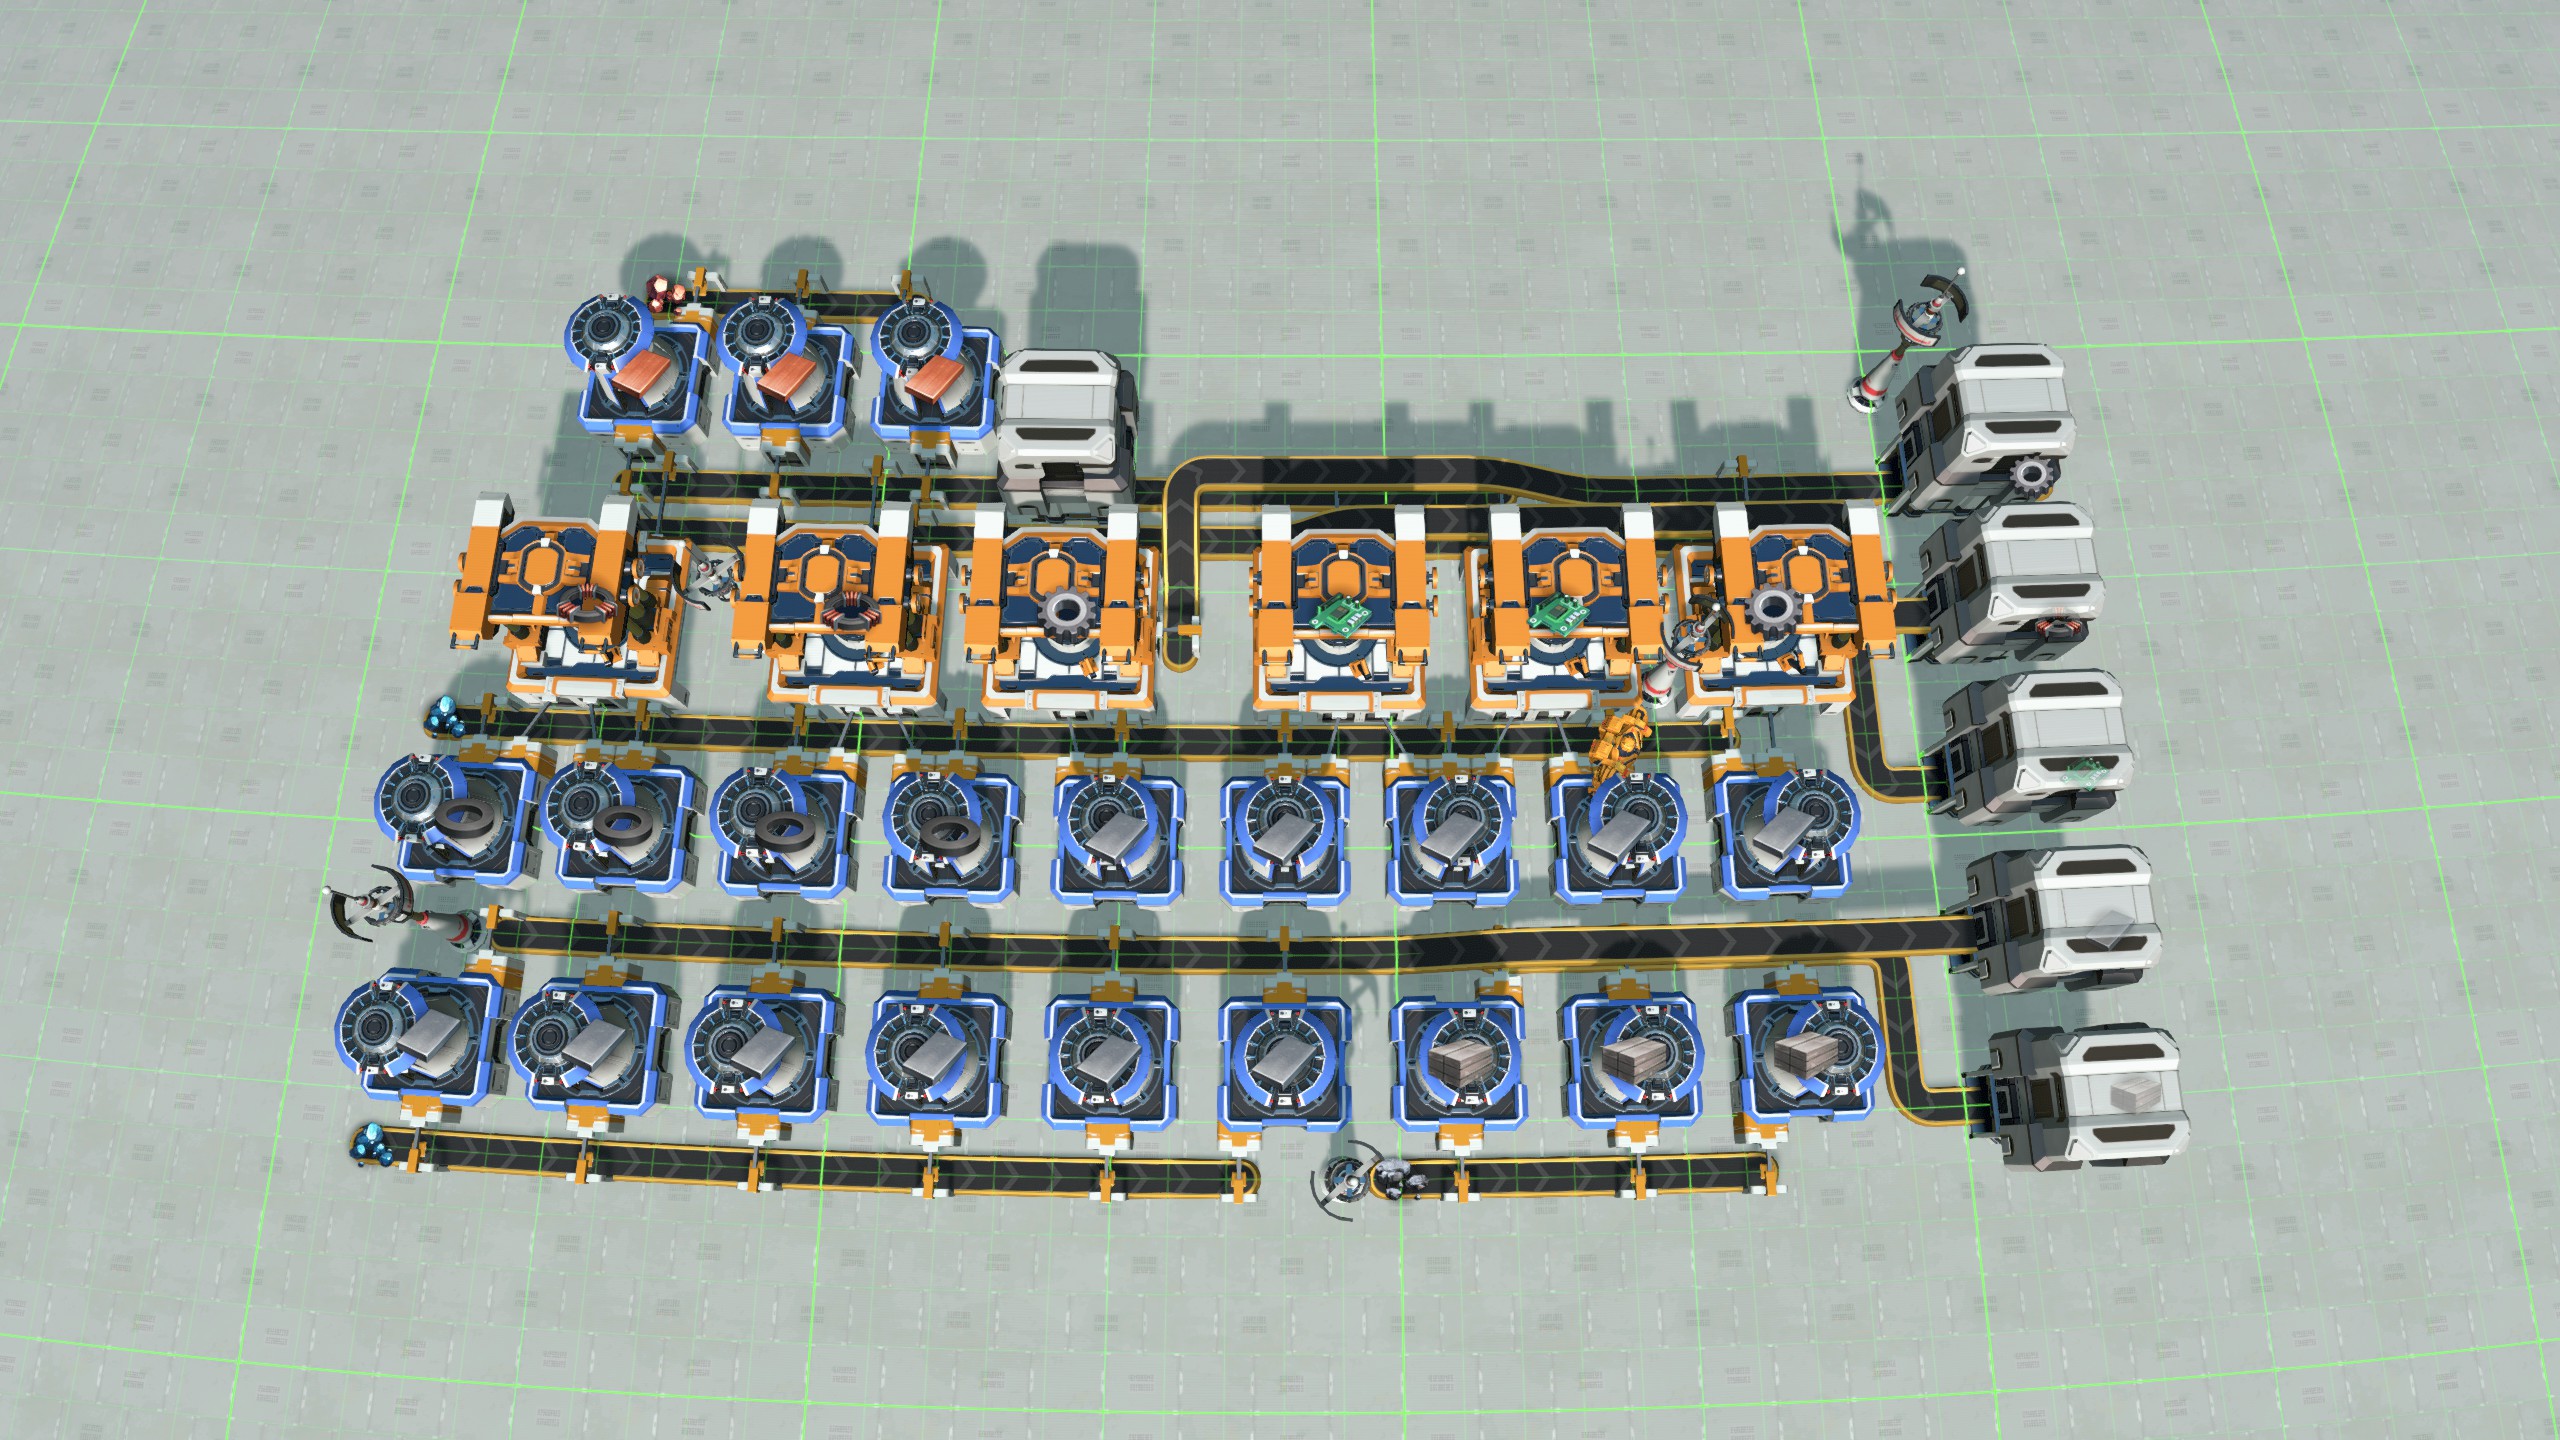
For me, the true enjoyment of games like Dyson Sphere Program comes from experimenting, developing my own strategies, and refining them over time. While guides can be helpful, I believe they can also limit creative thinking. When we take the time to solve challenges ourselves, we foster a deeper understanding of the game mechanics and develop our ability to think critically and innovatively. Relying too much on external solutions can prevent players from tapping into their full creative potential and finding truly unique approaches.
steven  [author] 5 Oct, 2024 @ 6:49am 
@Fella In Paris: thank you so much for your kind words! And yes that was a typo, I edited it.
Techhead7890 26 Sep, 2024 @ 7:22pm 
Hot damn, this is comprehensive and detailed! Thanks for putting it together!
Shiroe 19 Sep, 2024 @ 6:30am 
Interesting read. It looks like for buildings (other than belts) in this first playthrough of mine I stuck way, way too long with logistic bot transporting intermediary items to Icarus' inventory and then crafting the buildings there and then jumped straight to PLS mall-ish with attached depots to restock Icarus with buildings whenever I revisit the planet (hundreds of logistics bots to supply buildings and foundation ti Icarus is slow though...) With 2 ILS per 5 building types made I guess that should be expandable to a hydrid-ish version of the recycling ILS system you mentioned.

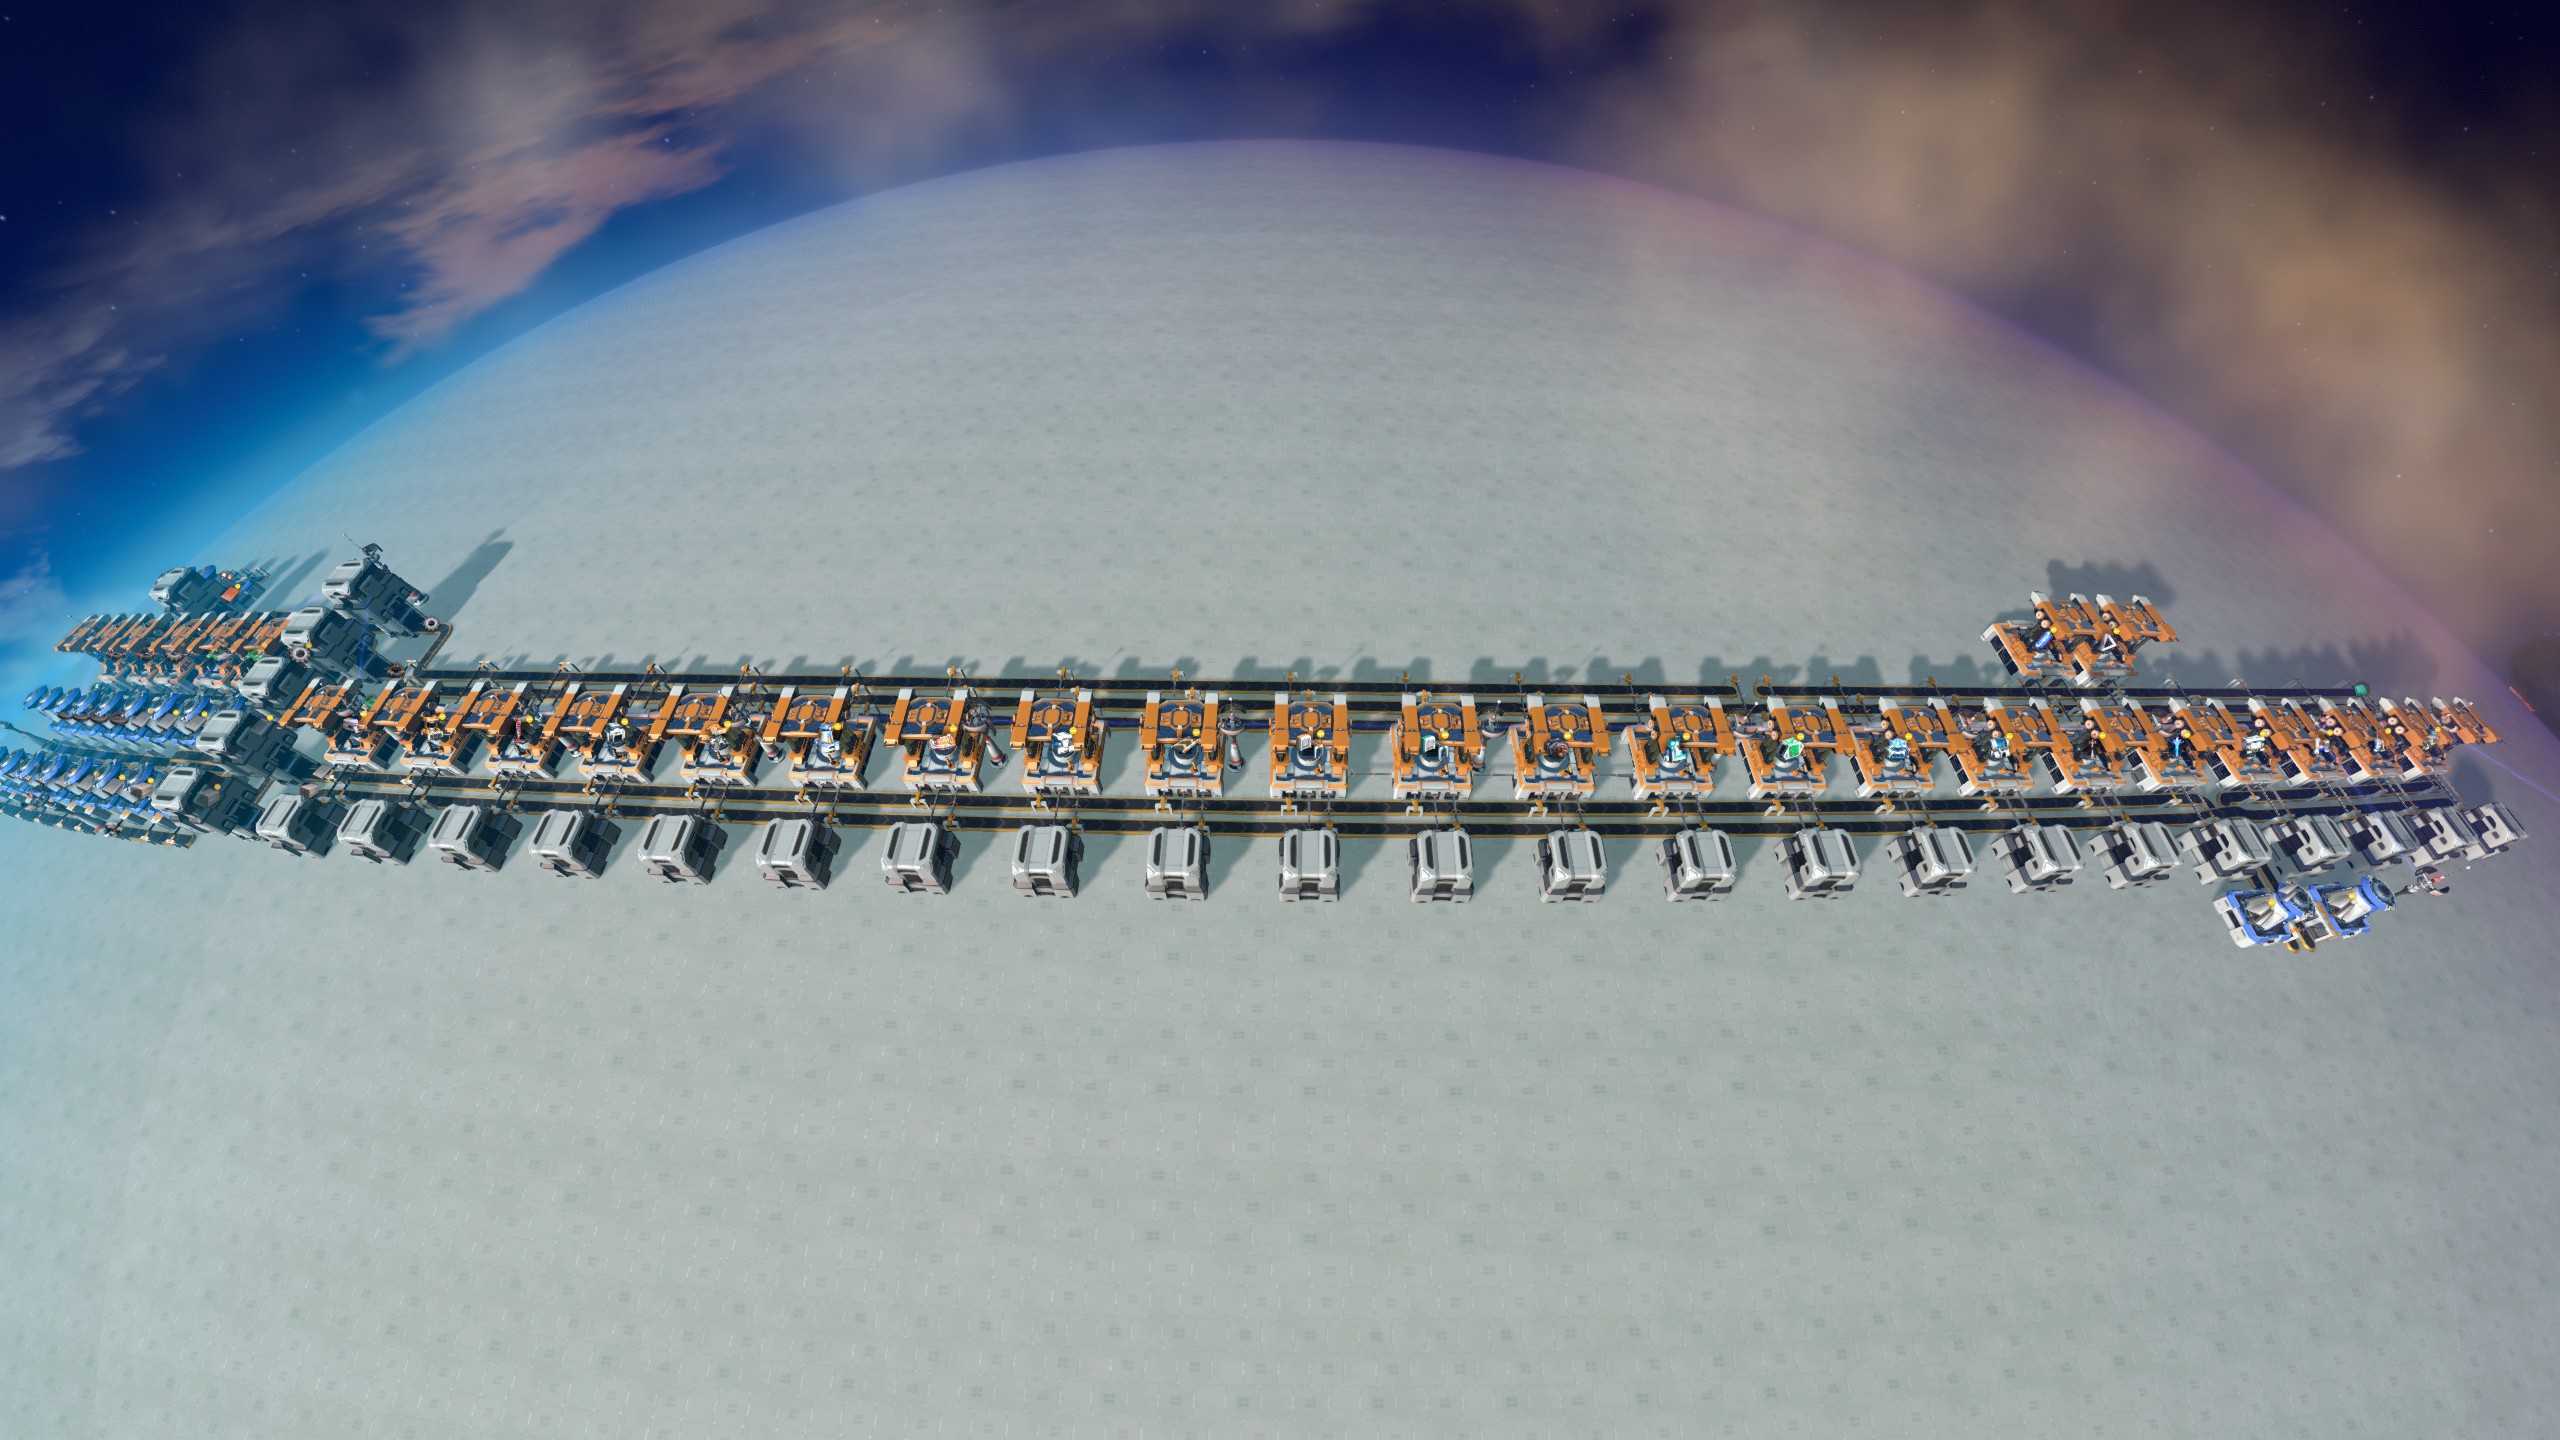
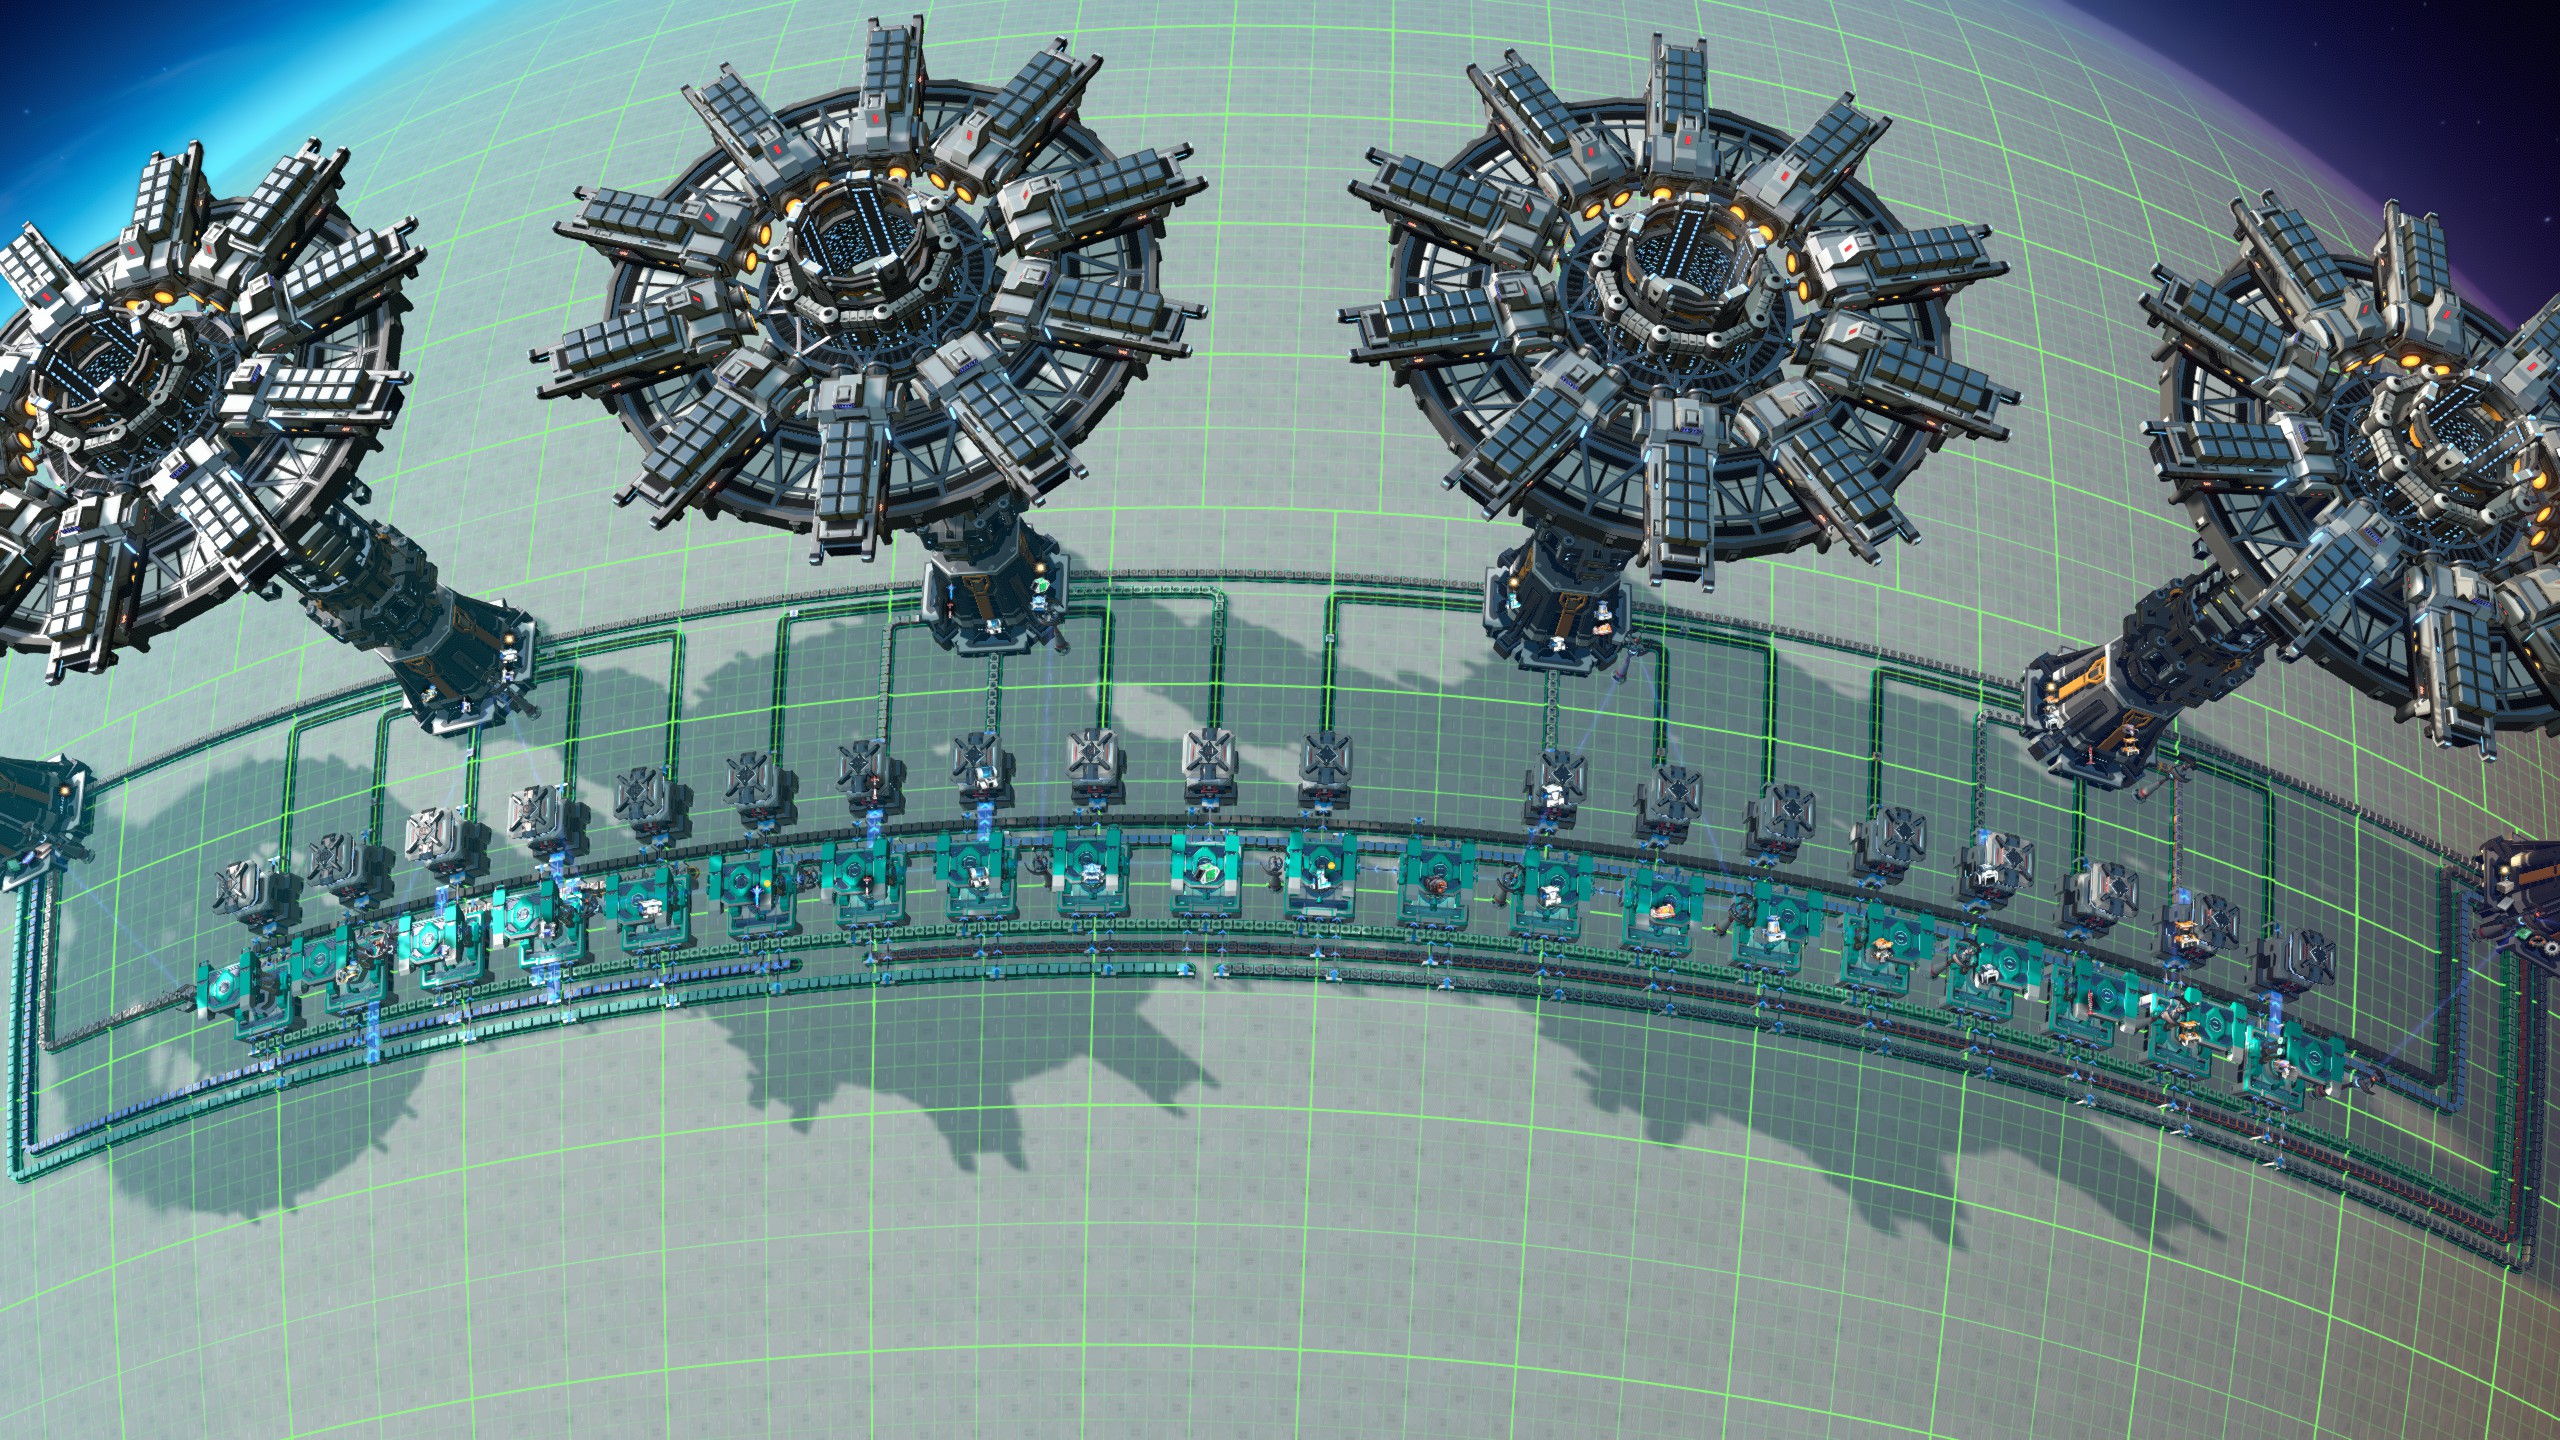
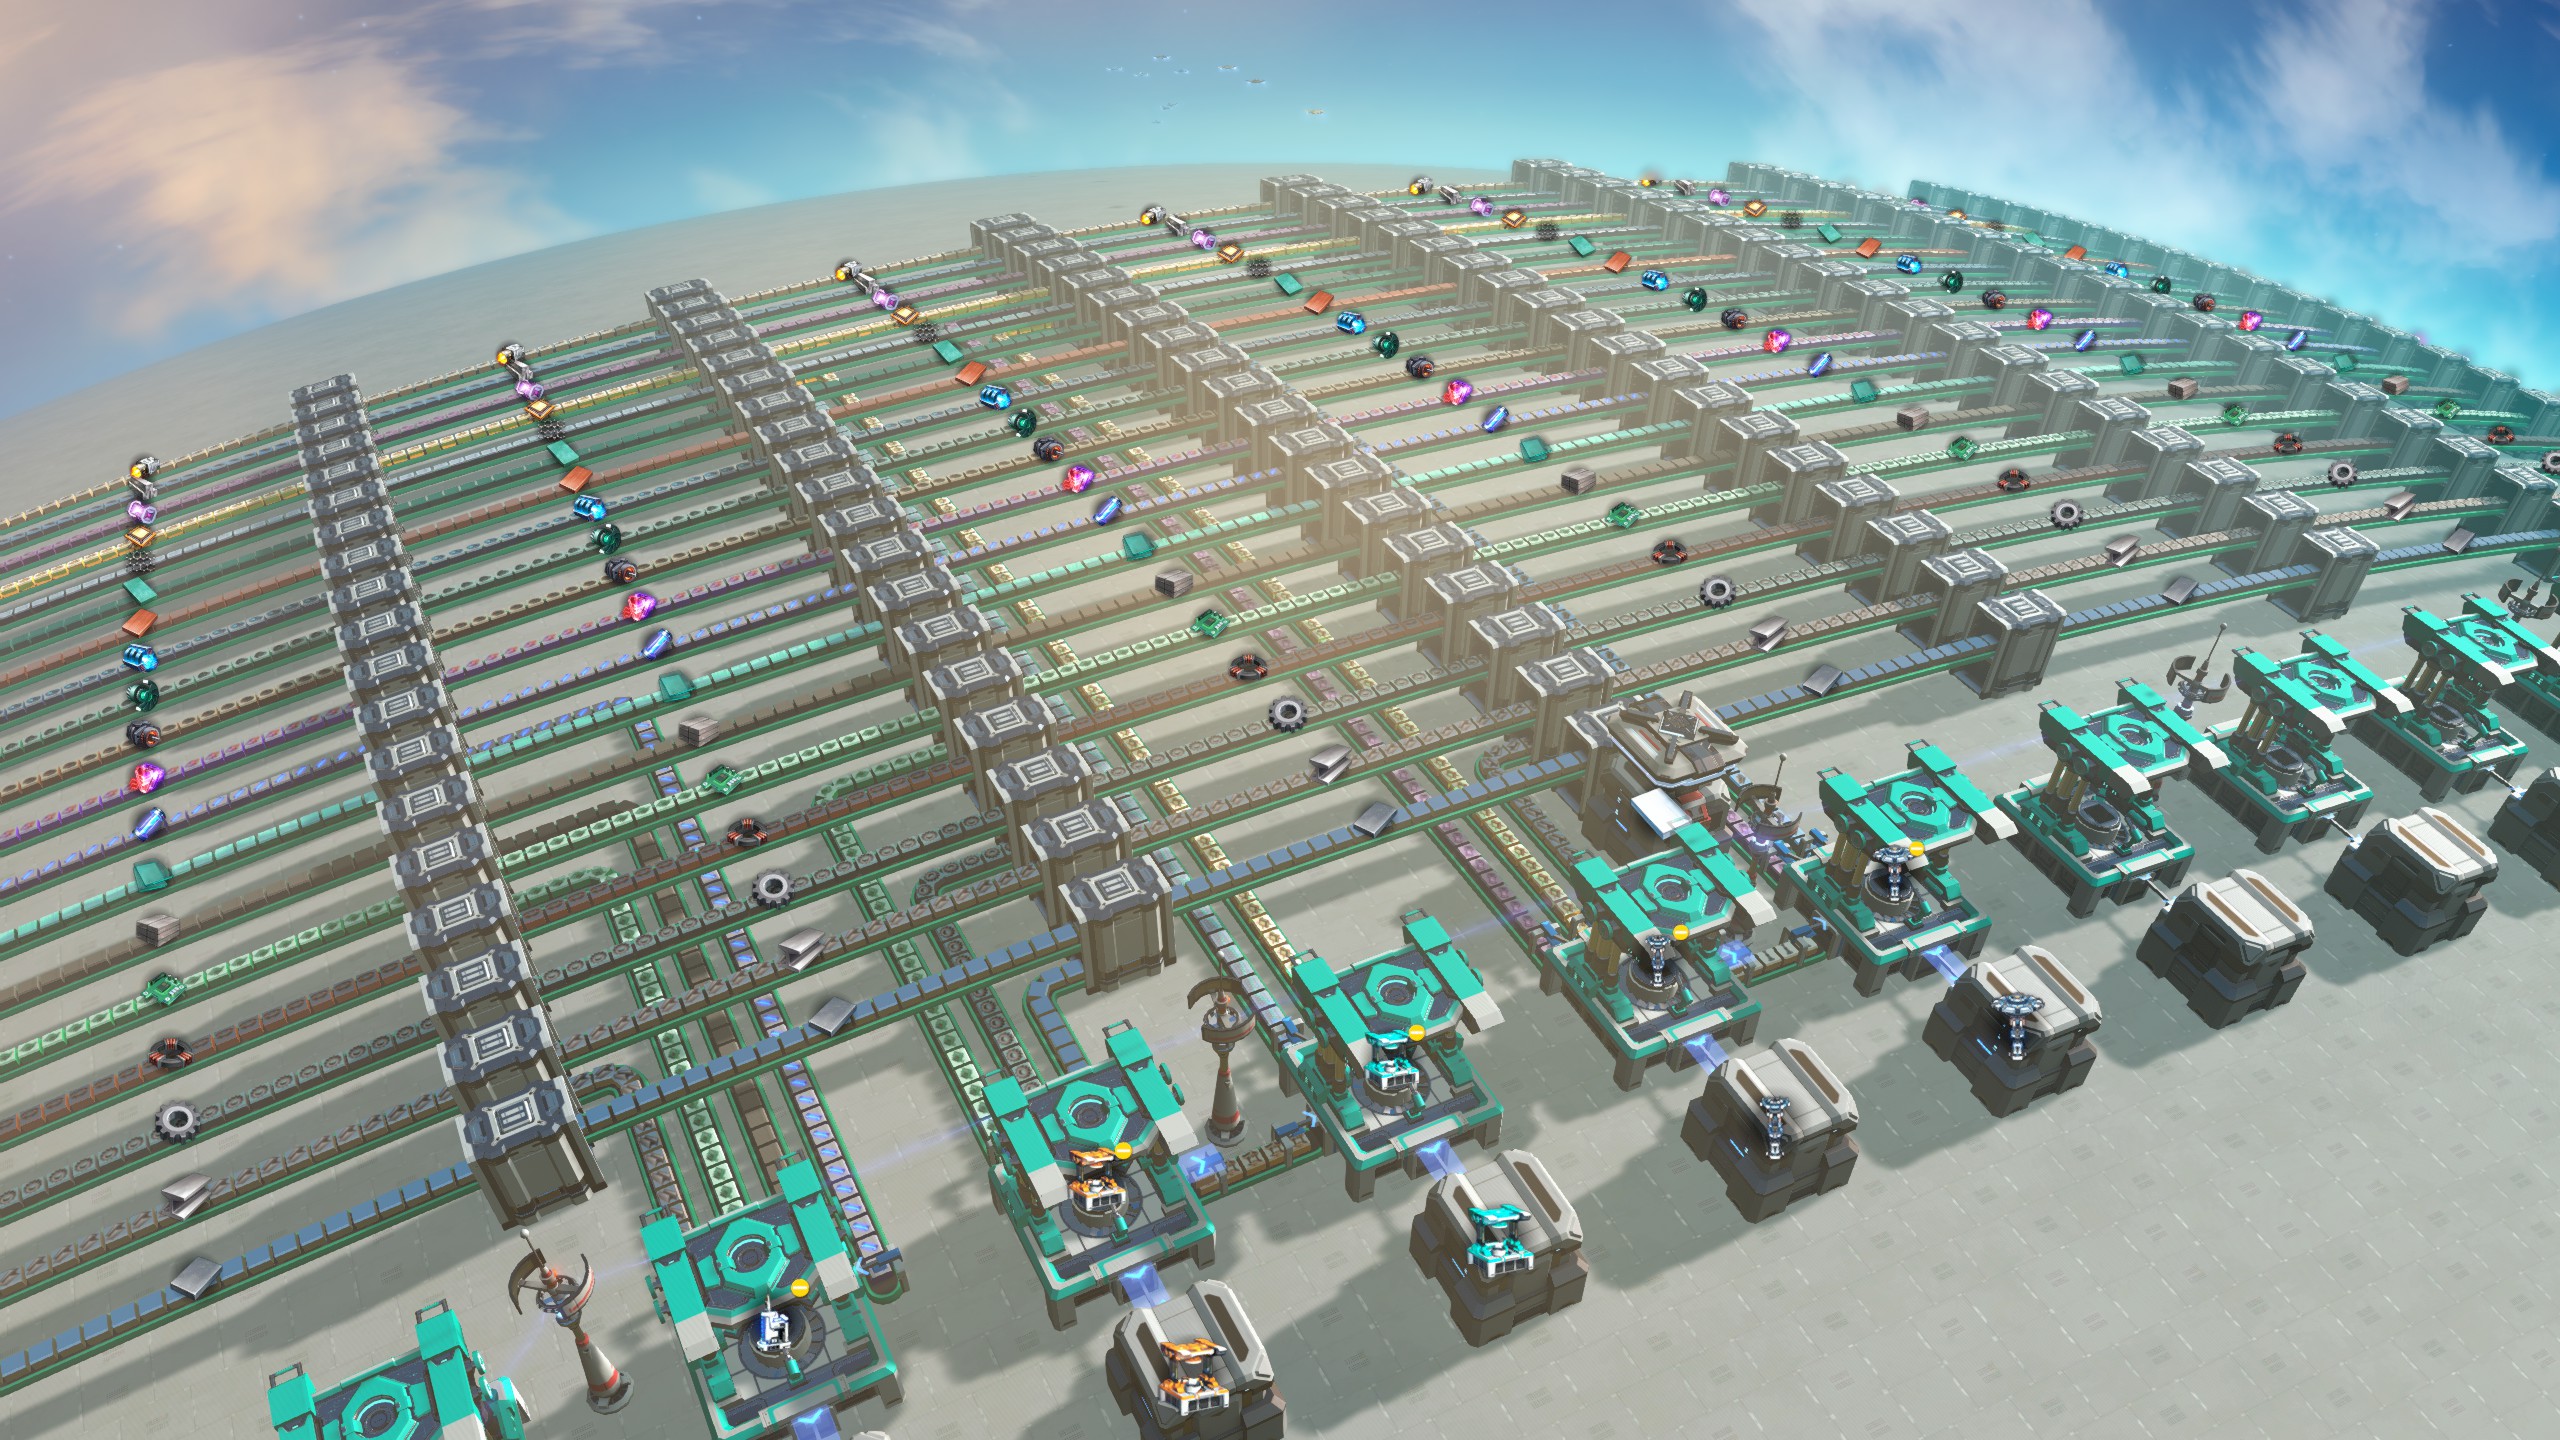
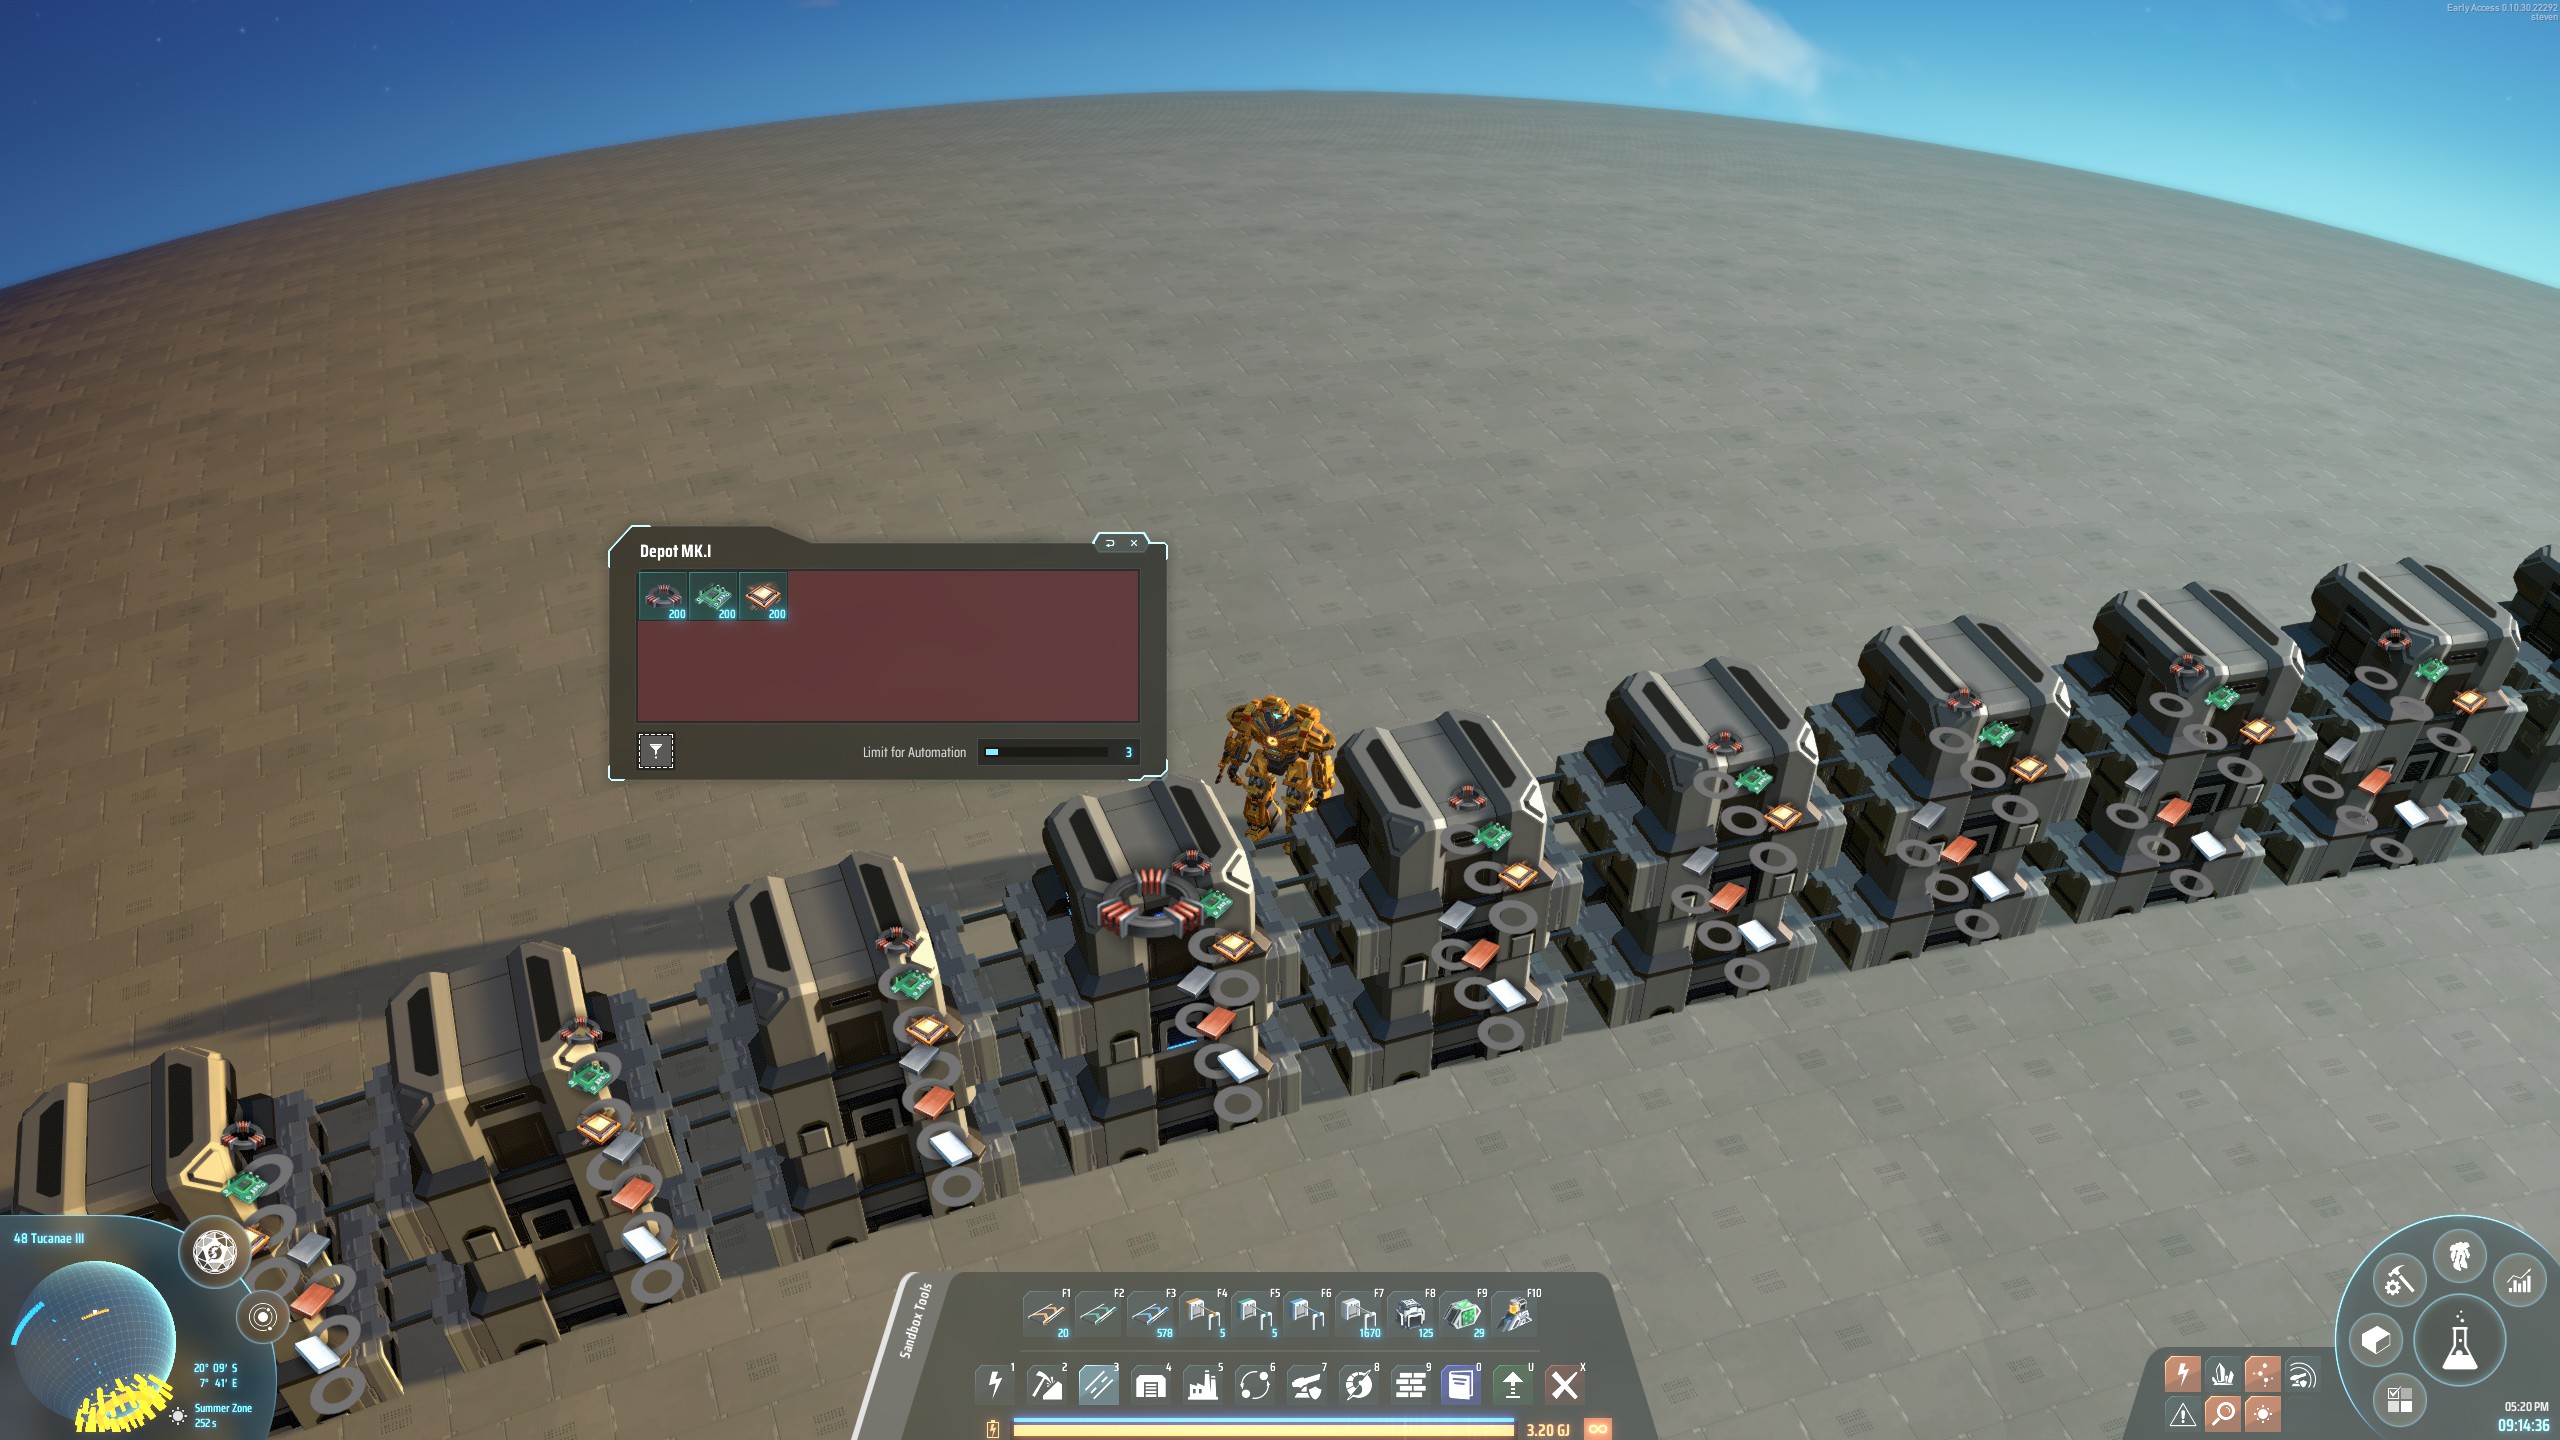
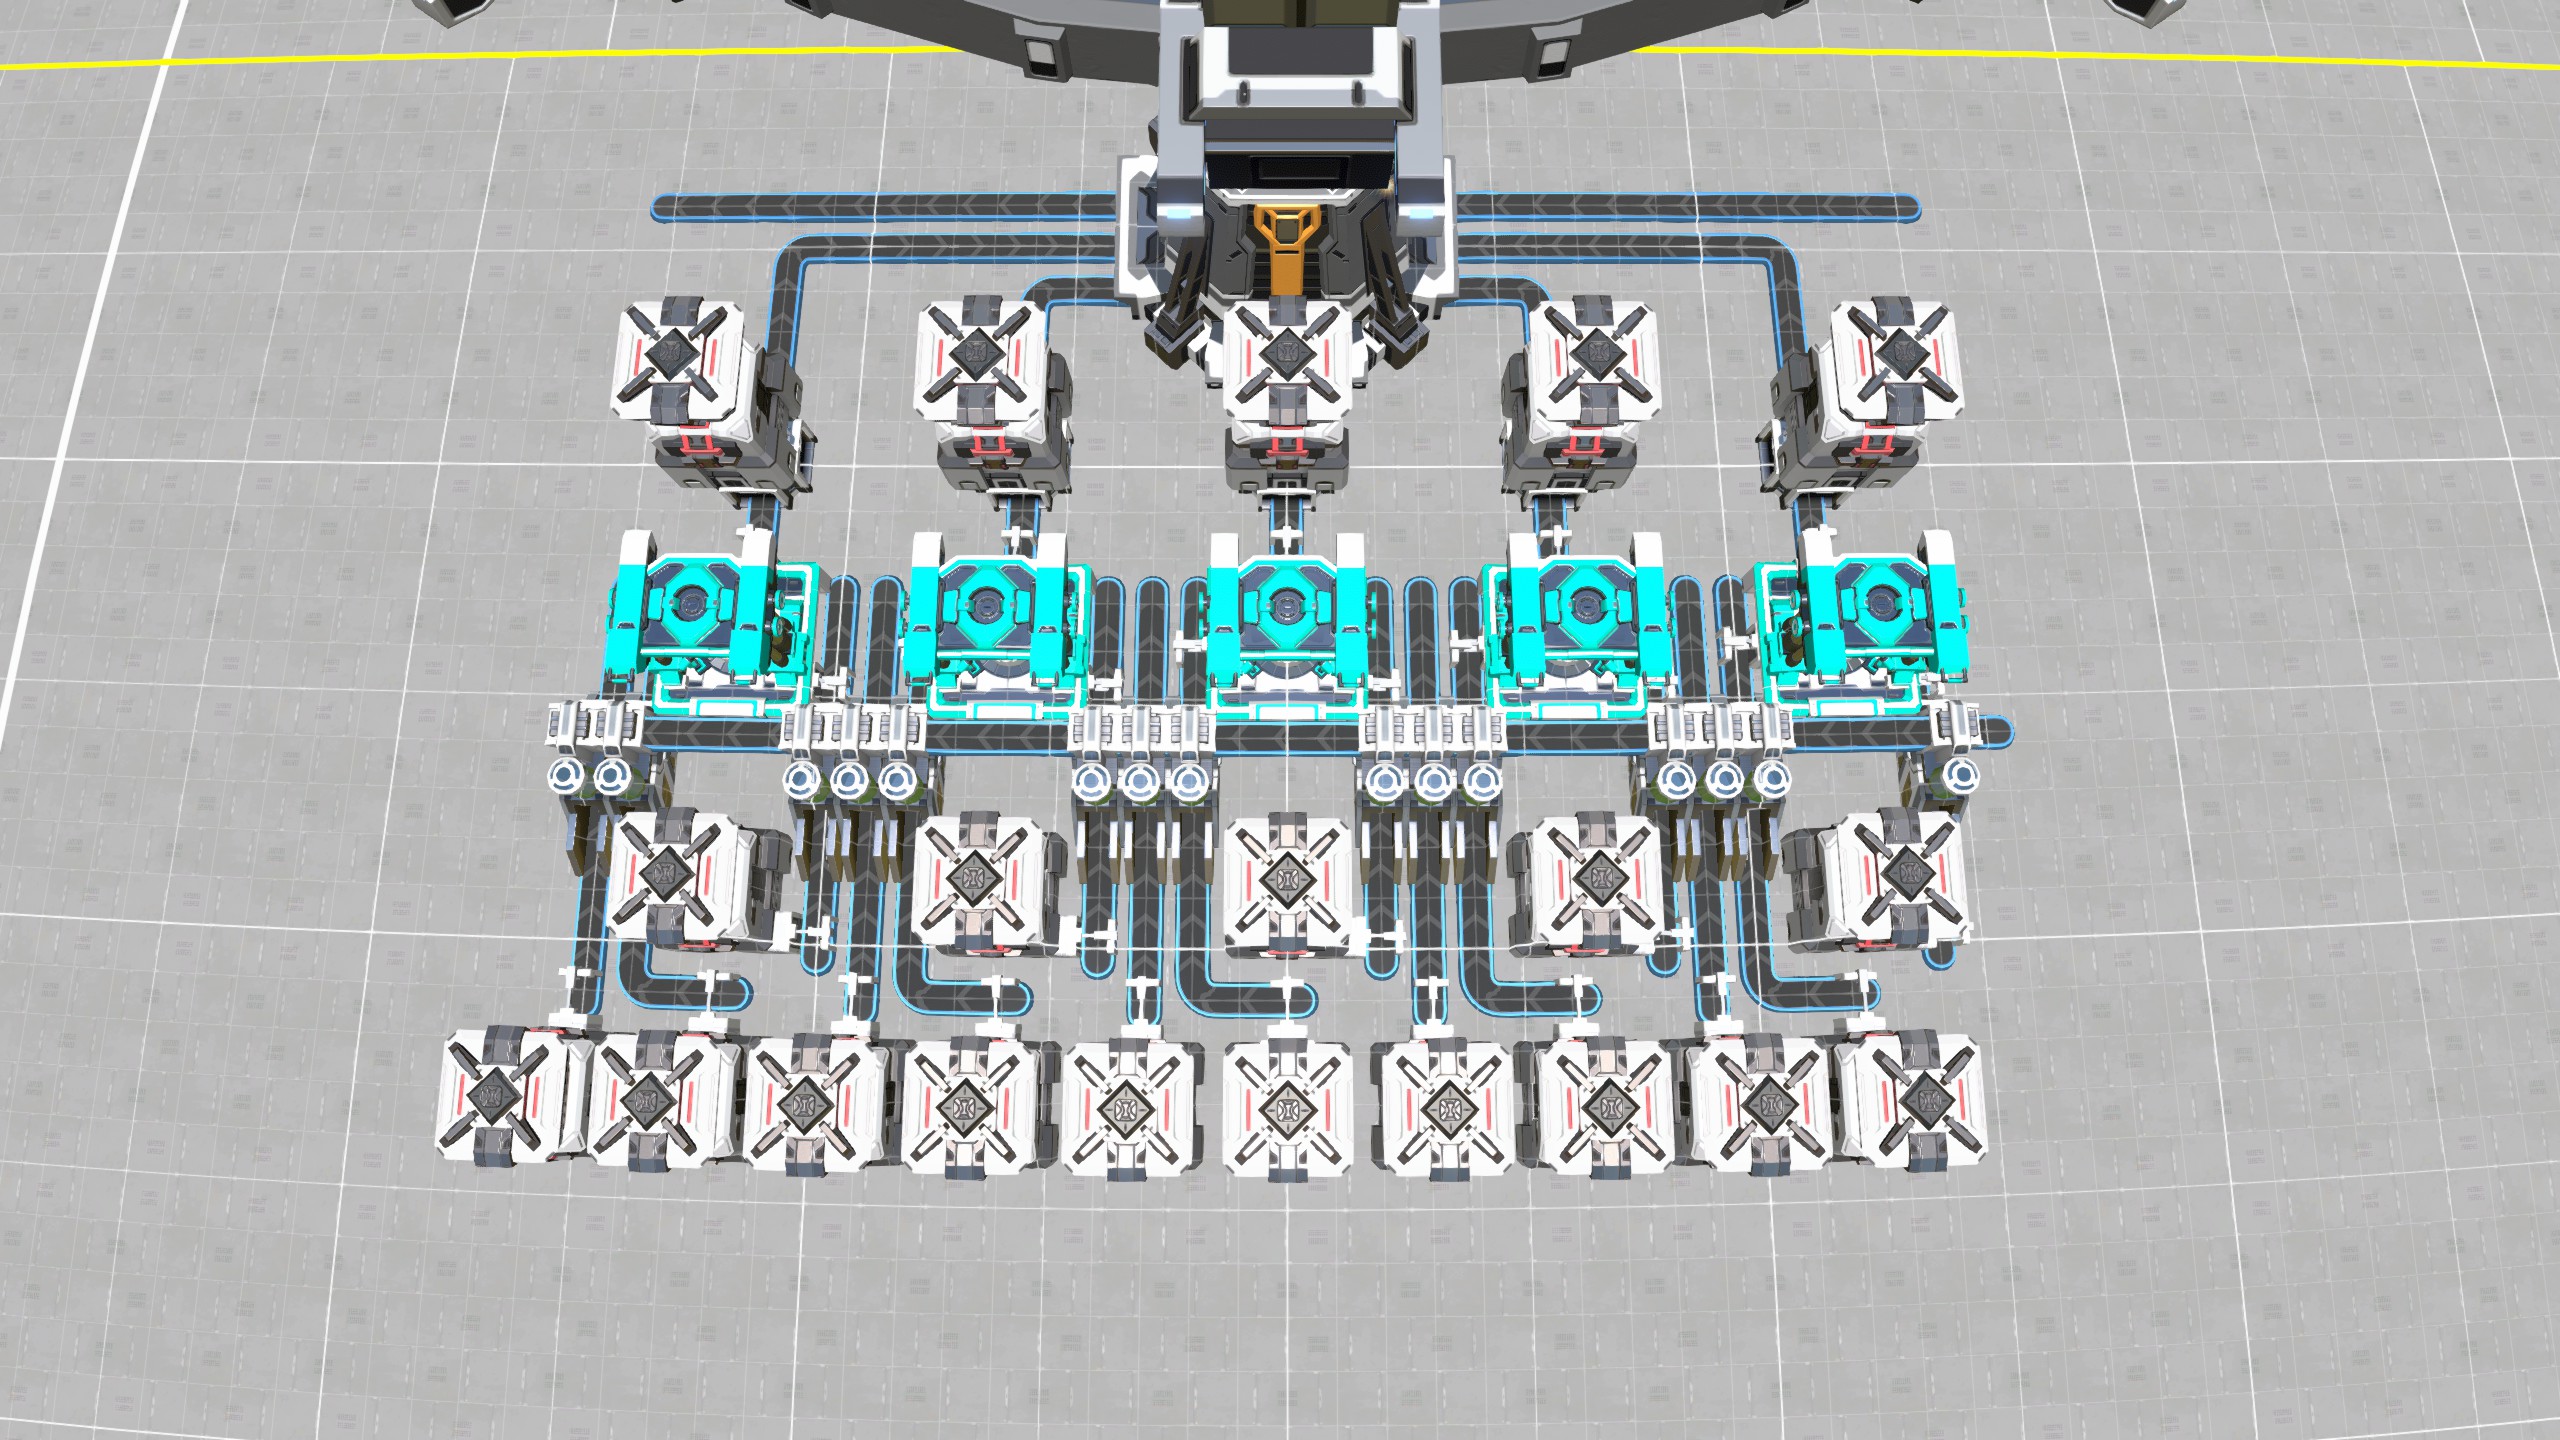
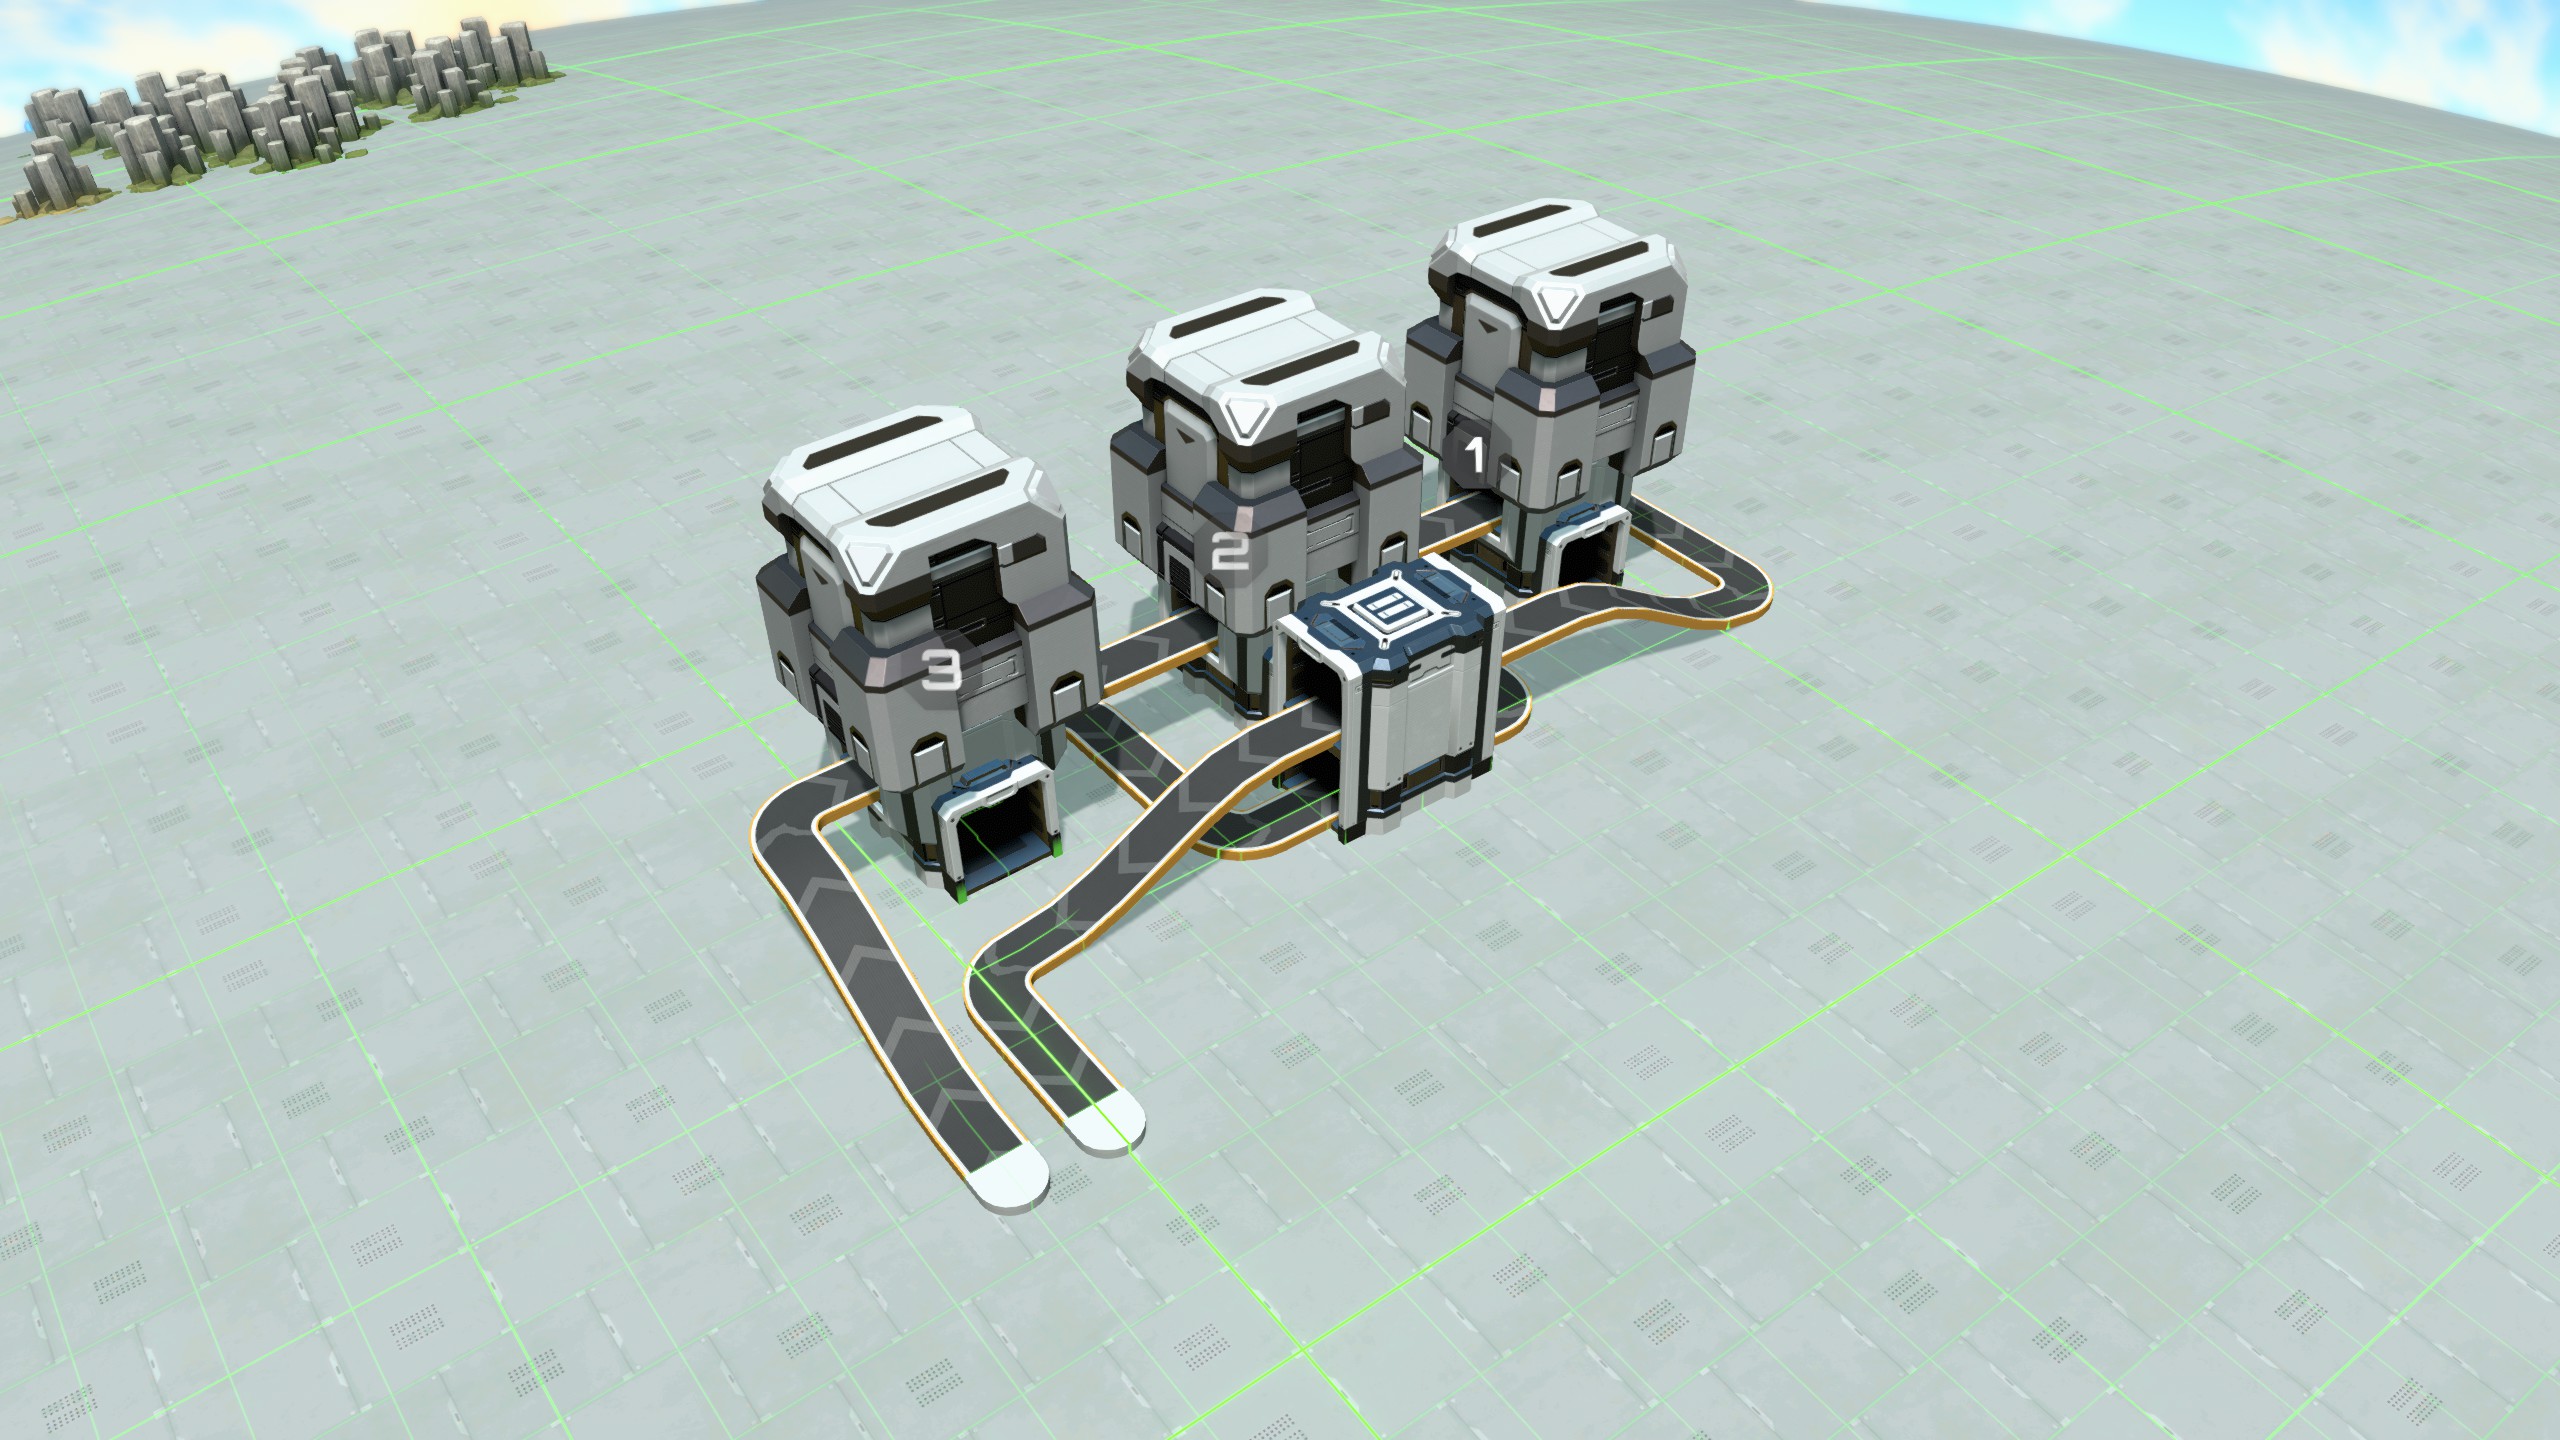
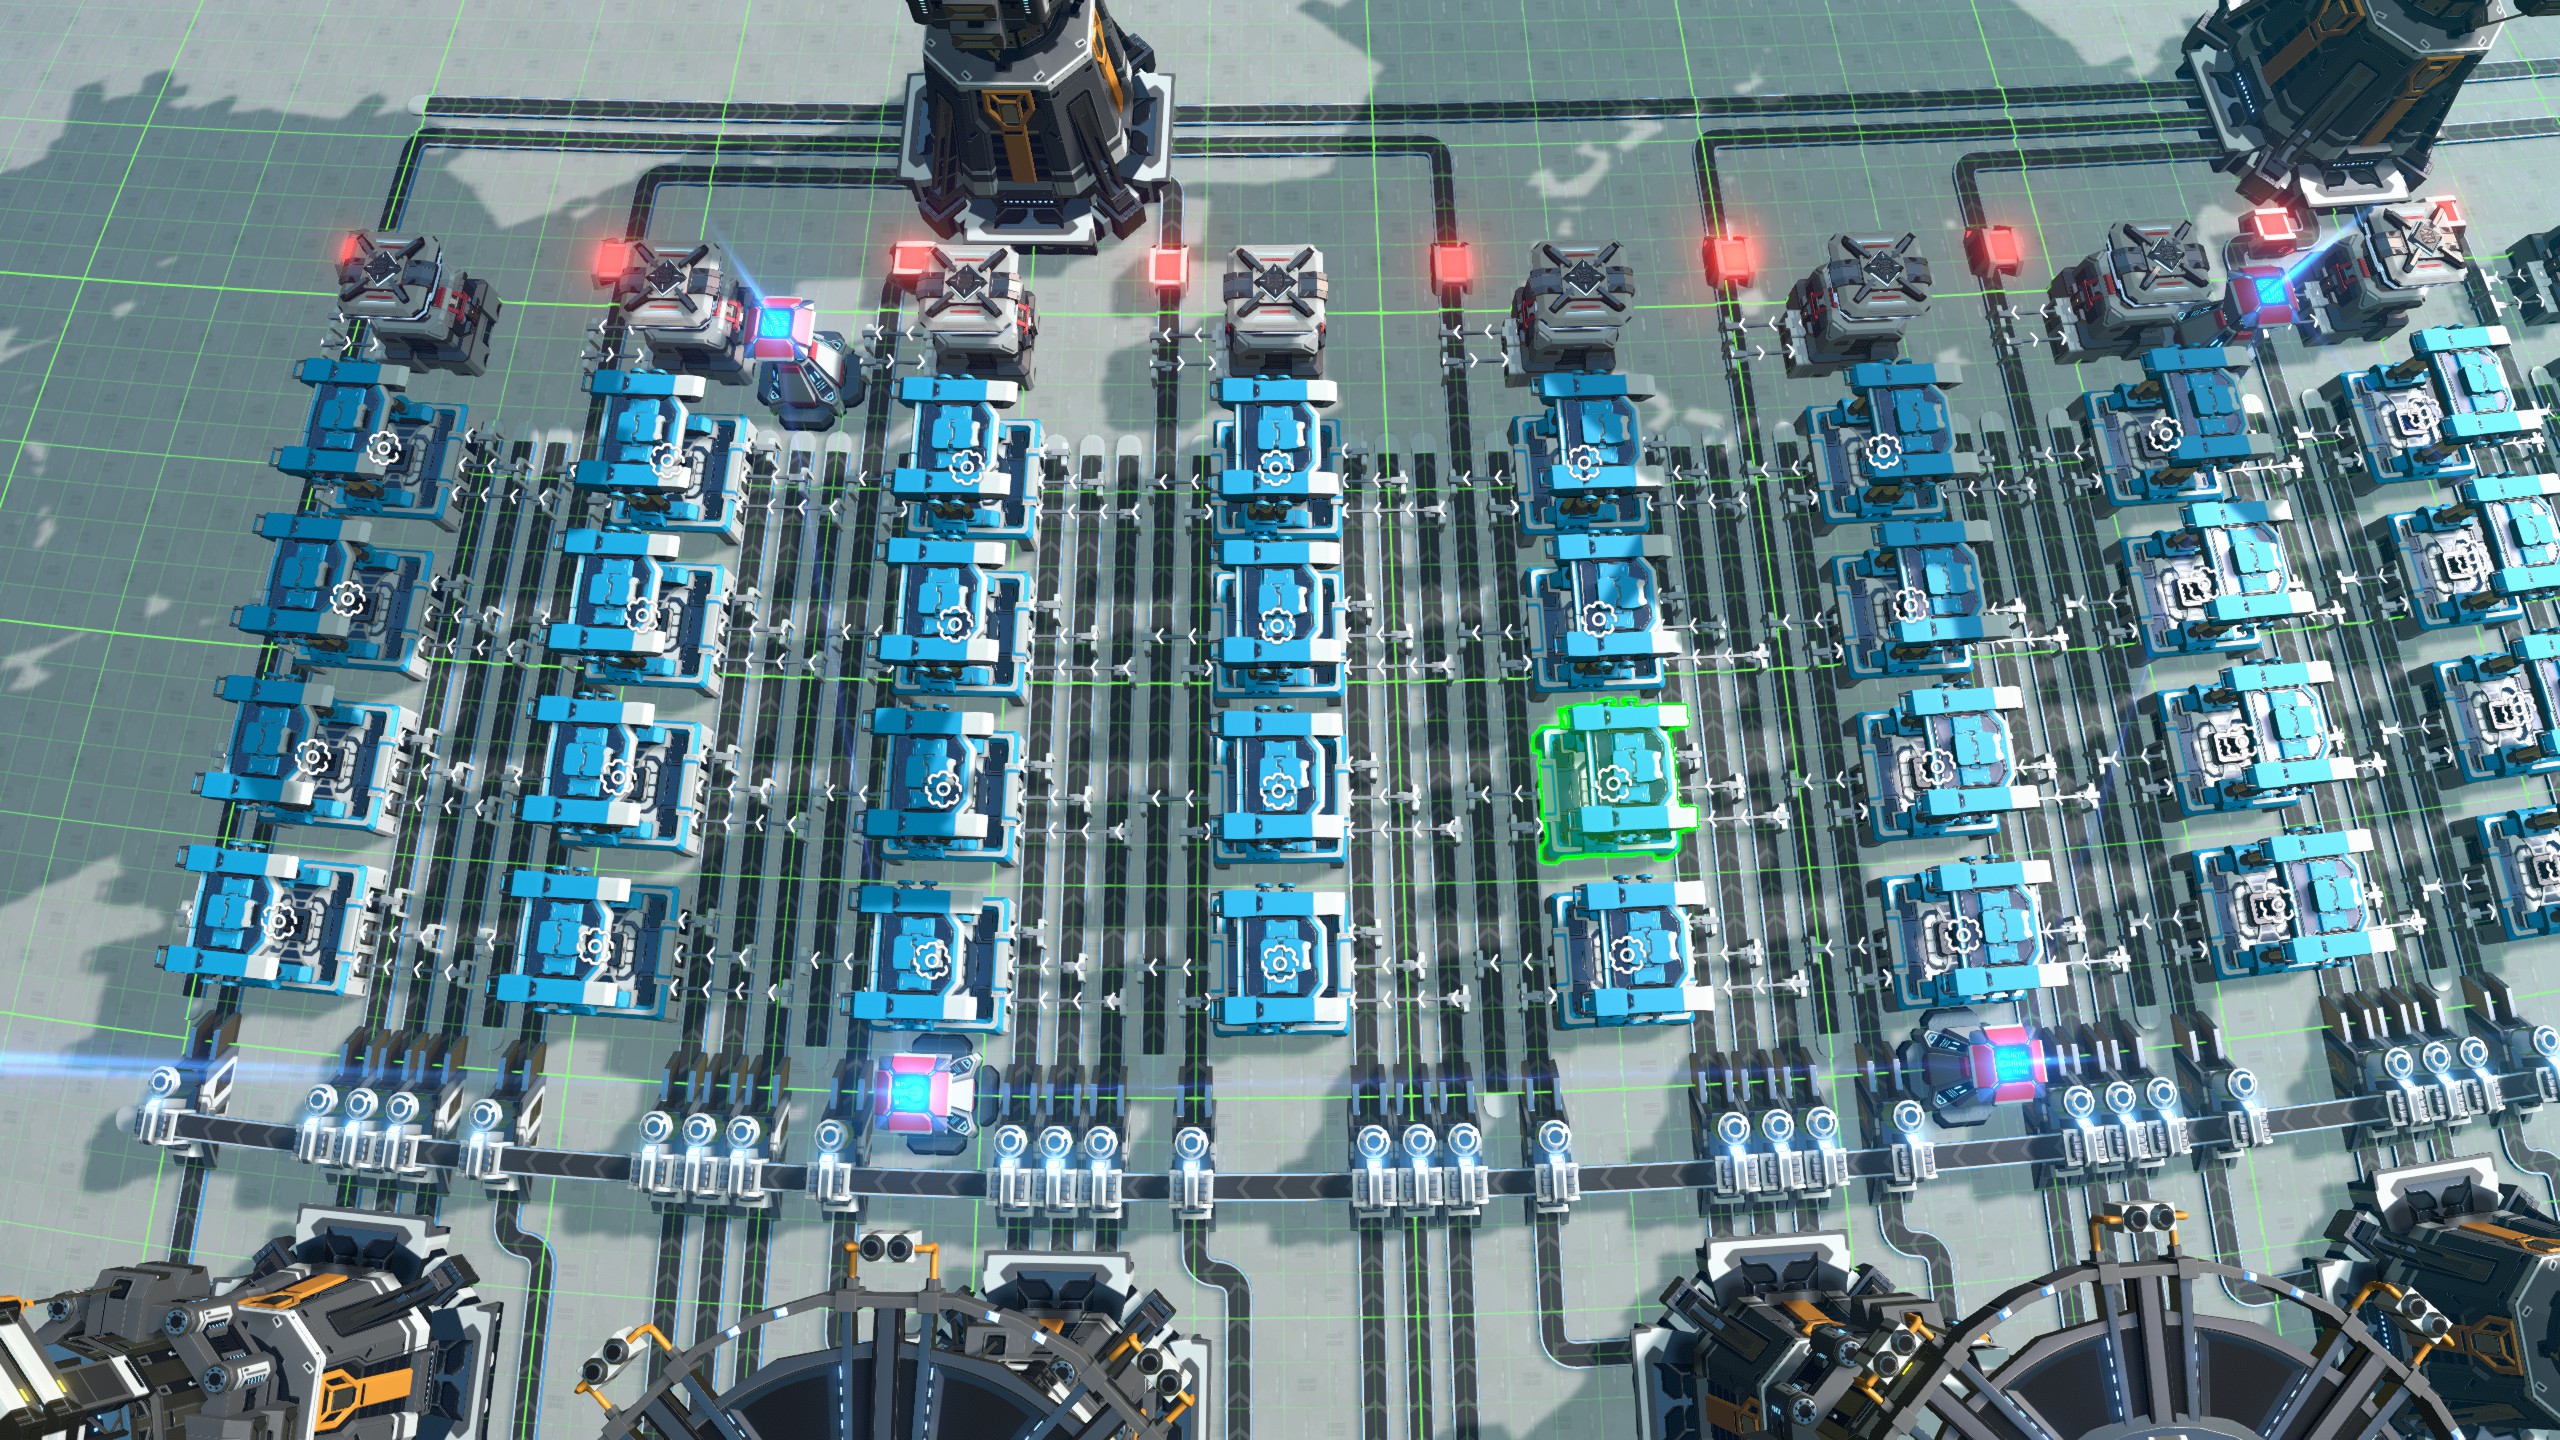
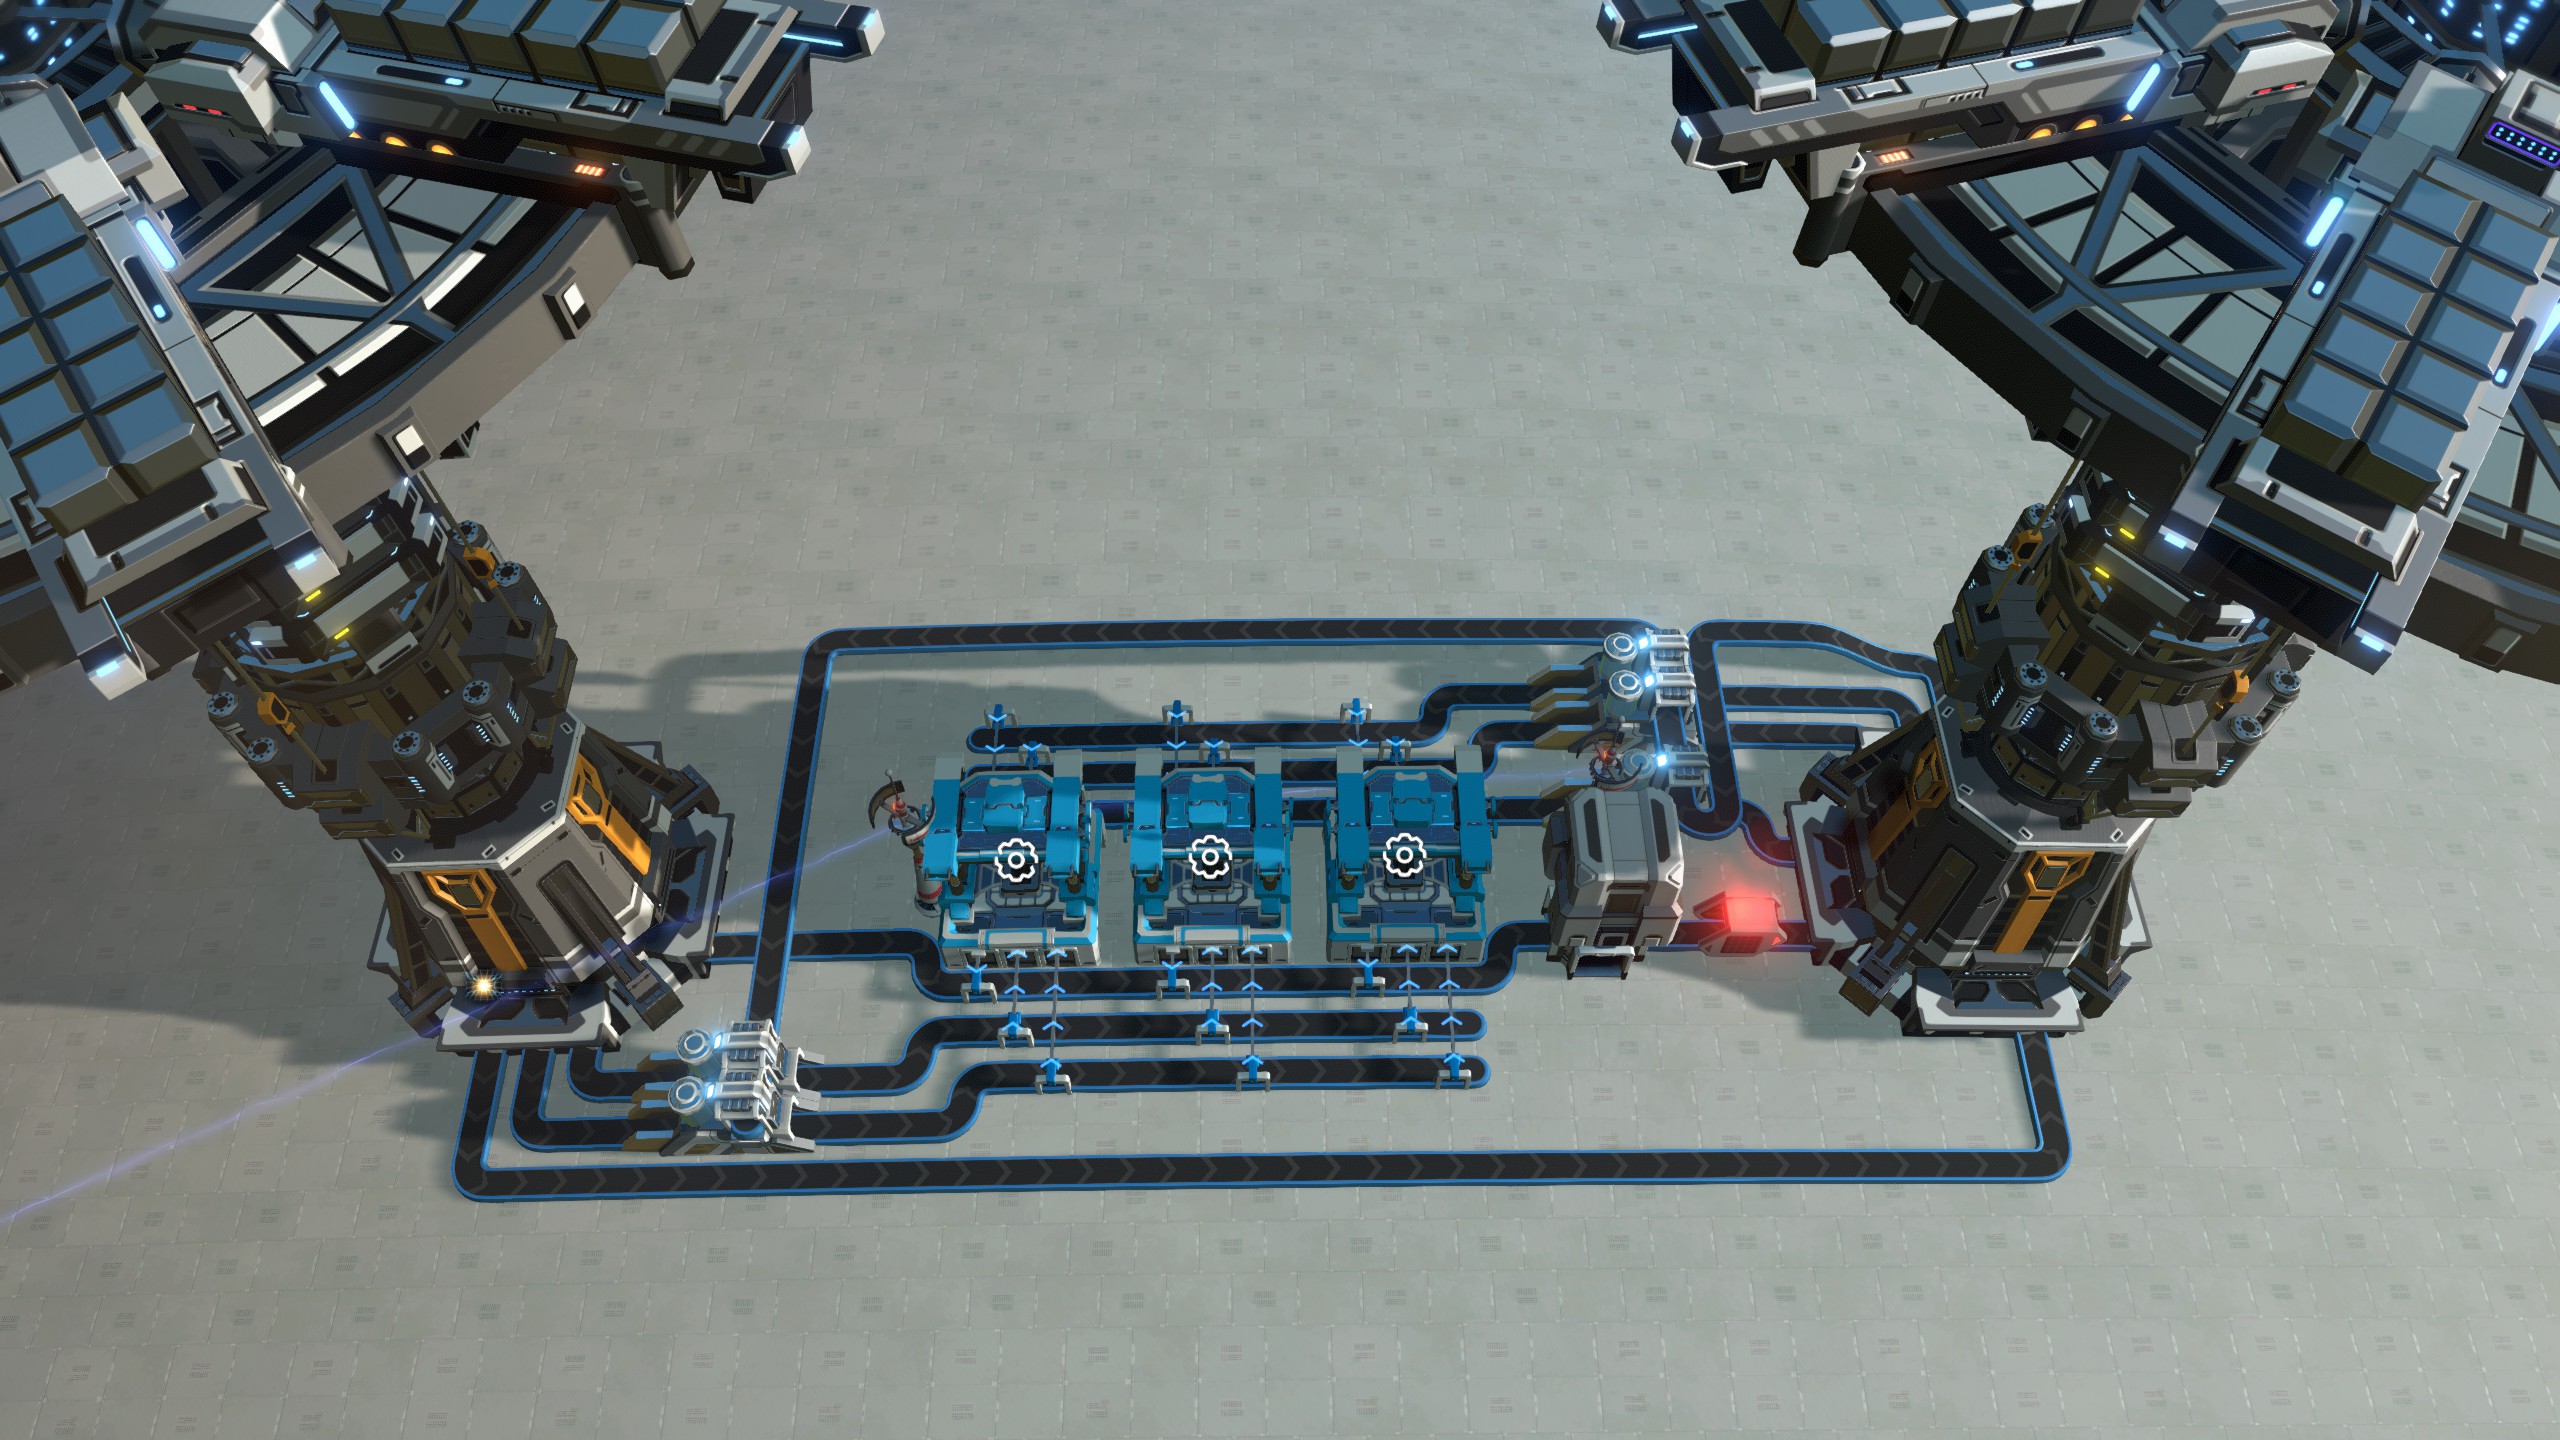
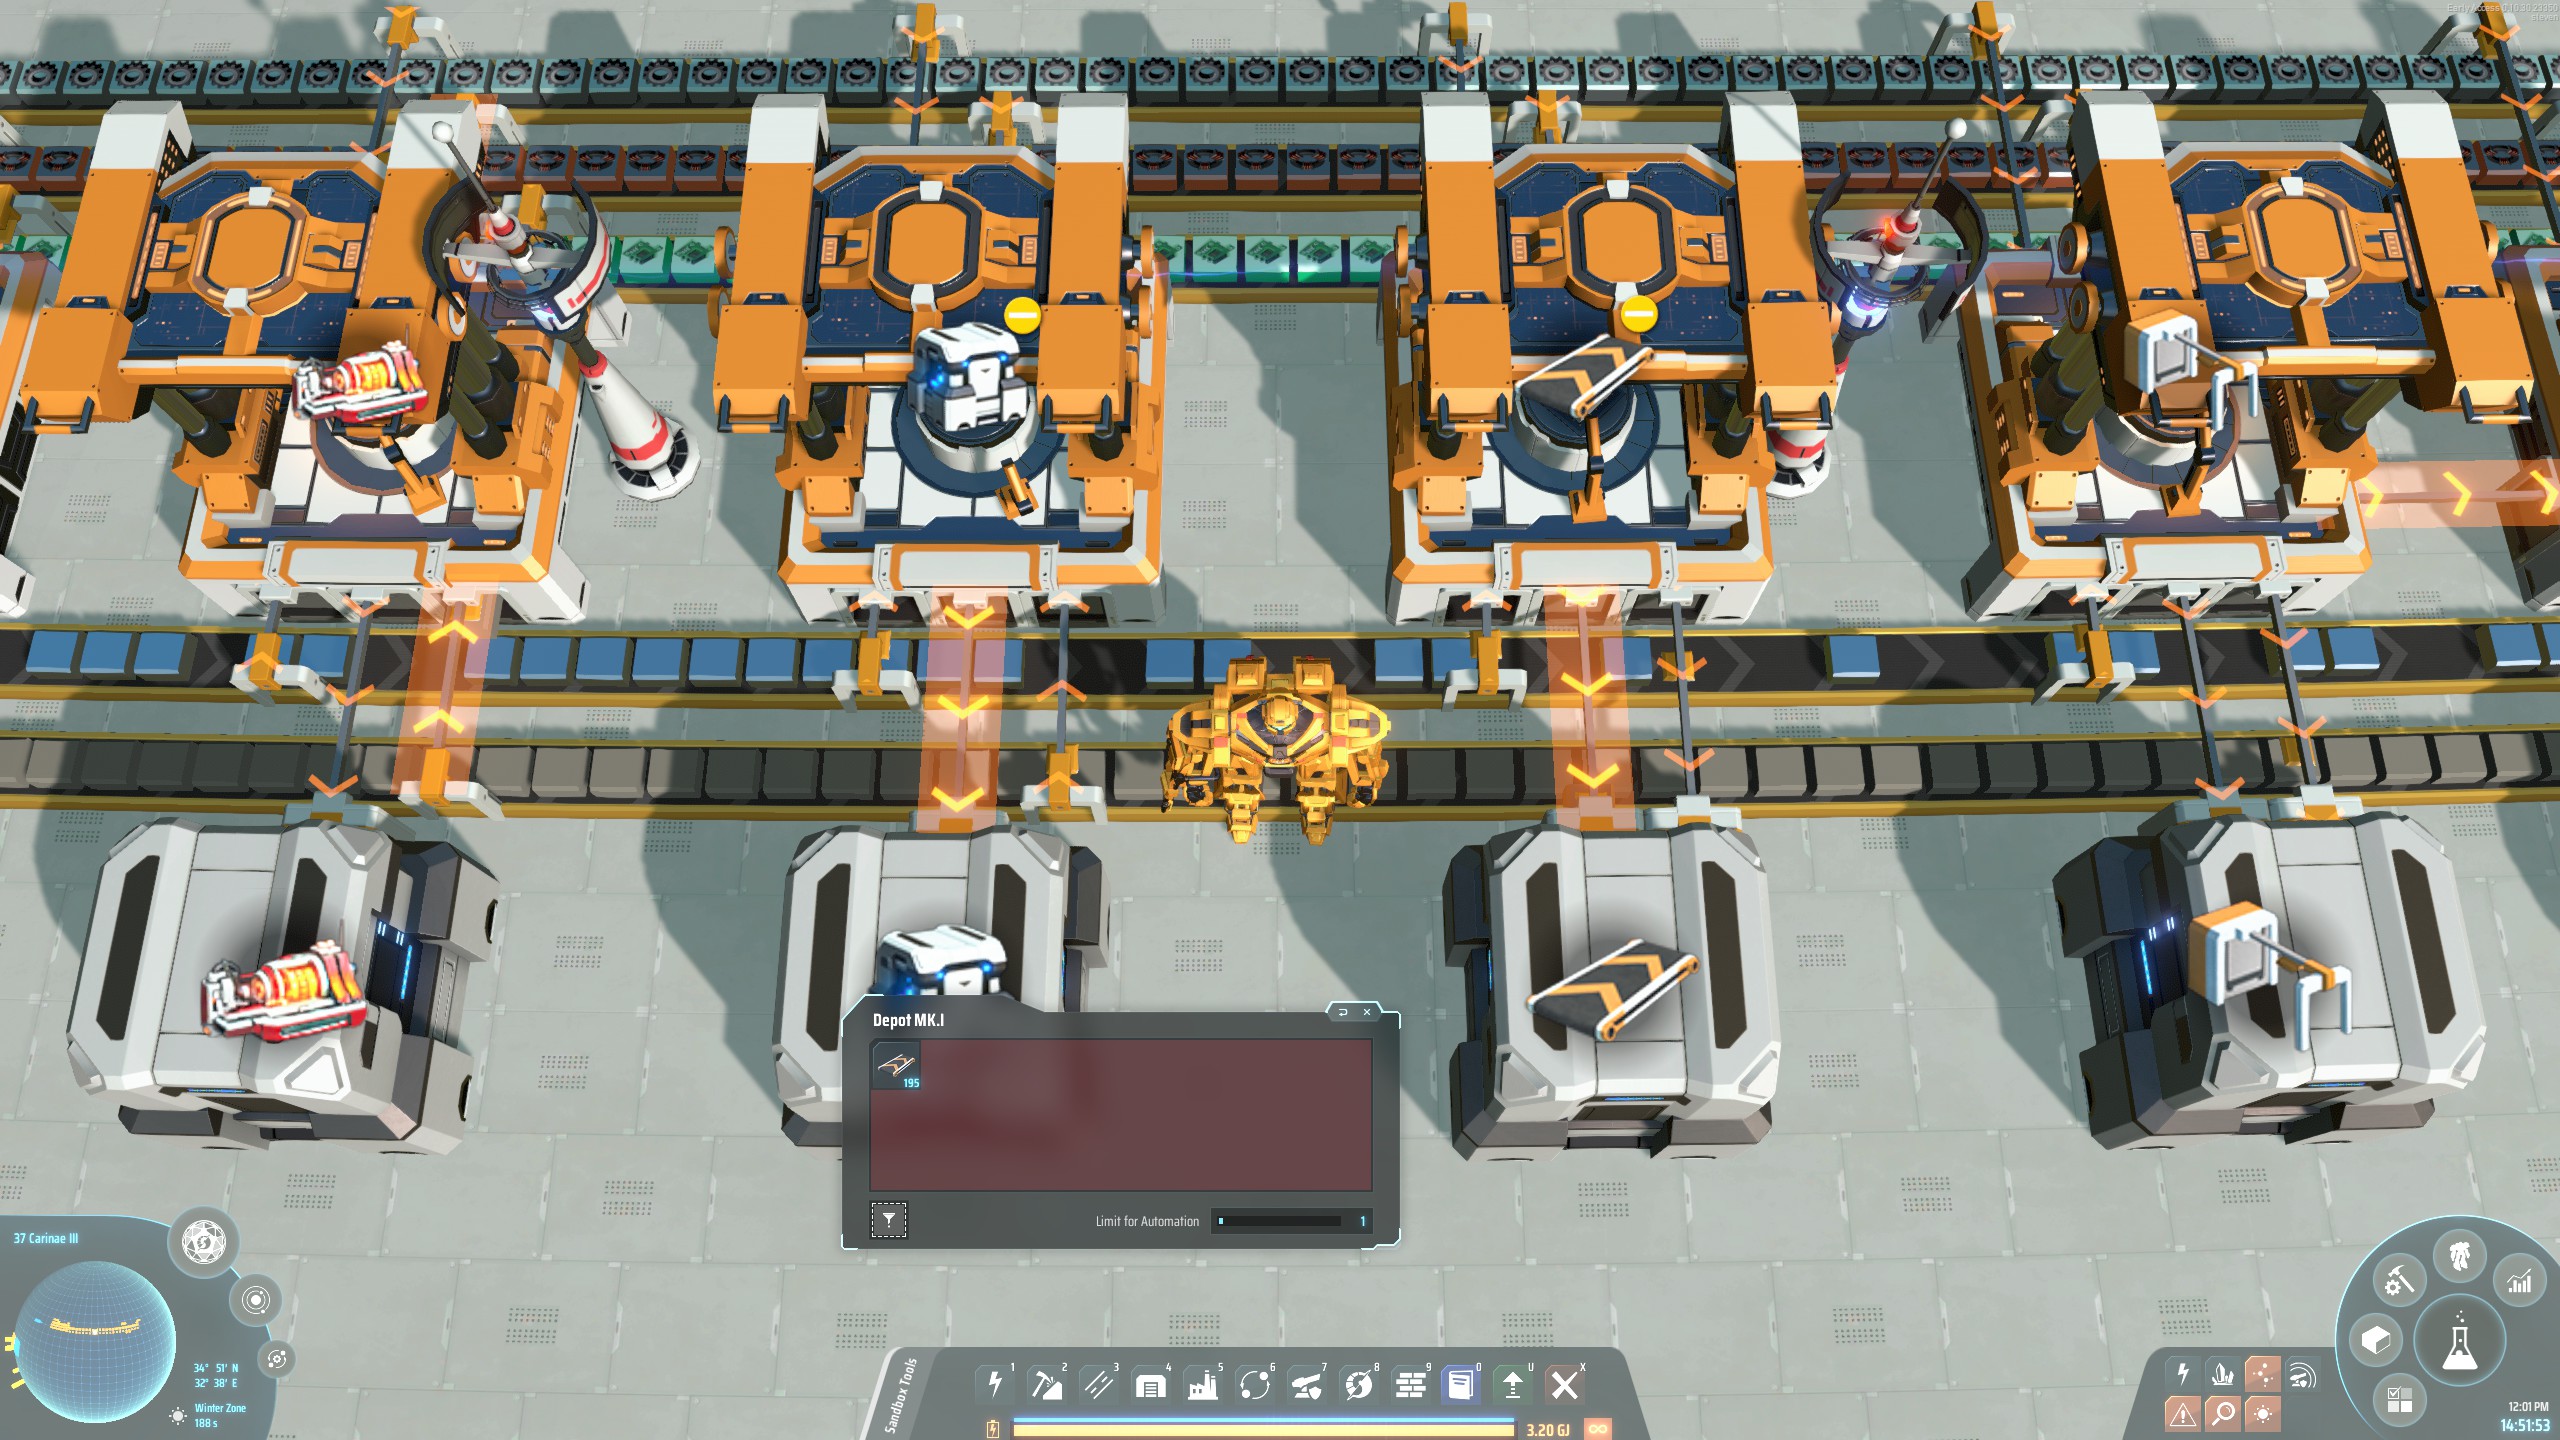
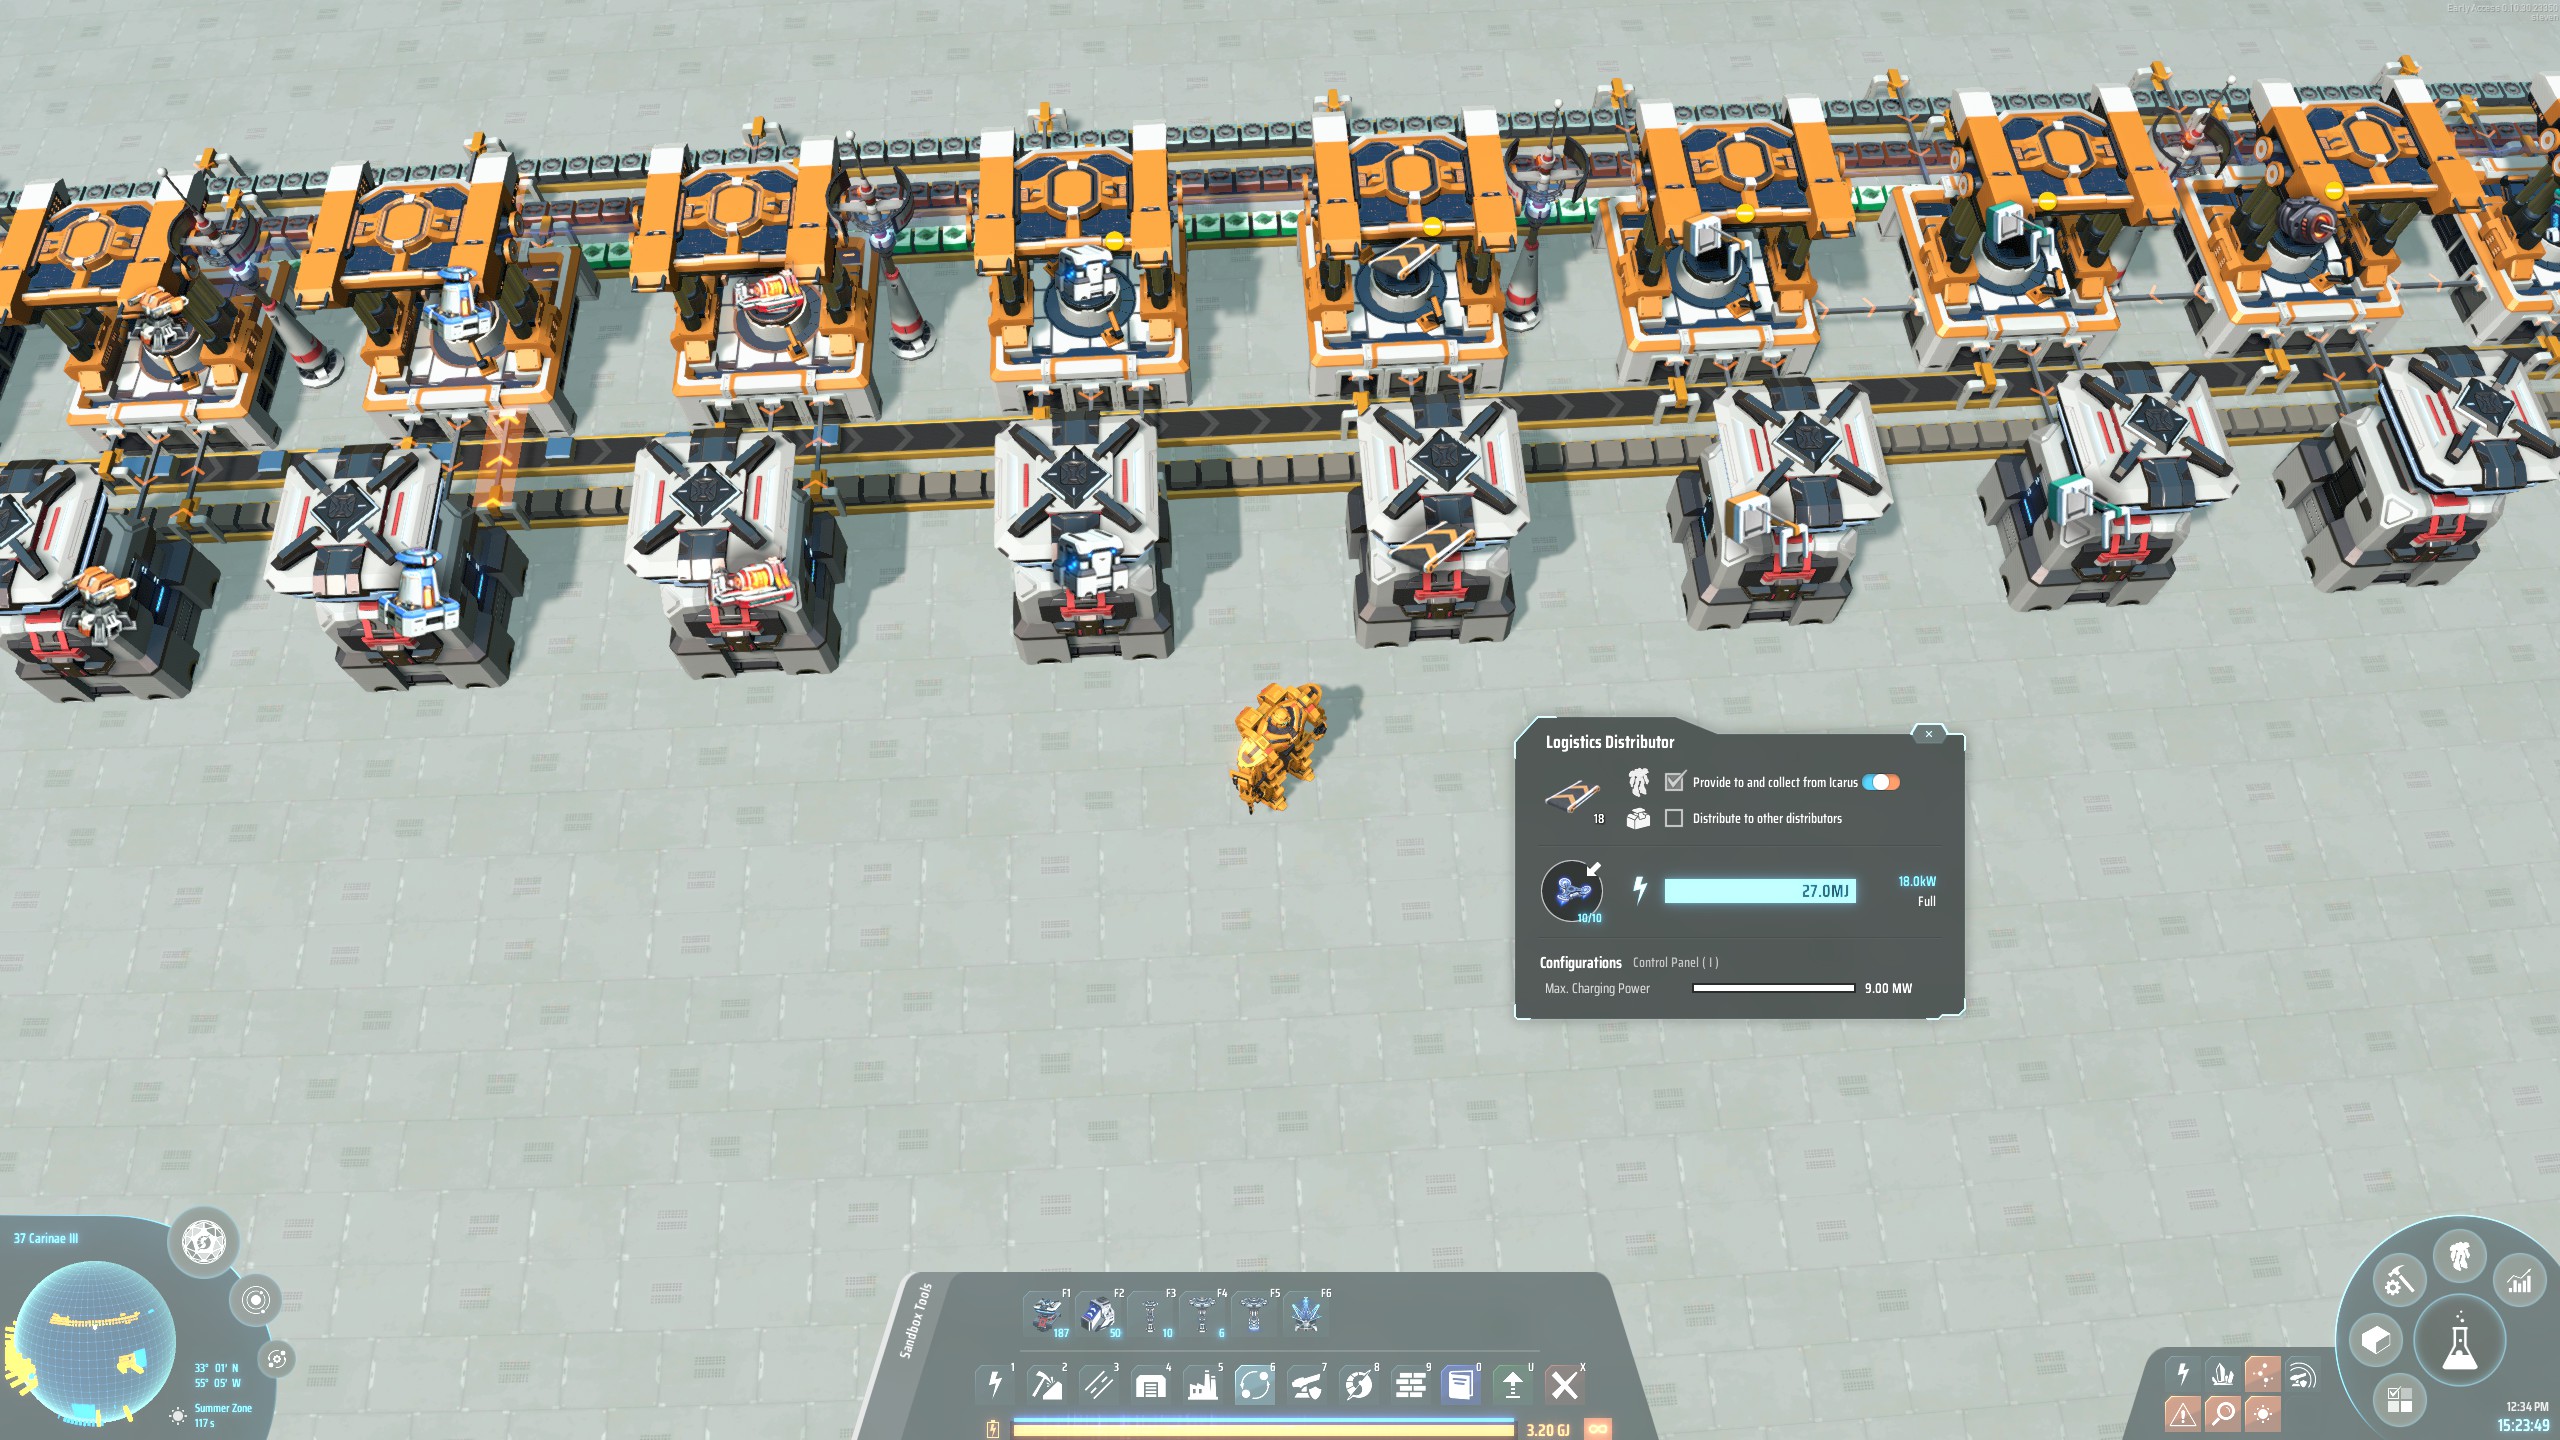
PS, if an automation limit is set in depots with logistics distributor to leave room and Icarus' logistics panel has upper limits set, then you also have the "recycling" bit on (part of) planet scale, having ripped up former spaghetti nicely stashed in the correct boxes for re-use.
Fella In Paris 16 Sep, 2024 @ 10:41am 
Thank you for this fantastic guide, it's truly helping me get a grasp on this game.
Please pardon my presumption but I believe there may be a typo in the last paragraph concerning "properties of bot malls" - second clause of the third sentence, "why" should probably be "while"
Again, thank you for the detailed explanation about malls!
steven  [author] 5 Sep, 2024 @ 12:44pm 
@Name Lips - thanks! I'm glad it's helpful. By all means let me know if you have lingering questions.

@kyklish - thanks for the bug report. I fixed the link.
kyklish 2 Sep, 2024 @ 3:36am 
PLS and ILS malls --> Links --> Duplicated links, fix them please.

Thanks for guide.
Name Lips 31 Aug, 2024 @ 7:17am 
Very interesting, I've struggled with DSP malls and this information is very helpful.
steven  [author] 28 Aug, 2024 @ 8:23am 
Hi guys! Thanks for the comments! Of course you don't have to take in the entire thing all at once, right? Just look at the type of mall you're interested in. And do let me know if there are parts that you would like a more detailed or clearer explanation about!