Crash Bandicoot™ N. Sane Trilogy

Crash Bandicoot™ N. Sane Trilogy

Not enough ratings
CRASH BANDICOOT N. SANE TRILOGY 100% COMPLETION - SHORT TEXT GUIDE (NO VIDEOS)
By Bocchi-chan
I have been playing Crash Bandicoot games since PlayStation 1 era, CB was always big part of my life. I loved and still love Crash Bandicoot trilogy and Crash Bash (I hope they remaster this one, too). Back in 2019-ish I bought N. Sane Trilogy and Reignited Trilogy together at a 50% discount. And starting playing it in 2020, and 100% completed it fully. And in February 2025 I was itching to play some Crash, so a few days ago I downloaded it again, and 108% completed Crash Bandicoot: Warped (it is my most fav game in the series, and easiest, and chill). But when doing so, I already forgot some secrets and etc., so I had to use Google. Then this idea occured to me: why not make a short text guide for people who already played Crash Bandicoot games and just want to remember things along playing? Even if you are new, this guide doesn't burden you too much, it gives essential information without spoiling much (at least I tried to avoid them). Initially I was not planning to make this guide, I was writing all of this in my Steam Notes, but in Notes, it is not easy to keep track of all this text + for Crash Bandicoot game, it would be easier to make this guide as a table rather than plain text which I did for Syberia (on paper, not guide, I was doing playthroughs, longplays and speedruns, so I wrote on paper really short guide where what to do).

In this guide we will strictly follow "Crystals and Gems before Relics" rule. Of course, if you are like me, already know which Relics you can take without Speed Shoes, you can do in a chaotic way, but I like order, and I hate time trials in any game, so I hate to get into speedrunning mindset after every level, I have to play the game normally in order to enjoy it, and will do time trials in later stages just to 100% complete it. But again, this rule is just to make sure we do things in order rather than to dictate you how to play, you are free to play in whatever way you want, you can always return to this guide to get certain info about which level opens another level, which Gem is required for which level, and other things just to remember.

Example: <INSTANCE NUMBER>. <LEVEL NAME> (<LEVEL NUMBER>) [<COMPLETION>%] <GEMS UNLOCKED THIS INSTANCE> <DESCRIPTION>
   
Award
Favorite
Favorited
Unfavorite
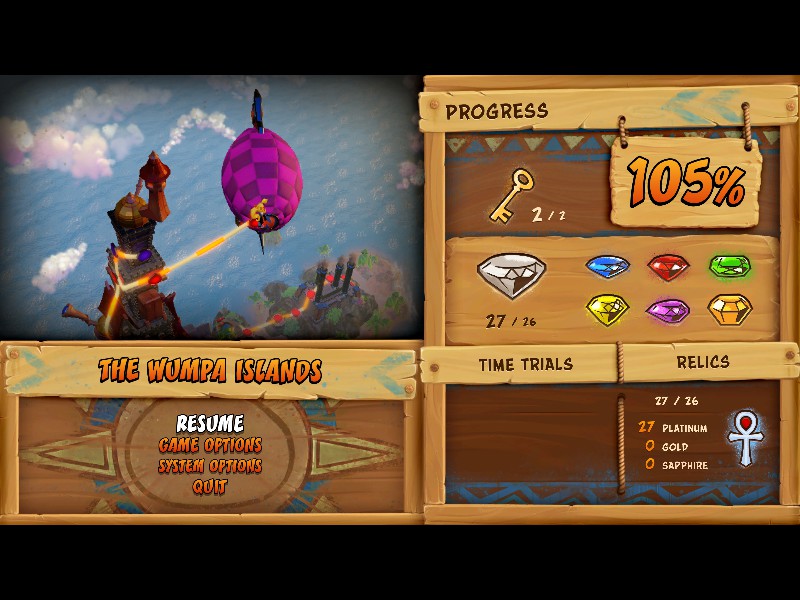
1. CRASH BANDICOOT (105% COMPLETION) IN 70 INSTANCES
In order to achieve 105% completion on Crash Bandicoot, you shouldn't defeat Dr. Neo Cortex until you have collected every gem, otherwise your progress will be stuck at 104% forever, and the only way to achieve 105% at that point would be to start a new game.
1.1. N. SANITY ISLAND
1. N. Sanity Beach (1) [3%]
Break all 49 boxes. In the fork, go right. When you reach where both roads rejoining, backtrack left road a bit, break 2 boxes, then continue the level as usual. The easiest way to cross the bridge of boxes is to collect 3 Aku Aku masks and run over it, the boxes will be destroyed on their own, but even without a mask, it is quite easy feat.
2. N. Sanity Beach (1) [3%] /
0:28.26 / 0:25.76
3. Jungle Rollers (2) [5%]
4. Jungle Rollers (2) [5%] /
0:48.12 / 0:46.89
5. The Great Gate (3) [7%]
6. The Great Gate (3) [7%] /
0:53.29 / 0:48.07
7. Boulders (4) [10%]
Break all 16 boxes.
8. Boulders (4) [10%] /
0:49.44 / 0:47.48
9. Upstream (5) [12%]
10. Upstream (5) [12%] /
0.49.95 / 0:46.51
11. Papu Papu (Boss 1) [14%]
12. Rolling Stones (6) [16%]
13. Rolling Stones (6) [16%] /
0:50.35 / 0:46.49
14. Hog Wild (7) [19%]
Break all 24 boxes.
15. Hog Wild (7) [19%] /
0:47.53 / 0:43.42
16. Native Fortress (8) [21%]
17. Native Fortress (8) [21%] /
2:25.87 / 2:05.80
1.2. WUMPA ISLAND
18. Up The Creek (9) [24%]
Break all 48 boxes. After hitting "!" box, backtrack till log bridge, you will see 2 boxes on the left bank. Activate TNT and jump back to the bridge.
19. Up The Creek (9) [24%] /
1:20.25 / 1:16.31
20. Ripper Roo (Boss 2) [26%]
21. The Lost City (10) [29%]
Break all 82 boxes without dying. One of the hardest Gems in the game, because N. Brio tokens and some boxes are hidden, if you make a mistake or die, you have to restart the level.
22. The Lost City (10) [29%] /
1:56.12 / 1:40.52
23. Jungle Rollers (2) [30%]
Green Gem Route is now open. Break all 43 boxes.
24. Temple Ruins (11) [33%]
Break all 67 boxes.
25. Temple Ruins (11) [33%] /
1:32.61 / 1:25.34
26. Road to Nowhere (12) [35%]
27. Road to Nowhere (12) [35%] /
1:03.26 / 0:57.85
28. Boulder Dash (13) [37%]
29. Boulder Dash (13) [37%] /
1:24.61 / 1:18.08
30. Sunset Vista (14) [44%]
Break all 90 boxes. The first Cortex Bonus Round in the game can be found in this level. If you complete it, you will earn which unlocks secret level Whole Hog (15). There are hidden boxes in some back areas such as right in the room behind Cortex Bonus Round platform. There is also "!" box which you can hit by timing your jump on the lizard.
31. Sunset Vista (14) [44%] /
4:10.04 / 3:41.85
32. Whole Hog (15) [47%]
Break all 24 boxes.
33. Whole Hog (15) [47%] /
0:30.44 / 0:26.87
34. Koala Kong (Boss 3) [49%]
1.3. CORTEX ISLAND
35. Heavy Machinery (16) [52%]
Break all 86 boxes. Don't forget a secret area where you jump down a gap between 2 Spiked Saucers near the start of the level.
36. Heavy Machinery (16) [52%] /
1:57:52 / 1:36:29
37. Cortex Power (17) [54%]
38. Cortex Power (17) [54%] /
0:43.98 / 0:39.70
39. Generator Room (18) [57%]
Break all 52 boxes without dying.
40. Generator Room (18) [57%] /
1:08.37
0:59.72
41. Upstream (5) [58%]
Orange Gem Route is now open. Break all 36 boxes.
42. Toxic Waste (19) [61%]
Break all 39 boxes without dying.
43. Toxic Waste (19) [61%] /
1:03.47 / 0:55.75
44. Rolling Stones (6) [62%]
Blue Gem Route is now open. Break all 87 boxes. Don't miss hidden box with N. Brio token over the first arrow box near the start of the level. The second N. Brio token is inside of the upper-left box where 5 TNT boxes aligned like X. Try not to explode it, otherwise, N. Brio token will be yeeted.
45. Cortex Power (17) [63%]
Blue Gem Route is now open. Break all 42 boxes. First fork — go right, second fork — go right, hit "!" and destroy boxes, backtrack to the second fork — go left, break Checkpoint box and, backtrack to the left side, third fork — go left (Blue Gem Route), continue as usual, when you reach last fork (you should have 26/42 boxes) — backtrack right, break 2 boxes, finish the level.
46. Pinstripe Potoroo (Boss 4) [65%]
47. The High Road (20) [68%]
Break all 45 boxes. Don't forget 4 hidden boxes right behind where you start (Wumpa fruits will show you hidden planks), and a hidden box in the air on the TNT tower with metal box on top (near the end of the level). Also, you can jump on the rope and move freely there till the very end. But it became harder in N. Sane Trilogy, at first it may seem hard, but with little practice, you will do it with 90% success (it is hit or miss sometimes).
48. The High Road (20) [68%] /
1:13.29 / 1:04.61
49. Slippery Climb (21) [71%]
Break all 51 boxes without dying. Reminder: death in Bonus Round doesn't count, so you can try Bonus Round as many times as you want.
50. Slippery Climb (21) [71%] /
3:00.47 / 2:26.08
51. Native Fortress (8) [72%]
Red Gem Route is now open. Break all 48 boxes.
52. Road to Nowhere (12) [73%]
Red Gem Route is now open. Break all 42 boxes. In the first Red Gem Route, there is a hidden "!" box in the middle of metal boxes.
53. Lights Out (22) [75%]
54. Lights Out (22) [75%] /
1:20.67 / 1:06.87
55. Jaws of Darkness (23) [82%]
Break all 112 boxes. The second Cortex Bonus Round in the game can be found in this level. As soon as you start Blue Gem Route, there will be metal boxes on right side, jump on them, and break a hidden box. Somewhere in the middle, after double spear trap, you will encounter a snake enemy, don't kill it with spin, just jump on it, otherwise it will make TNT behind it explode, which will yeet Cortex token. Same as in , if you see a wumpa trail leading to nowhere, make a walk of faith, meaning, just walk to the left, and hidden fallable platforms will appear, you will get to the secret area where third Cortex token and Cortex Bonus Round platform are. If you complete Cortex Bonus Round, you will earn the Key which will unlock secret level Fumbling in the Dark (24).
56. Jaws of Darkness (23) [82%] /
1:59.21 / 1:36.26
57. Fumbling in the Dark (24) [85%]
Break all 18 boxes. There are 7 hidden boxes right behind you, when you start the level.
58. Fumbling in the Dark (24) [85%] /
1:57.68 / 1:41.59
59. Castle Machinery (25) [88%]
Break all 27 boxes.
60. Castle Machinery (25) [88%] /
2:37.61 / 2:09.89
61. N. Brio (Boss 5) [90%]
62. The Lab (26) [93%]
Break all 36 boxes without dying.
63. The Lab (26) [93%] /
0:56.22 / 0:44.92
64. The Great Gate (3) [94%]
Yellow Gem Route is now open. Break all 38 boxes. There is a hidden box behind the wooden wall where you jump with the help of the second arrow box in Yellow Gem Route. After jumping behind wall, just go to right, you won't see anything behind the wall, so if something blocks your path, just spin.
65. Lights Out (22) [95%]
Yellow Gem Route is now open. Break all 15 boxes.
66. Boulder Dash (13) [96%]
Purple Gem Route is now open. Break all 35 boxes.
67. Stormy Ascent (27) [101%]
Break all 56 boxes.
68. Stormy Ascent (27) [103%] /
4:30.00 / 3:10.00
69. The Great Hall (28) [103%]
70. Dr. Neo Cortex (Boss 6) [105%]

Congratulations! You achieved 105% completion on Crash Bandicoot!
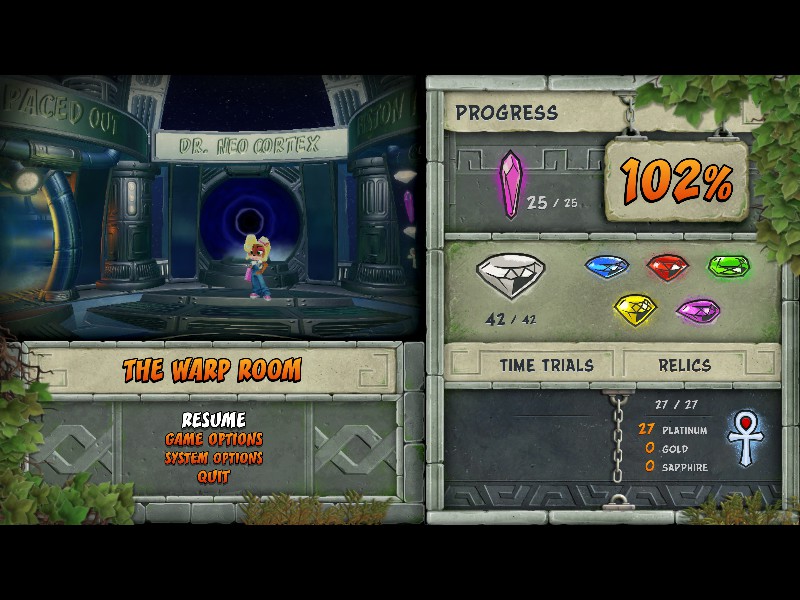
2. CRASH BANDICOOT 2: CORTEX STRIKES BACK (102% COMPLETION) IN 63 INSTANCES
To get Gold or Platinum Relics in Time Trials we need Speed Shoes which is given after defeating Dr. Neo Cortex, so we won't do Time Trials until we fully beat the game. Also, Slide+Jump+Spin (shortly, SJS) is your friend.
2.1. WARP ROOM 1
1. Turtle Woods (1) [3%]
Break all 62 boxes. There is a secret stage (stone face) where you have to slam yourself in order to get into the stage. SJS over flamingos to get to the higher places. If you still miss a box, that is probably the one on the turtle, where you flip it over and jump on it to reach the box, or just use SJS.
2. Turtle Woods (1) [4%]
Don't break any boxes.
3. Snow Go (2) [7%]
Break all 74 boxes. When you fall down from 2D part of the level, there is a "!" box for Nitros right behind you. Sometimes it is glitched with invisible wall, try to slide back (to the screen), this helped me.
4. Hang Eight (3) [10%]
Break all 74 boxes.
5. Hang Eight (3) [11%]
At some point you will see a timer in the lower-right corner. Finish the level before time runs out.
6. The Pits (4) [14%]
Break all 53 boxes.
7. Crash Dash (5) [17%]
Break all 44 boxes.
8. Ripper Roo (Boss 1) [17%]
2.2. WARP ROOM 2
9. Air Crash (7) → Snow Go (27) [19%]
Skip the first jet board part and instead, jump across the floating crates until you reach a stone platform. This platform will take you to the Secret Warp Room, where the portal to the secret area of Snow Go (27), where you will collect Red Gem, then finish the level as usual.
10. Snow Biz (6) [22%]
Break all 125 boxes.
11. Air Crash (7) [25%]
Finish the level via Death Route in order to collect Gem.
12. Bear it (8) [28%]
Break all 45 boxes.
13. Crash Crush (9) [31%]
Break all 56 boxes.
14. The Eel Deal (10) [35%]
Break all 79 boxes. First fork — go right, there is a hidden wall behind all those nitro boxes. Jump into it and collect Green Gem, backtrack, or die, then continue to the left. Second fork — go left, then right.
15. Komodo Brothers (Boss 2) [35%]
2.3. WARP ROOM 3
16. Plant Food (11) [38%]
Break all 53 boxes.
17. Plant Food (11) [39%]
At some point you will see a timer in the lower-right corner. Finish the level before time runs out.
18. Sewer or Later (12) [43%]
Break all 57 boxes. Go to the Yellow Gem Route, take Gem, and die, no need to complete that route, there are no boxes there. Later you will see a fork — go right, hit "!" boxes, go back to the fork — go left, take Crystal and break the boxes, go back to the fork, and continue to right as usual.
19. Bear Down (13) [47%]
Break all 42 boxes. In the end of the level, where Polar launches you to the finish door near "!" nitro box, hit it, but don't enter the finish door, but jump on across the platforms on the water to reach to the middle platform which will take you to the Secret Warp Room.
20. Air Crash (26) [48%]
Break all 102 boxes. When you encounter 3rd jet board, don't jump on it, but jump accross the platforms on the left to reach 4 boxes. Although in the original PS1 Crash Bandicoot 2: Cortex Strikes Back, you could break those boxes with jet board by running into the mines, and they would launch you onto the platform. Also, make sure that TNT boxes always blow up in front of your eyes, there is a known glitch in N. Sane Trilogy where if TNT boxes don't explode in front of you / on screen, not off screen, then they don't count sometimes. In fact, I had this glitch happen to me 3 times in a row when I was testing the game for this Guide, I was always missing 8-ish boxes.
21. Road to Ruin (14) [51%]
Don't die, there is a Death Route in this level. Go to the Death Route to collect Gem, continue the level as usual.
22. Un-bearable (15) [55%]
Break all 58 boxes. The first time the polar bear falls into the pit, jump into the pit, too, to get into the secret stage. If you still miss 2 boxes, it is probably those 2 boxes in the secret stage after Uka Uka mask and jump boxes. This is probably the hardest secret stage in Crash Bandicoot 2: Cortex Strikes Back, in my opinion. But you can decrease its difficulty by either starting the level with 2 Uka Uka masks beforehand, and / or hitting "!" nitro box, which is a little bit after the secret stage, and then going back to the secret stage afterwards.
23. Un-bearable (15) → Totally Bear (29) [56%]
Break all 38 boxes. In the end of the level where Polar launches you off to the finish doors, go back to Polar, it will take you to the Secret Warp Room where you can go into Totally Bear (29).
24. Tiny Tiger (Boss 3) [56%]
2.4. WARP ROOM 4
25. Hangin' Out (16) [59%]
Break all 93 boxes. Somewhere in the middle of the level, you will fall down near Crystal and Checkpoint box, if you go back, you will see a hole. Don't go into there yet. I usually don't reveal secrets before its time, but this one seemed too obvious to ignore. This level also has the hardest Bonus Stage in Crash Bandicoot 2: Cortex Strikes Back, in my opinion, but the difficulty of it again can be decreased either by holding 1 Uka Uka mask, and/or hitting "!" nitro box which is not so far ahead from the Bonus Stage.
26. Hangin' Out (16) → Totally Fly (30) [61%]
Break all 44 boxes. Now go into that hole, and go on until you will be warped to the Secret Warp Room where you will go into Totally Fly (30).
27. Diggin' It (17) [65%]
Break all 95 boxes. Go to the Death Route to collect Gem, backtrack right way till you have 74/95 boxes, then continue the level as usual.
28. Diggin' It (17) → Road to Ruin (28) [67%]
After the Death Route and right road rejoins you will encounter a spit plant alone on a ground surrounded by pit. Jump and slam yourself onto it. It will take you to the Secret Warp Room where you will go to Road to Ruin (28) level to collect Gem by breaking all 89 boxes, no need to backtrack after you join the main route of the level.
29. Cold Hard Crash (18) [71%]
Break all 155 boxes. Go to the Death Route (don't forget to break Checkpoint box before going), go all the way right, no need to break any boxes in Death Route, collect Gem, die. You will be respawned near the Death Route. Go again to the Death Route, break every box, hit "!" box (DON'T FALL!), backtrack, hit the formerly outlined life box, jump onto Death Route platform, so it takes you back to the main route. Continue the level as usual. Now, this is the hardest Death Route in Crash Bandicoot 2: Cortex Strikes Back, in my opinion, unless you hold 2 Uka Uka masks before going into the Death Route, then you will clear it smoothly easy without a problem.
30. Ruination (19) [75%]
Break all 84 boxes. Got to Green Gem Route to collect Gem. Green Gem Route may seem hard, but in case if you didn't know, you can actually spin logs. After you have got the Gem, die, you will be respawned near Green Gem platform. Continue the level as usual.
31. Bee-Having (20) [79%]
Break all 92 boxes. Jump on the nitro box staircase to go to the secret route to collect Purple Gem, then die, you will respawn in the main route with Purple Gem, no need to finish secret route, continue the level as usual. By the way, this level has a secret feature, if you hit beehives, you will earn a free life.
32. Dr. N. Gin (Boss 4) [79%]
2.5. WARP ROOM 5
33. Piston It Away (21) [83%]
Break all 69 boxes. Probably the hardest level in Crash Bandicoot 2: Cortex Strikes Back, and for clear Gem you need to backtrack and take Death Route in one go, this can't be done separately. When you reach Death Route platform, jump onto it, then die, so if you die in this level again, the Death Route platform won't disappear. You will be respawned in the last checkpoint. Continue the level as usual, when you encounter the first shrink ray (a gun shooting electric ball), don't kill the tentacle bot, you will need it to backtrack (by jumping on it to reach the left side). Continue until you have 38/69 boxes, then backtrack, and continue with Death Route, continue this route, and finish the level. Bonus Stage can be challenging, if you don't know "how to." When you try to jump over nitro boxes, don't break the life box, because you will need it to backtrack and jump over them again after hitting "!" box.
34. Rock It (22) [86%]
Break all 39 boxes.
35. Night Fight (23) [90%]
Break all 46 boxes. In the fork — go right, when the roads rejoin backtrack to the left road (Death Route) until you collect the Gem and have 31/46 boxes, then continue the level as usual.
36. Pack Attack (24) [93%]
Break all 45 boxes.
37. Spaced Out (25) [97%]
Break all 60 boxes. In the beginning of the level go to All Gems Route, collect the Gem, die, you will be respawned in the starting point of the level. Continue the level as usual.
38. Dr. Neo Cortex (Boss 5) [100%]
2.6. TIME TRIALS
39. Turtle Woods (1) [100%] /
0:56.87 / 0:45.47
40. Snow Go (2) [100%] /
0:49.64 / 0:42.88
41. Hang Eight (3) [100%] /
1:02.93 / 0:56.24
42. The Pits (4) [100%] /
1:11.51 / 1:00.34
43. Crash Dash (5) [100%] /
1:07.22 / 0:59.68
44. Snow Biz (6) [100%] /
1:09.82 / 0:51.97
45. Air Crash (7) [100%] /
1:01.01 / 0:52.75
46. Bear it (8) [100%] /
0:48.07 / 0:44.82
47. Crash Crush (9) [100%] /
1:19.83 / 1:07.87
48. The Eel Deal (10) [100%] /
1:08.46 / 0:58.90
49. Plant Food (11) [100%] /
1:03.31 / 0:57.28
50. Sewer or Later (12) [100%] /
0:41.29 / 0:34.00
51. Bear Down (13) [100%] /
0:49.85 / 0:46.14
52. Road to Ruin (14) [100%] /
0:51.78 / 0:39.04
53. Un-bearable (15) [100%] /
1:35.53 / 1:26.10
54. Hangin' Out (16) [100%] /
1:03.82 / 0:56.23
55. Diggin' It (17) [100%] /
1:48.12 / 1:36.77
56. Cold Hard Crash (18) [100%] /
2:06.07 / 1:35.99
57. Ruination (19) [100%] /
1:19.36 / 1:04.36
58. Bee-Having (20) [100%] /
1:22.00 / 1:13.42
59. Piston It Away (21) [100%] /
1:23.33 / 1:16.03
60. Rock It (22) [100%] /
0:59.55 / 0:53.44
61. Night Fight (23) [100%] /
1:10.98 / 1:04.49
62. Pack Attack (24) [100%] /
1:08.29 / 0:58.25
63. Spaced Out (25) [102%] /
1:09.24 / 0:56.95

Congratulations! You achieved 102% completion on Crash Bandicoot: Cortex Strikes Back!
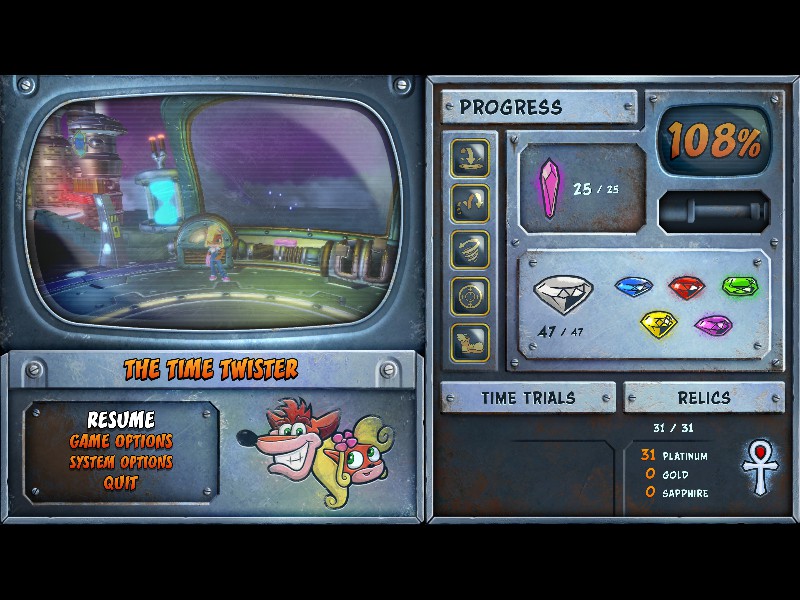
3. CRASH BANDICOOT: WARPED (108% COMPLETION) IN 72 INSTANCES
We won't do Time Trials before beating the game fully (defeating Dr. Neo Cortex), because in order to get the 47th gem, we need all 31 Relics to be at least Gold or Platinum (no Sapphires), and to do so, we need Speed Shoes which is given after defeating Dr. Neo Cortex.
3.1. WARP ROOM 1
1. Toad Village (1) [2%]
Break all 42 boxes.
2. Under Pressure (2) [4%]
Break all 92 boxes. Some boxes are hidden behind algaes and corals.
3. Orient Express (3) [6%]
Break all 51 boxes.
4. Bone Yard (4) [8%]
Break all 66 boxes.
5. Makin' Waves (5) [10%]
Break all 37 boxes.
6. Tiny Tiger (Boss 1) [11%]
3.2. WARP ROOM 2
7. Gee Wiz (6) [13]
Break all 100 boxes.
8. Hang'em High (7) [15%]
Break all 96 boxes.
9. Hog Ride (8) [17%]
Break all 13 boxes.
10. Tomb Time (9) [18%]
11. Midnight Run (10) [20%]
Break all 35 boxes.
12. Dingodile (Boss 2) [21%]
3.3. WARP ROOM 3
13. Dino Might! (11) [22%]
14. Deep Trouble (12) [25%]
Break all 83 boxes. Hit "!" box at the end, return back to outline box, now it is a TNT box, touch it, and continue with the new route to get Red Gem.
15. Bone Yard (4) [26%]
Red Gem Route is now open, go get the Gem.
16. High Time (13) [29%]
Break all 85 boxes. Go to Death Route (you need not to die in order to unlock the Death Route platform, otherwise it will be outlined). Get Purple Gem, but don't finish the level. Die, and you will be respawned at Checkpoint with Purple Gem, now continue and finish the level as usual.
17. Tomb Time (9) [31%]
Break all 95 boxes. When you reach the fork — don't break the Checkpoint box, go right, break boxes until you have 72/95 boxes, backtrack till the fork, break the Checkpoint box, go left, to the Purple Gem Route.
18. Road Crash (14) [33%]
Break all 25 boxes. It is hard to get both Crystal and Gem in one instance, so this level may take 2 instances.
19. Road Crash (14) → Hot Coco [34%]
Break all 70 boxes.
20. Double Header (15) [36%]
Break all 91 boxes.
21. Dr. N. Tropy (Boss 3) [37%]
3.4. WARP ROOM 4
22. Bye Bye Blimps (17) [39%]
Break all 11 boxes.
23. Tell No Tales (18) [41%]
Break all 61 boxes.
24. Future Frenzy (19) [42%]
25. Tomb Wader (20) [45%]
Break all 8 boxes. Go to Death Route. Get Blue Gem, but don't finish the level. Die, and you will be respawned at Checkpoint with Blue Gem, now continue and finish the level.
26. Sphynxinator (16) [48%]
Break all 105 boxes. There are 4 hidden boxes right behind you at the start. Fork — go right. Go to the Blue Gem Route, but don't hit Checkpoint boxes on your way. Collect Gem, die, and you will be respawned at Checkpoint before the Blue Gem Route. Continue and finish the level as usual.
27. Dr. N. Gin (Boss 4) [49%]
3.5. WARP ROOM 5
28. Orange Asphalt (22) [51%]
Break all 20 boxes. This is probably the hardest level to get both Crystal and Gem in one go, however, still achieveable.
29. Flaming Passion (23) [54%]
Break all 75 boxes. Break nitros manually with Fruit Bazooka. Don't die, go to the Death Route to get Green Gem, but before going you should have 29/75 boxes (destroy the one box right after Death Route platform, if you don't want to backtrack a bit).
30. Gone Tomorrow (21) [57%]
Break all 87 boxes. After Green Gem Route don't forget to backtrack a little bit to get 4 former outlined boxes.
31. Mad Bombers (24) [59%]
32. Bug Lite (25) [61%]
Break all 121 boxes.
33. Dr. Neo Cortex (Boss 5) [62%]
34. Future Tense (31) [64%]
To play Future Tense (31), you need to hop on the little platform between the entrances of Warp Room 1 and Warp Room 2. Break all 145 boxes. Fruit Bazooka is your friend. Don't forget to break 8 hidden boxes right behind you at the start. Right after the first lift, jump on the roof of the lift by jumping on the box, hit "!" box with Fruit Bazooka, jump left side and break 4 more boxes with 4 lives. Don't die, there is a Death Route in this level. There are lot of hidden sides of the map in this level. If you see a jumping box, jump on it to the upper-left side always. Also, a common mistake by newbies is to forget 3 live boxes in Bonus Stage, you should backtrack over the pack of nitros in order to get them. You have to slide or spin to kill this spiky bot, in order to hit the hidden box whose reflection we can see on the window (see image). I don't want to spoil every secret this level has to offer, because they are not that complex to guess, they are not on a Crash Bandicoot 2: Cortex Strikes Back level unintuitive, they are intuitive and can be guessed, I would say, but if you have any questions, just ask me in the comments, I think I pretty much covered everything needed for short fast guide.
3.6. SECRET WARP ROOM
Secret Warp Room can be accessed by standing in the middle of the main Warp Room.

35. Toad Village (1) [65%] /
0:57:50 / 0:44:03
36. Under Pressure (2) [66%] /
1:10:90 / 1:03:50
37. Orient Express (3) [67%] /
0:27:80 / 0:18:10
38. Bone Yard (4) [68%] /
1:40:20 / 1:21:00
39. Makin' Waves (5) [69%] /
1:03:23 / 0:56:23
40. Gee Wiz (6) [70%] /
1:22:73 / 1:05:90
41. Hang'em High (7) [71%] /
0:52:63 / 0:43:80
42. Hog Ride (8) [72%] /
0:44:43 / 0:38:06
43. Tomb Time (9) [73%] /
1:10:00 / 0:53:90
44. Midnight Run (10) [74%] /
0:38:23 / 0:18:20
45. Ski Crazed (26) [75%]
Break all 100 boxes.
46. Hang'em High (27) [76%]
47. Dino Might! (11) [78%]
Break all 112 boxes. After Yellow Gem Route, backtrack until you have 61/112 boxes, then continue and finish the level as usual.
48. Dino Might! (11) → Eggipus Rex [80%] /
In the Yellow Gem Route, during triceratops chase, hit the the 2nd pterodactyl (don't kill it, just let it take you away), and it will take you to the secret level Eggipus Rex. Take watch, do Time Trial, and you will earn both Gem and Relic.
0:52:03 / 0:47:74
49. Bug Lite (25) [81%]
Go All Gems Route to collect Gem.
50. Area 51? (28) [83%]
Break all 24 boxes and win the race. This is actually one of the easiest levels to get Platinum Relic, in my opinion. Although as a kid I had a "wow" effect when I first unlocked Secret Warp Room playing on my PlayStation, especially this level, but in 2020 when I started playing N. Sane Trilogy, I got it so fast, I kind of was disappointed actually how easy it was, considering I suck at racing games, this was something shocking. Anyway, technically it is possible to get both Gems and Relic in one playthrough, but since this Guide is strictly in order, we do first Gems, then Relics, but if you want, you can try to do all of them in one instance.
51. Future Frenzy (29) [85%]
Break all 133 boxes. Don't forget to backtrack after the first platform takes you to the midway of Future Tense (19) level.
52. Rings of Power (30) [87%]
Break all 33 boxes and win the race. In my opinion, this is one of the hardest levels to get both Gems at the same time, also, as I mentioned, I suck at racing games, that may be it, too.
3.7. TIME TRIALS
53. Dino Might! (11) [88%] /
1:25:76 / 1:03:00
54. Deep Trouble (12) [89%] /
1:15:13 / 1:08:33
55. High Time (13) [90%] /
1:04:10 / 0:56:93
56. Road Crash (14) [91%] /
1:26.70 / 1:23.10
57. Road Crash (14) → Hot Coco [92%] /
0:30.10 / 0:19.93
58. Double Header (15) [93%] /
1:21:12 / 0:59:40
59. Sphynxinator (16) [94%] /
1:22:63 / 0:56:70
60. Bye Bye Blimps (17) [95%] /
0:38:40 / 0:31:50
61. Tell No Tales (18) [96%] /
1:35:63 / 1:15:23
62. Future Frenzy (19) [97%] /
1:34:00 / 1:19:62
63. Tomb Wader (20) [98%] /
1:45:03 / 1:24:00
64. Gone Tomorrow (21) [99%] /
1:25:60 / 1:02:10
65. Orange Asphalt (22) [100%] /
1:33:30 / 1:23:80
66. Flaming Passion (23) [101%] /
1:13:10 / 0:59:40
67. Mad Bombers (24) [102%] /
1:15:23 / 0:58:13
68. Bug Lite (25) [103%] /
1:34.86 / 1:14.90
69. Ski Crazed (26) [104%] /
0:53.50 / 0:36.30
70. Area 51? (28) [105%] /
1:57:80 / 1:52:50
71. Rings of Power (30) [106%] /
1:11.46 / 1:01.73
72. Future Tense (31) [107%] /
1:15:43 / 0:52:17

Go get the last Gem near Coco and save/load monitor.
Congratulations! You achieved 108% completion on Crash Bandicoot: Warped!
2 Comments
Bocchi-chan  [author] 28 May @ 11:17pm 
It is the best to quit to Warp Room, and then re-enter the level, just to be sure. As far as I know, if you didn't hit the Checkpoint box, the game won't count your death as "death" (I haven't tested this myself, but I have read about it on CB Wiki, so take my words with grain of salt). So, you should be fine. But again, I suggest, restarting the level, just to be sure. Better late, than sorry.
dynastystar 28 May @ 2:01pm 
Question, is there any way to reset easily reset a level? I think for about 3 levels now, I've got all the crates and didn't get the gem with it saying at the finish screen "Nearly perfect ...but you died." I don't mind replaying a level again and again, but I don't have finally finishing a level and it not giving me the gem cuz I died too much.
I know why it happens since if you die too much, it starts you off with a mask but being able to tank an extra hit or being able to run through the beginning of the level means nothing to me if I don't get the gem afterwards.