Aloft
39 ratings
Aloft Progression Guide
By intentionally blank
Stuck? Don't care about spoilers? Can't find the Sawmill? Then here's a step-by-step progression walk-through!

Applies to EA version 0.3.1.15, but is being updated for 0.3.2.20
2
2
2
   
Award
Favorite
Favorited
Unfavorite
BEWARE! SPOILERS!
This is ALL SPOILERS, no spoiler tags! Turn back now, ye who are brave enough to discover without help!

tl;dr = Go to each Fresco
Look for the ? on the map. Here's the sequence:
  1. <Glider Stand> Emerald Isles (starting island)
  2. <Helm> Emerald Isles (stone tower island)
  3. <Research Lab> Emerald Isles (2nd sector)
  4. <Loom> Emerald Isles (3rd sector)
  5. <Windmill> Fallen Heights (bottom of inner circle) -- this one is optional
  6. <Sawmill> Fallen Heights (top of inner circle)
  7. <Pottery Station> Red Cliffs
See below for details.

Talking To Myself
I decided to write this walk-through in the first-person voice rather than second-person -- because it amuses me.
> Biome 1: Emerald Isles
(each step includes what I will learn along the way, with critical <Fresco discoveries> encased in angled brackets)
(No, I do not need to turn every island in the Emerald Isles green -- but I like to, anyway)

Step I - Set Sail
In the first archipelago, I must:
  1. do the tutorial, stopping at every Learning Stone (Workbench, Home Kite)
  2. to head up to the very first Fresco (<Glider Stand>)
  3. to explore within the archipelago (Wooden Wall, Millstone, Table-map)
  4. to find the next big island -- notable for it's stone tower lighthouse that I can sketch and all the free Rope laying around (it's replenishing; I should come back here should I ever run out of rope)
  5. to learn necessary recipes from Stones, Anchors, and Frescos (Rudder, Leaf Floater, Leaf Square Sail, <Helm>)
  6. to sail my very own island! (Oh, how I love this game)
(I gloss over this step because I think the tutorial's sufficient; in fact, I'm rather impressed with it)


Step II - Find the Fresco
Then, I must build a Table-map (probably right next to my helm):
  1. to place a waypoint at the island marked by a ? in the second sector
  2. to stop at some unexplored islands that I pass (learning things like Cooking Plate/Campfire, Compost Bin, and Leaf Bed along the way -- see "Blueprints" below) and grab all their loot (see Step IV)
  3. to get to that ? island and remove the Corruption (all Mykter Trees are sitting out in the open, around the periphery)
  4. to find my way into the heart of the island by one of two ways:
    • I could go to the top and work my way down, defeating the corruption core along the way
    • I could circle the island by glider, looking for a lost key; there I will also find a small crevice that I can mine away into a passageway (this is the sneaky method, but I will have to "backtrack" up the stairs to get one of the corruption cores)
  5. to enter the chamber* and defeat both corruption cores + enemies, ignoring the Mykter Cages**
  6. to find the crucial fresco there (<Research Lab>)
* I must be sure to bring 5 (five) Lost Keys to this chamber (one for the door and four for the Intricate Chests -- I mustn't forget the three behind the fresco).
** I will need to revisit this island with a sword coated in fungicide (after I've done Step III, below) to remove those cages blocking off precious resources -- including one more Intricate Chest requiring a sixth key. But first: get the fresco's blueprint for a Research Lab.


Step III - Know Your Enemy
Then, I must go to the workbench and make 6 Carved Wood (3 wood + 1 hardstone + 1 sharp stone = 3 carved wood):
  1. to build the Research Lab
  2. to invest 50 Mykter Fiber to reach Tiear 1 research (Coating Station & Upgrade Station Frame)
  3. to build the Upgrade Station (10 Stones + 10 Wood) with the Coating Station add-on (5 Mykter Fiber + 5 Carved Wood)
  4. to coat a weapon with the Fungicide I have found in various chests (particularly those Lost Chests that I dug up with my Dorkip wherever the stones formed an X or an O)
  5. to slay a whole bunch of malicious mushroom monsters for their Mykter (both samples when the sword's coated, and fibre when it's not)
  6. to collect 100 Intact Mykter Samples (ought to be enough for now)
  7. to fuel my research until I get to Tier 2, which unlocks the Mycosis Terrarium which lets me grow my own Intact Mykter Samples to fuel more research
(200 Intact Mykter Samples are needed for Tier 3, which unlocks the Fungicide Brewing Still, but I can't build that until Biome #3)


Step IV - Accumulate and Build

While adventuring, I must:
  • learn a lot at Stones and Anchors (I'll get things like Sewing Table, and Square Wool Sail, which I need but can't craft yet)
  • collect lots of Mykter Fibre from fighting on corrupted islands
  • collect as much Fungicide as I can find
  • collect/make lots of Rope to make lots of Hay to befriend Sheep and/or Alpacas by feeding them the Hay, and move them to my home island
  • collect Charcoal and collect/make lots of Paper to use my Sketchbook to get blueprints for many building parts
  • collect Lost Keys, which I need to open doors to Fresco rooms (and Intricate Chests that hold valuable loot)
  • collect Windstone Crystals, Salt Crystals, Brightsun Flowers, and Golden Feathers (all of which will be very useful, if not necessary)
  • collect lots of Hardstone
to get some essential resources/tools/intermediates:
  • 1 Hardstone + 3 Wood + 1 Sharp Stone = 3 Carved Wood. (Sharpened Stone now required as of 0.3.1.10)
  • Grind 1 Mykter Fibre at the Millstone to get 1 Mykter Grease
  • 2 Carved Wood + 3 Mykter Grease = 1 Wooden Cog
  • 1 Carved Wood + 2 Hardstone = 1 Shears
  • to use the Shears to collect copious amounts of Wool from my sheep, feeding them hay each time (this will take some time)
  • to craft 2 Wool = 2 Wool Thread, which I will need in bulk once I get the Loom


Step V - The Looming Question
Then, I must:
  1. set a course for the ? on the third sector of the map (getting distracted by unexplored islands along the way -- see Step IV)
  2. to restore that island's ecosystem by chopping down corrupted trees and destroying Corruption Cores (a couple of them hidden)
    • there's a modestly tricky glider puzzle on the bottom of the island
    • I will need a fungicide-coated sword to break down a barrier found inside a dark cave
    • I'll hold my Field Guide and look for anything that turns bright red
  3. to explore that huge island with much to offer (Rustic Farm Plot, Sharpening Station, Windchaser, and I must sketch all the building parts that I can)
  4. to find the last fresco on the Emerald Isles (<Loom>)
I must bring enough Lost Keys to open the Fresco room and the four Intricate Chests inside. I wonder if I can find all the secret goodies stashed out of sight (especially Windstone Crystals way high up)?


Step VI - Upgrade the Sails
Finally, I need to build that elusive Loom:
  1. to craft Wool Cloth (yields 3 per wool thread; I'll need A LOT for what's to come)
  2. to finally replace these flimsy Leaf Sails with those Wool Sails that I've known about for a long time
  3. to brave the first storm barrier, marked on the map as a cyan line at the top of these first three sectors (see Pesky's famous guide for tips on how to do this daunting task)
... to get the next biome, Fallen Heights!
> Biome 2: Fallen Heights
Step I: Flax & Wax
I must sail around and utilize this biome's new resources:
  • collect Flax until I get enough Flax Seeds (look for tiny purple flowers; if you have trouble distinguishing one type of flower from another, I made this image for comparison)
  • and start growing Flax in large quantities (see the Farming section of the Cooking Guide)
  • collect Wax from beehives
  • to make Waxed Rope, which will help me make the mid-tier recipes and blueprints
Although I don't need them to progress, this biome offers many more new resources:
  • Pheasants who drop Eggs and Feathers (perhaps I'll make a Bow & Arrows)
  • (Edit for 0.3.2.12) New small animals -- descriptions coming once I get my current play-through this far
  • New foods like Honey, Tomatoes, and Pumpkins


Step II: Find the Fresco (or Not)
Then I want to progress towards the "bottom" ? in this inner ring of the map, collecting loot & knowledge along the way. When I get to this island, I must glide over
  • to get the top, where the waters fall down the center
  • to drop down, landing on the room holding the fresco
  • to go towards the wooden ruins and find the marble gateway leading downwards*
  • to use one of my Lost Keys on the door (if I don't have any spares, I'm sure I can find one on the island itself)
  • to go get the first fresco in this biome (<Windmill>)
*I can take one of at least two alternate paths to the locked door, if I'm willing to mine rocks.

I want to bring Lost Keys for the Intricate chests around the island:
  • one at the top of the island, inside the base of the overflowing water tower that's closest to the edge of the island's rim
  • one just after the locked door, up & to the left (before the tunnel to the fresco chamber)
This step is technically optional, since I don't actually need a Windmill! However, it's a brief stop along the way, and the Windmill unlocks automation, which will allow certain crafting machines to continue running while I do other things. Also, this is a pretty fun island to explore (with no corruption!


Step III: A Long Trek
Then I need to start heading towards the "top" ? in this inner ring of the map (collecting loot & knowledge along the way, as usual), which is 3 sectors away from the "bottom" ?, clockwise.


THIS IS A LONG JOURNEY, so if I plan on going straight there, I need to either be AFK (returning periodically to turn right a little) or else occupy myself with base-building and farming. How are my Flax crops doing, I wonder...?


Step IV: The Cloven Galleon
(UPDATE: v0.3.1.13 changed this island dramatically!)
Once I arrive at the island, I'll see a few obvious things:
  • the large, multi-level sea vessel that's made of stone and wood, somehow lodged into this island, and cloven in twain
  • the bow is mostly exposed, the stern is more solidly encased in rock, and they are separate islands
  • attached to the bow island (and thus considered the same island) is an alabaster temple with a large, locked door (I bet the Fresco's in there)
  • that they're totally corrupted with fungal grossness!
OK, now I must:
  1. cleanse the bow island of the Mykter Tree(s); this is a bit tricky to find:
    • First I must glide around to find a hole in the side of the ship, through which I may enter
    • Then I need to wind my way down one deck, hearing the sounds of enemies as I approach
    • I will need to hack away some overgrown mushrooms to get through a blocked doorway
    • I'll need to drop down to a level beneath the ship's hull, to fight off enemies (I know this was mere hours ago, but I forget if there was a Mykter Tree here or not)
    • I must progress further downward into a dark chamber to destroy all corruption therein
  2. to unlock the alabaster temple door with a Lost Key*, preferably at night (because of the Moonbloom Blossoms)
  3. to get the fresco (<Sawmill>)
* I should also bring 5 extra Lost Keys for the Intricate Chests:
  • there's one on top of the Alabaster Temple, towards the back
  • two are slightly hidden inside what looks like planters, just after I enter the temple
  • two are sitting boldly on either side of the fresco
(Above: this image is outdated, from version 0.3.1.10)
After the corruption clears and I nab the long-overdue Sawmill blueprint, I may want to rush home to build all that stuff I've been yearning for (but never had a means to make planks). Of course, there's so much on this island to sketch, and so many chests to loot... decisions, decisions... Hey, beehives!


Step V: Upgrade the Sails
I must finally build that Sawmill everyone keeps talking about
  1. to make Wooden Planks
  2. to make a Flax Break
  3. to turn Flax into Fiber
  4. to weave into Linen Cloth
  5. to make Linen Sails


Step VI: Once More, Unto the Breach
At last, I must use these fancy linen sails to get through the second barrier and progress to the third biome. I better stock up on Linen Cloth!
  • I can charge straight ahead, leave the helm, and frantically glide around my island repairing sails (the Brute Force approach -- it works!)
    -OR-
  • I can thread the needle like a leaf on the wind, keeping all my sails clustered right next to the helm for quick repairs (as Pesky does -- much more elegant and less linen-consuming).
This step is tempting to do as soon as possible, as indicated on the maps I drew for Biomes 2 and 3. However, if I can muster the patience, I want to stay in the inner ring for another sector or so before crossing over the barrier. This will allow me to use the more favorable clockwise winds to get close to the next destination (the only Fresco site in Biome 3) with less travel time.

(Apologies to any literature nerds out there: I know I got the Henry V quote wrong, and it really doesn't have anything to do with this game. I just made a random reference because it sounded good at the time!)
> Biome 3: Red Cliffs
Step I: It's a Dry Heat
Before I do anything in Red Cliffs, I need to figure out how to deal with the heat! I'm susceptible to getting the Parched debuff that will drastically slow down my attacks/resource gathering. To avoid this, I want to:
  • make and wear Linen Clothing at the Sewing Table (provides the Heat Protection buff for a few minutes)
  • stay Hydrated (see the Food Guide)
  • get Wet (another debuff; -1 Momentum)
  • stay indoors during the day, going out only at night (day/night part needs to be verified/refuted)
  • ? Possibly staying in Adobe buildings (needs to be verified or refuted)
  • ? Possibly gliding around (needs to be verified or refuted)
There are periodic heat waves that will make me Parched even if I wear Linen and wade in the pond. When they get really bad, a threatening bar appears, building up towards a menacing red flame icon (instant respawn!) For each of the above measures I have taken (except staying indoors), an additional segment appears on this threatening bar, delaying the respawn (flame).
At some point (when?) the Parched debuff will apply a limited amount of damage, if I'm at full health.
I hope my home base has a water source, because my crops get mighty thirsty in this heat, and most of these desert islands are bone dry.


Step II: Gather Materials
I need to obtain:
  • the blueprint for Antidote Brewing Still via the Research station (Tier 4)
  • the blueprint for the Kiln from a Learning Stone
  • scarce Darkwood (that is not dark on the outside, but rather pale); this can be further refined for more crafting options:
    • 1 Darkwood => 1 Darkwood Plank (at the Sawmill)
    • 3 Darkwood Planks + 1 Hardstone + 1 Sharpened Stone = 3 Carved Darkwood
  • common Clay using a Dorkip (it looks a little different from the surrounding rocks); this is necessary once I get the Pottery Wheel and the Kiln, but it's also useful for building Adobe structures (assuming I have enough Darkwood)
  • Whistling Cores from tall rocks with circular holes in them (the description says that they are only available during heat waves; this is inaccurate); these will let me build the Antidote Brewing Still, as well as crafting a trinket and other uses (see below)
  • (the real sticky part) Acacia Gum, which can be found on Lone Acacia trees (I should farm these trees, since the gum doesn't spawn very often); this will be necessary to form Uncooked Pottery (with Clay) at the Pottery Wheel; I can also make a bunch of new colors at the Sewing Station and Glider Stand by combining multiple base dyes with Acacia Gum as a bonding agent
  • Bones aren't technically required for progression (currently) but if I can combine them with Carved Darkwood and Waxed Rope, I can make tools/weapons that are far superior to the basic stone tools.
  • Very rarely, I may find Aloe Vera; this will let me craft Tier-3 Linen bandages
  • I can find Potatoes, Carrots, Watermelon, and Peas to increase my culinary repertoire
  • I can find purple Horned Beetles (different from Blue Beetles) on stumps and logs, to help me restore ecosystems
  • (Edit for 0.3.2.12) New small animals -- descriptions coming once I get my current play-through this far
  • Also: now there are Goats to befriend and milk!


Step III: Adobe City
Then I must get to the final ? on the map
  1. to sketch every part of the impressive adobe city*
  2. collecting loot, resources, and crops
  3. and be sure to get the learning stones & the fresco (<Pottery Station>)
* When I run out of paper to sketch, I can make more (Glasswort required; good thing I've been hoarding it up til now).
I want to bring enough Lost Keys for the door to the Fresco room, as well as the Intricate Chests I will find:
  • one is sitting out in the open on the upper level
  • one is inside a small house, behind a couch that's tilted at an odd angle
  • two are in a hidden alcove up and to the left of the fresco
  • two are behind the Fresco itself


Step IV: Brew the Antidote
Once I make the Kiln and Pottery Station, I can
  1. make Uncooked Pottery (requires Clay, Acacia gum, Dirty Water) at the Pottery Wheel
  2. to make Clay Flasks in the Kiln (requires Charcoal, Salt, and Uncooked Pottery)
  3. to make an Antidote Brewing Still (requires 10 Clay Flasks, 5 Whistling Cores, 10 Stones, 3 Charcoal, 3 Dirty Water)
  4. to brew the Antidote (requires Fungicide & Reishi Mushroom) that will cure Leviathan.


Step V: Find Leviathan
I'm going to use the Stormchaser to direct me to the final "level": Leviathan (remember her from the tutorial?) This doesn't cost much, but each use only lasts about five minutes.

I hope this works...

Leviathan Search Log
  • Not sure how many times I'll have to use this Stormchaser before I find Leviathan.
  • So far, I was pointed directly at the center of the storm*, making me cross the barrier again -- my poor sails!
  • Upon getting back to the inner ring, I found islands, but they weren't Fallen Heights biome; they were Emerald Isle biome!
  • A second use of the Stormchaser led me to the impassable barrier around the center of the maelstrom.* Maybe Leviathan's on the opposite side of the storm? Going around...
  • Nope. I went around, back to the start of Fallen Heights, but I'm still getting pointed into the barrier.* Hmmm...
  • Broke down, looked it up on the forums. Thanks for the answer, Pesky!

* EDIT: This log was written wwaaaayyy back in January, when the Stormchaser malfunctioned. Since then (0.3.1.15), it appears to work properly. They must've fixed it without a word (or I just missed it in the change logs).

If I were to find Leviathan flying higher than my island's 1000 meter limit, I could consult this forum post for guidance.

Psych!
Turns out the Stormchaser was totally lying (but it works now). Leviathan isn't in the center of the storm, she's cruisin around the last sector of the third biome. I'll just keep heading counter-clockwise/anti-clockwise/widdershins until I can't no more.

Wait, what's that whale-call all around me? Is it...? It is!
> Leviathan
Fighting for Leviathan
The first thing I notice is that Leviathan is composed of several linked islands, all corrupted. All but the last have cages that can only be removed by an antidote-coated weapon.

Tail to Head
It looks like I must start at the tail, since this is the only "island" that has a Mykter tree that I can fight. When I destroy it, the next section's tree(s) will appear, and so forth. When the last section has the corruption removed, Leviathan will be cured.

Preparation
Originally posted by xitooner:
When I did the leviathan, I went in with 2 sharpened/coated weapons; bone sword and dorkip. (plus a bow with lots of arrows for those high nodes). Turns out I needed both coatings to make it through all the cages and creatures easily. I think building the coater/sharpener on the tail island is probably the way to go (that and resting up to get your HP back when you need to).

These fights may serve as a "final level", but they aren't much harder than what I've already faced. I will make a point to follow all the tactics I've accumulated, bring at least one backup tool coated in Antidote, and prepare 4-8 of my finest gourmet meals (plus coffee!).

Cleansing Leviathan
Once I have cleansed all "islands" of Leviathan, I'll get a very brief "cutscene" of her restoration, with some music. And that's it! No story, no endgame, not even credits. The game is still very Early Access; what can you expect?

I notice there are a bunch of resources available after cleansing Leviathan. Bright blue Windstone Crystals are everywhere (some of them out of reach -- good thing I can build platforms). I also notice a new resource: bright purple Wisteria draped here and there. Although there is no sickle symbol when I look at it, I can nonetheless harvest the Wisteria with a sickle. The first time I do this, I'll learn a recipe for Wisteria Tea (cold-brewed at a workbench, not on a cooking plate) and a decorative Teapot. If I'm interested in continuing the fight against the Mykter Corruption, this rare tea will grant me substantial benefits (the Enthusiastic and At Peace buffs, both for 10 minutes).
Biome 1 Knowledge Progression
The following is the order of unlocks according to one of my characters' play-through (one without sketching any blueprints). You may experience a different order, but that has more to do with whether you are visiting a fresco, anchor, or simple learning stone. I don't believe there is any random element to the order of unlocks, until you get to the "random sketchable" stones -- then it will give you a random "sketchable" blueprint that you haven't sketched yet. Sometimes a "listed" blueprint can be sketched, skipping that learning stone and giving you the next in the sequence. Some folks report that they can receive a duplicate blueprint during this phase, but that's not supposed to happen.

Disclaimer
Note that there is another guide that has just the quotes (Words of Wisdom by AburntBridges). I did not copy that guide, but rather wrote these down from the game. I don't mean to steal your wind, AburntBridges; I just needed to match the quote with what it unlocks, because too many folks were getting progression hangups (or bugs), myself included.

Frescoes (Emerald Isles)
  1. <Glider Stand>
  2. <Helm>
  3. <Research Lab>
  4. <Loom>

Anchors (Emerald Isles)
  1. <Rudder> - "We were brought into this world to tame it, and tame it we did"
  2. <Leaf Floater> - "We sailed the winds, thanked the storm, and mourned the sea"
  3. <Table-map> - "Only by knowing where we've been, will we know where to go"
  4. <Leaf Square Sail> - "With promise on the horizon, we trimmed our sails with the winds of the past"
  5. <Wool Square Sail> - "Together we charted a course where no single voice led, but all voices guided"
  6. Stormchaser - "The ancestral wind guides our way, bringing us closer to our purpose"
  7. Wool & Leaf Gaff Sail - "The Great Wind was our vessel, and through its rage we reached serenity"
  8. Wool & Leaf Lateen Sail - "The sea of clouds brought us ashore, home once again"
  9. Beacons* - "We captured the stars, and left their guidance for others to find"
  10. Wool & Leaf Junk Sails - "Troubled waters were cleared, making room for the sun as storm clouds parted"
  11. Wool & Leaf Bermuda Sails - "As Children of the Skies, we were orphans no more"
  12. + (nothing) - "The teachings of these lands have ended... perhaps new horizons will bring growth"

Learning Stones (Emerald Isles)
  1. <Workbench> - "Our most valuable resource, creativity, was truly limitless"
  2. Home Kite - "Our journey is not defined by what we abandon, but by what we carry with us"
  3. Wooden Wall - "Our duty is not to thrive, but to lay the foundation for those to come"
    (This includes numerous construction parts, storage)
  4. Leaf Bed - "Under the stars, our fate was safe at last"
  5. Campfire & Cooking Plate - "As long as we tend our hope, we will burn bright, strong, and enduring"
  6. (NEW) Leaf Animal Landing Pad - "Defined by our actions, we ensure that everyone makes it home safely"
  7. <Millstone> - "The great storm is the mill of Humanity, ready to be born anew"
  8. (NEW) Habitats - "By providing homes for others, we forge a world we value and cherish"
  9. Compost Bin - "Risen from our ancestral home, the soil remains rich and healthy"
  10. <Rustic Farming Plots>* - "From earth, water and wind, life springs forth"
  11. Sewing Table - "We adorned ourselves with the badges of our past, each cloud offering a new hue"
  12. Sharpening Station - "We face our challenges with pride and resolve, prepared for what's to come"
  13. (NEW) Wooden Animal Bell - "When friends run astray, may the chimes of our hearts guide them home"
  14. Customizing Station - "We carve and shape our tools, and in turn they carve and shape our fate"
  15. Wood Dock - "From island to island; sharing was the way forward"
  16. Pigment Pool - "Adorned by the sunset, we danced with the sunrise"
  17. Crystal Window - "The clouds may hide the stars, but their brilliance endures"
  18. Worm Box - "The cycle of nature brings new life to the earth, giving purpose to the past once more"
  19. Rope Basket* - "With our craft, we preserve our memories"
  20. + (a random sketchable) - "Fragments of text and carvings ignite inspiration for a new design"
*Some of these can be sketched, and therefor may not occur unless I am explicitly trying not to sketch anything.

Lost Sayings
These quotes/recipes have been removed (and the blueprint is now unlocked in some other manner):
  • Cooking Plate & Campfire - "Just like memories, some things are better once shared"
  • Granary - "The fruits of our labor have ripened, waiting to be savored"
    (now Granary unlocks as soon as you get some food to store)
Biome 2 Knowledge Progression
Frescoes (Fallen Heights)
  1. Leaf Windmill
  2. <Sawmill>

Anchors (Fallen Heights)
  1. <Linen Gaff Sail> - "The sky roared, but our sails stayed strong"
  2. Linen Lateen Sail - "Fear not the boundaries of this world, for they whisper of possibilities"
  3. Linen Junk Sail - "We refused the constraints of our birth, molding the clouds as we saw fit"
  4. Linen Bermuda Sail - "We sail not to escape the Storm, but to learn its ways"
  5. Linen Square Sail - "The Great Wind carried us forward, fueled by our hopes"
  6. + (nothing) - "The teaching of these lands have ended... perhaps new horizons will bring growth"

Learning Stones (Fallen Heights)
  1. Spinner - "The ropes and knots weave our lives together into a tapestry of memories"
  2. Trough* - "With a gentle hand we feed them, yearning to see them grow into old friends"
  3. <Flax Break> - "In the grand tapestry, even the broken threads contribute to its beauty and resilience"
  4. Bird House* - "Each and every one of us has a part to play, from the tallest to the smallest"
  5. Wood Chest* - "A life in the clouds means every find is a treasure"
  6. + (a random sketchable) - "Fragments of text and carvings ignite inspiration for a new design"
Biome 3 Knowledge Progression
Fresco (Red Cliffs)
  1. <Pottery Wheel>

Learning Stones (Red Cliffs)
  1. <Kiln> - "Like fire, challenges have the power to harden or destroy us"
  2. Stone Chest* - "Under stone and bone, we safely store our cherished treasures away from the storm"
  3. + (a random sketchable) - "Fragments of text and carvings ignite inspiration for a new design"


Note: all progression above is still in the process of being verified against the most recent build (0.3.2.20 as of this writing). Sometimes the order changes, but there isn't any way of knowing without testing from a fresh character/world. It takes me a cool minute to play through all 3 biomes from scratch.
Mysterious Map Symbols & Other Tips
This Is The Way
I posted the map I made for Biome #3 under the Artwork section, and got a fun comment.
Originally posted by Wookie:
I'm in Red Cliffs now and funny thing is, we have both taken the same path to get there... Lol

I want to copy-paste my reply here, in case it interests anybody else.
Originally posted by me:
@Wookie: I really hesitated to reply this way, because I hate sounding dismissive: The map highly encourages this path. The winds blow counter-clockwise on the outer ring, and clockwise on the inner ring. Combine that with the need to hit up each fresco in sequence (and the rock barriers), you get a fairly linear path, even though it feels like an open world.

One could stay in their current biome after upgrading their sails, or fly against the wind. But in general, very few players have that kind of patience. Even the "sprint to the sawmill" section in biome #2 is encouraged by the fact that recipes for items needing planks have been unlocked long before you get the Windmill. The common experience is to jump into Biome 2/Fresco 1 island hoping to find the Sawmill, only to get let down by a blueprint for optional tech (the Windmill). This emotionally stimulates players to rush past all the islands in the next three sectors, just to get to Biome 2/Fresco 2 for that long-awaited lumber machine. When we finally get the sawmill, we realize that we can now upgrade our sails to linen, so we do that and make a beeline for the next barrier to test them out.

The only real place where I see the game no longer guiding the player in the correct direction is the final stretch: the search for Leviathan. I did what I thought I was supposed to do: use the Stormchaser. Alas, be it a bug or sneaky misdirection, the Stormchaser does not accurately point to the final "boss," so one is left to either "follow the wind" (the correct choice) or else cheat by asking others (what I did).

Sorry for the long-winded book, but I wanted to thoroughly explain why I consider this to be "THE" path of progression. Again, I'm sorry if I come across as dismissive. I think it's awesome that we took the same path! I just think this is also the case for most players who get to the final biome.

If you have any thoughts (especially if you disagree), please leave a comment below.
That Is All
Thank you so much for reading my lengthy guide! I spent a lot of time on it, and hope that it can help someone, or interest someone, or amuse or even bemuse. Let me know if I got anything wrong, or I missed anything, or if you have any other comments.
For Further Reading
Aloft hasn't been out that long, but there's already a wealth of player-made literature to help other players. Here is a selection of other Steam Guides (in no particular order):
If you find any of these helpful, please support the author with a "thumbs up" to the guide.
27 Comments
Good Old Gamer 20 Apr @ 2:25am 
ohhhh Thanks Intentionally Blank.. .i didn't realies... might give this game another shot soon then :) <3
gg.nadrewod 20 Apr @ 12:18am 
This game doesn't really have ranged combat or magic, so literally the only way to fight is the same way you mine or cut trees: you hit it with something until it breaks. Different tools have different combat characteristics, but theoretically any tool can be used to defeat all enemies in the game with enough skill/patience. There's always two things to focus on when clearing corruption:

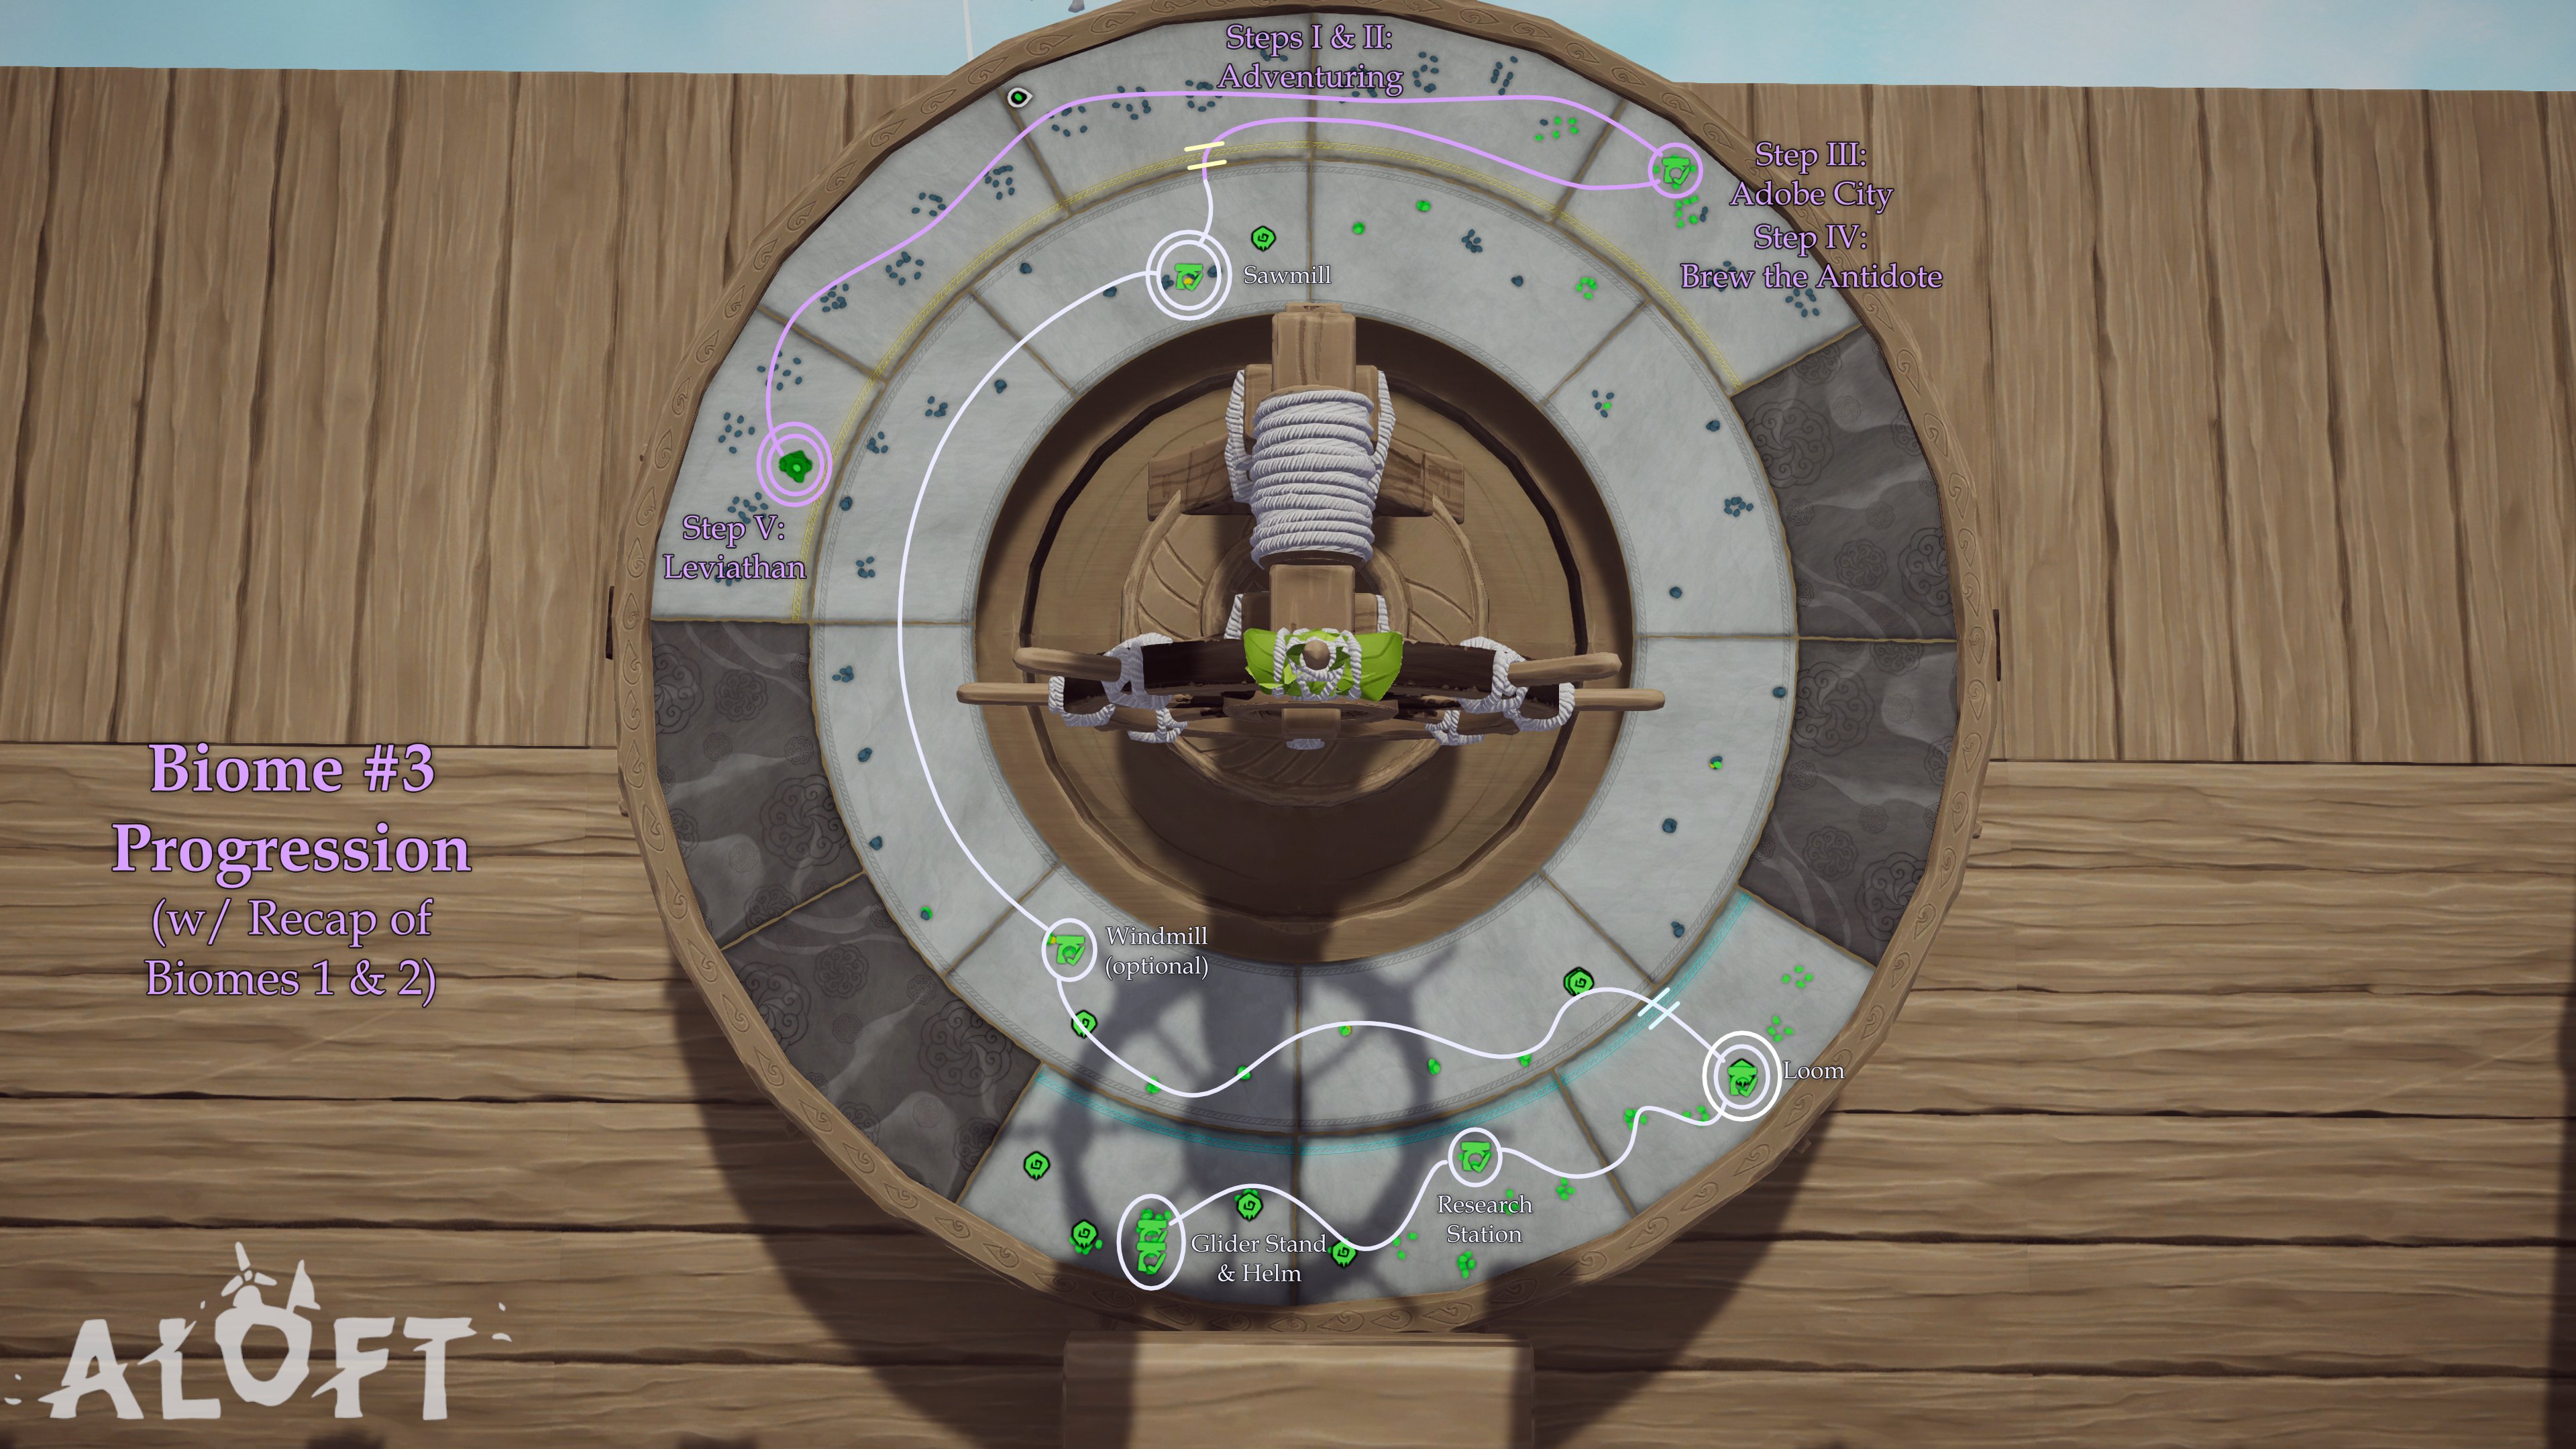
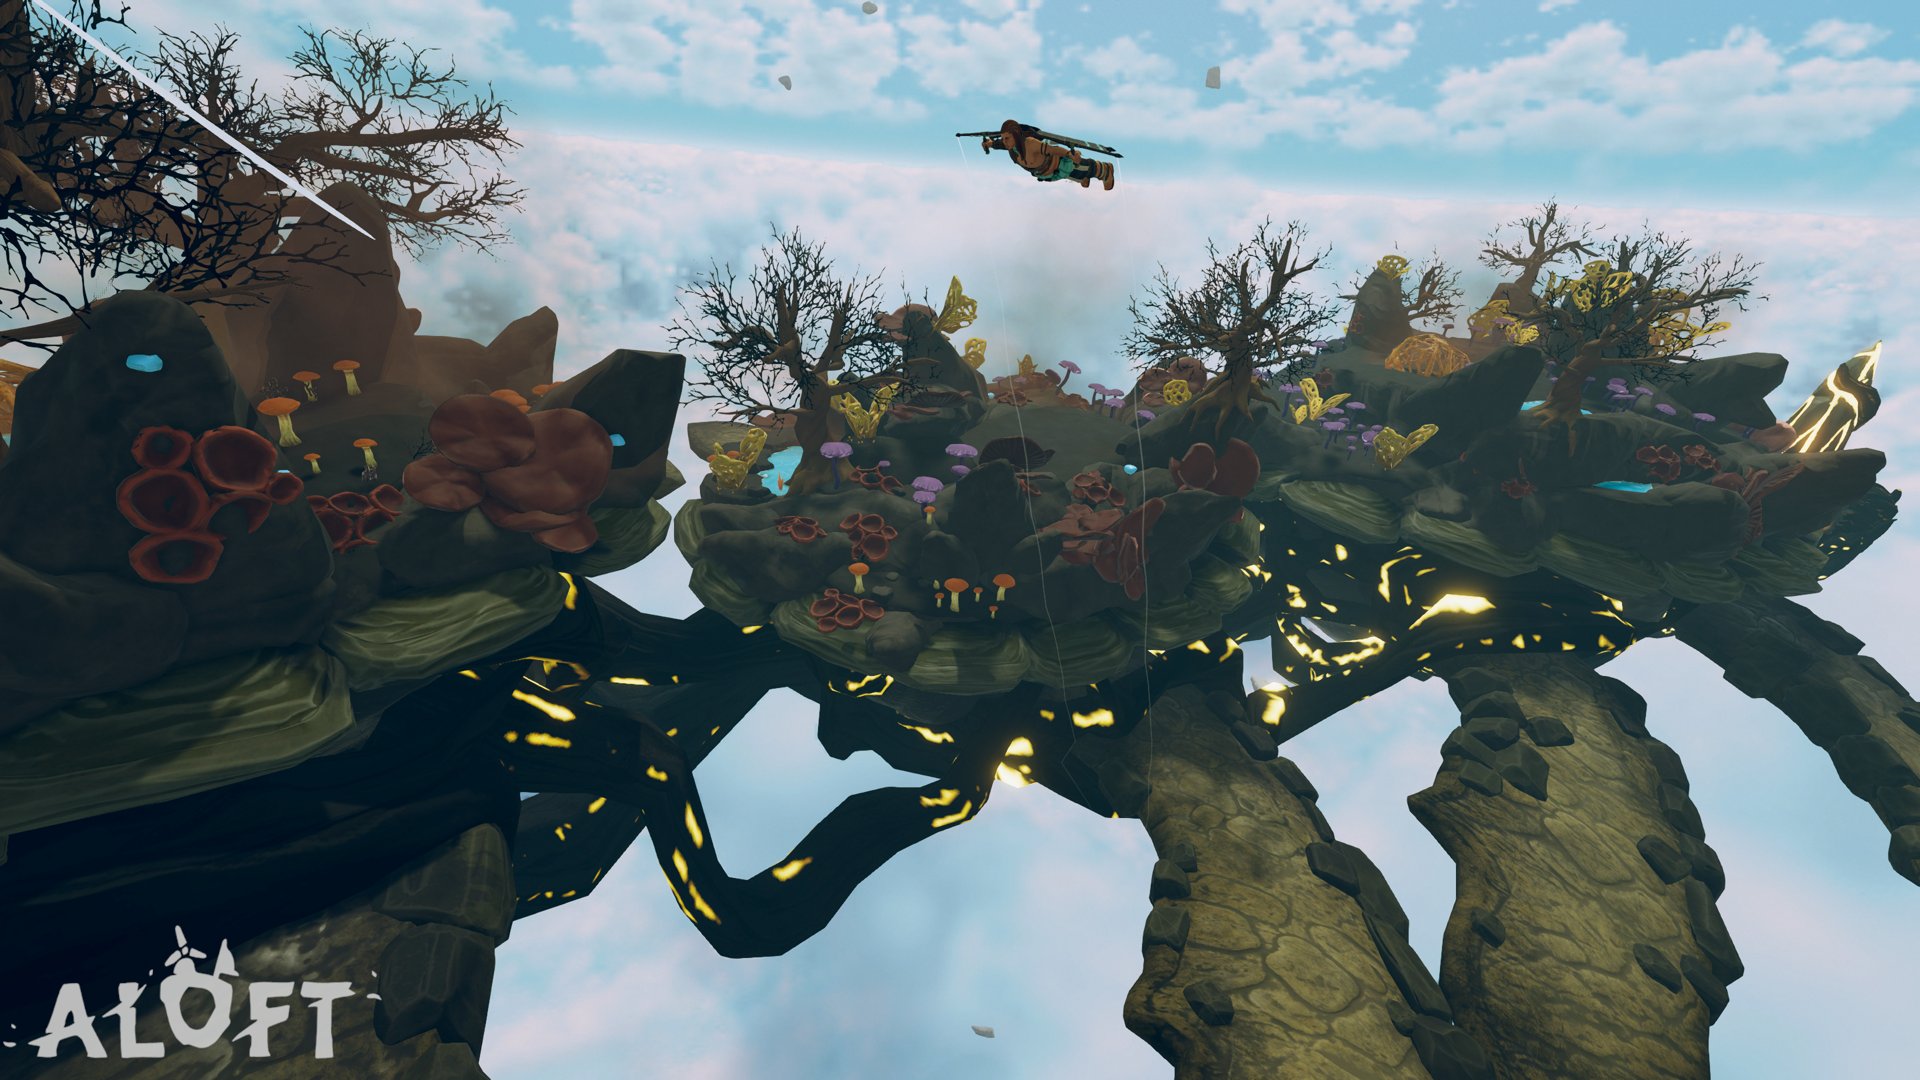
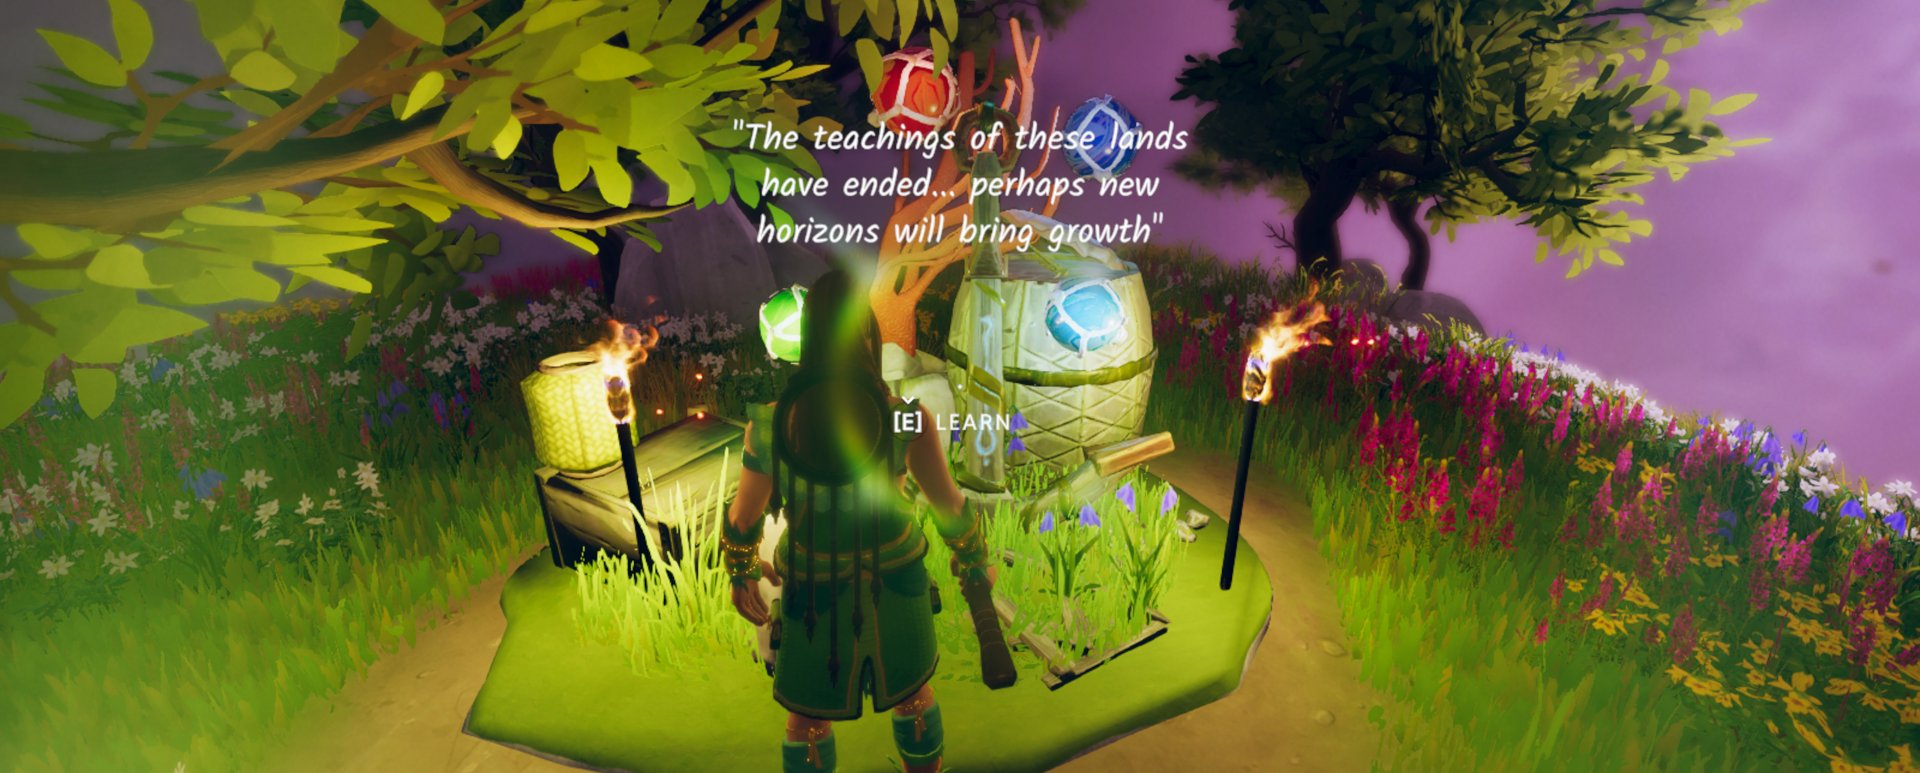
1, whack the moving mushroom enemies first, since they are the greatest threat anywhere on the island:
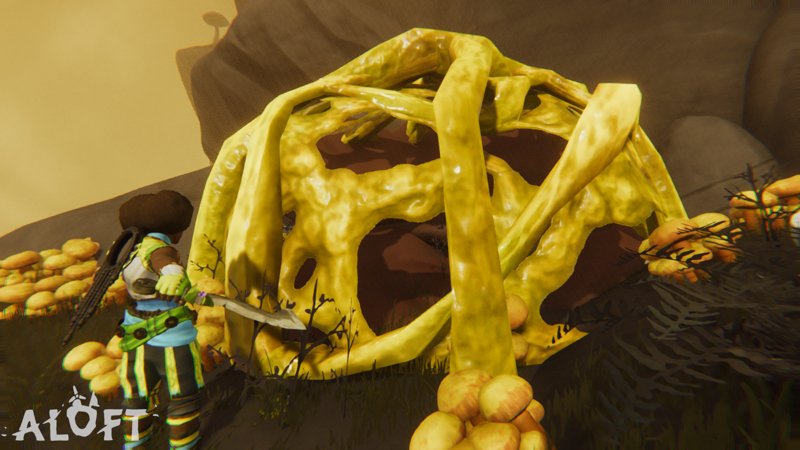
2, go to the big flower tower things, whack the 2 bulbs extending out from the center until they retract (being wary of any vine attacks from the flower tower itself), then whack the bulb in the center of the flower after it descends, then repeat all steps one more time to destroy the flower tower. If that was the last flower tower on the island, corruption is cleared automatically after the flower tower's death animation ends.
intentionally blank  [author] 19 Apr @ 6:40pm 
It's terrible that you had such a hard time, Good Old Gamer. I can try to expand upon my guide some more, but I would love some more detailed feedback in the meantime. For instance:
* What do you mean "how to arm up"? I would assume those words refer to combat (I have made a combat guide, separate from this).
* "all this *go here - grab this - move on* as if we are psychic and know oyur thought processes or where you actually found a single thing???" -- I'm assuming you are having trouble understanding some of my guide, and think it needs more detailed instructions. Is this correct?
* I'm sorry you couldn't figure out how to clear corruption. It's just combat, so maybe my combat guide would have helped you (had you not refunded).
Good Old Gamer 19 Apr @ 6:26pm 
not to be *one of those* ... but do you actualy teach us how to arm up? or did i miss it?

all this *go here - grab this - move on* as if we are psychic and know oyur thought processes or where you actually found a single thing???

This is why i refunded ages ago... almost two hours.. .and i couldn't even figure how to CLEAR corruption!
intentionally blank  [author] 23 Feb @ 3:37pm 
Lol, fair enough!
gg.nadrewod 23 Feb @ 3:24pm 
I mostly just mentioned the hammer so I could put the "AND MY AXE!" meme from Fellowship...
intentionally blank  [author] 23 Feb @ 3:14pm 
Dear Dower Dan-
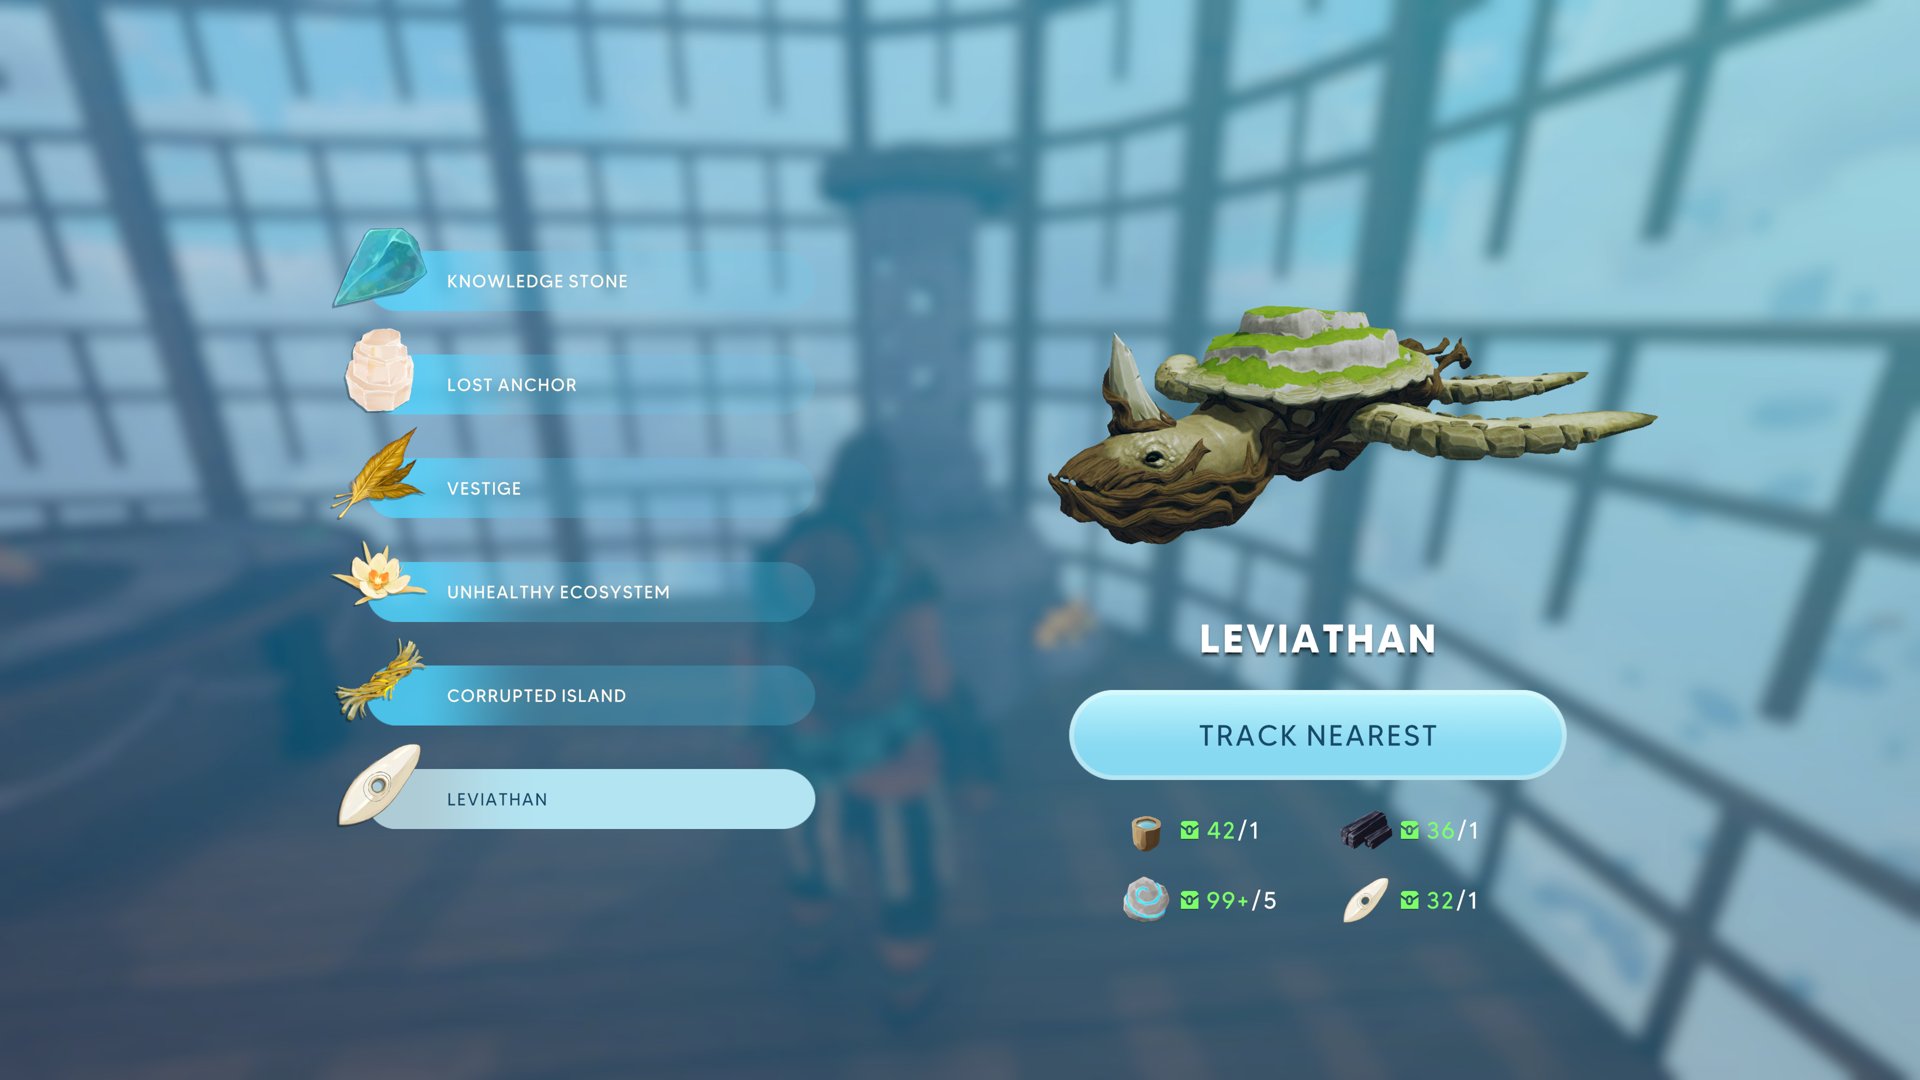
You're right! The Leviathan level isn't hard enough to justify setting up camp. My second time, I just flew in with only a half-coated stone dorkip and a stone sickle (no sharpening, no trinkets). It took two rounds of moderately decent food, with a nap-break in between. I would mainly object to the claim that the hammer is a valid choice for combat; it goes *squeak* when it lands. It has limited range, no sweep, and negligible damage.

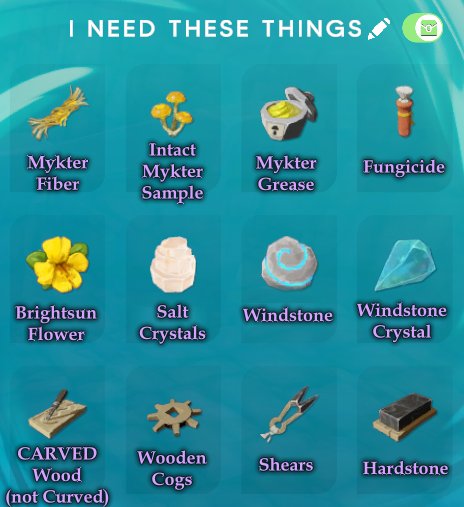
As for the linen shortage: gotta grow flax. It's the only way.

And the waxed rope: definitely a problem if you didn't collect enough in Biome 2. I'm looking forward to the new "Queen Bee" item that will be introduced, allowing me harvest wax & honey on my own island.

Thanks for the comments!
-me
gg.nadrewod 23 Feb @ 1:24pm 
There's no real need to build a coating station on the Leviathan. If you've cleared at least 1 section, you can just wait there until the Leviathan loops around to wherever you parked your home island.

Also, since the "injured sample" isn't used for anything in this Early Access version, you can just save your coated weapon for the ~5/6 fungicide barriers and use a non-coated weapon to kill everything on the Leviathan (dokpi offers range, while sickle slices multiple enemies with each swing, but if you want to bash them with a hammer "AND MY AXE!", feel free to do so).

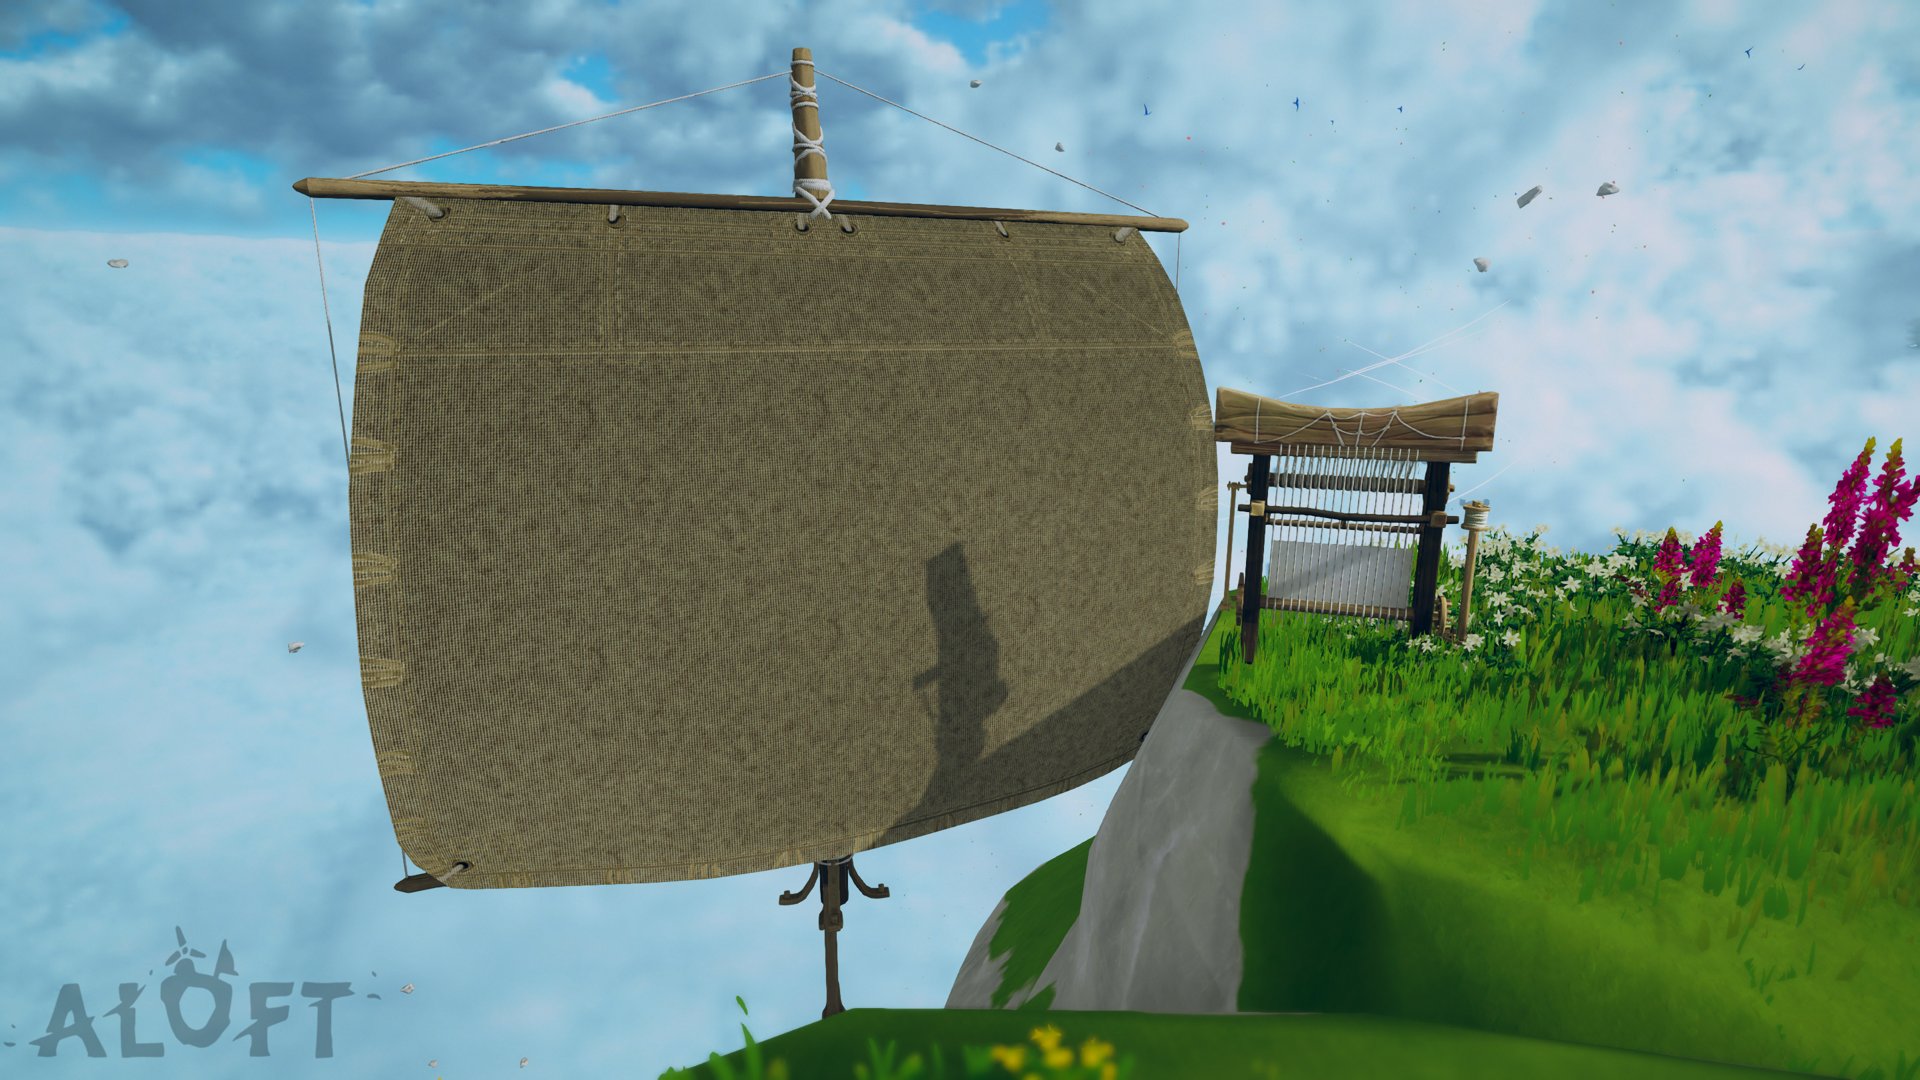
The most annoying part is the inability to repair linen sails in the 3rd biome if you haven't started a flax farm, and the inability to make bone tools without waxed rope, when I haven't found any wax drops in the 3rd biome and ran out of my stockpiles while making the first 2 tools.
intentionally blank  [author] 5 Feb @ 11:33pm 
Thank you! :steamhappy:
Klüglscheißer 5 Feb @ 9:13pm 
Oh bad, but nice Guide :)